M20_Ope_E - 第507页
Chapter 16 Dispenser 16-37 ⑨ With the tube clamp pressed against the tube joint, tighten the bolt. Be sure that the tube joint orientation is correct at this ti me. As shown in the figure b elow, the tube clamp's fa…
Chapter 16 Dispenser
16-36
16-5-2-4 Reassembling the tube joint
Action:
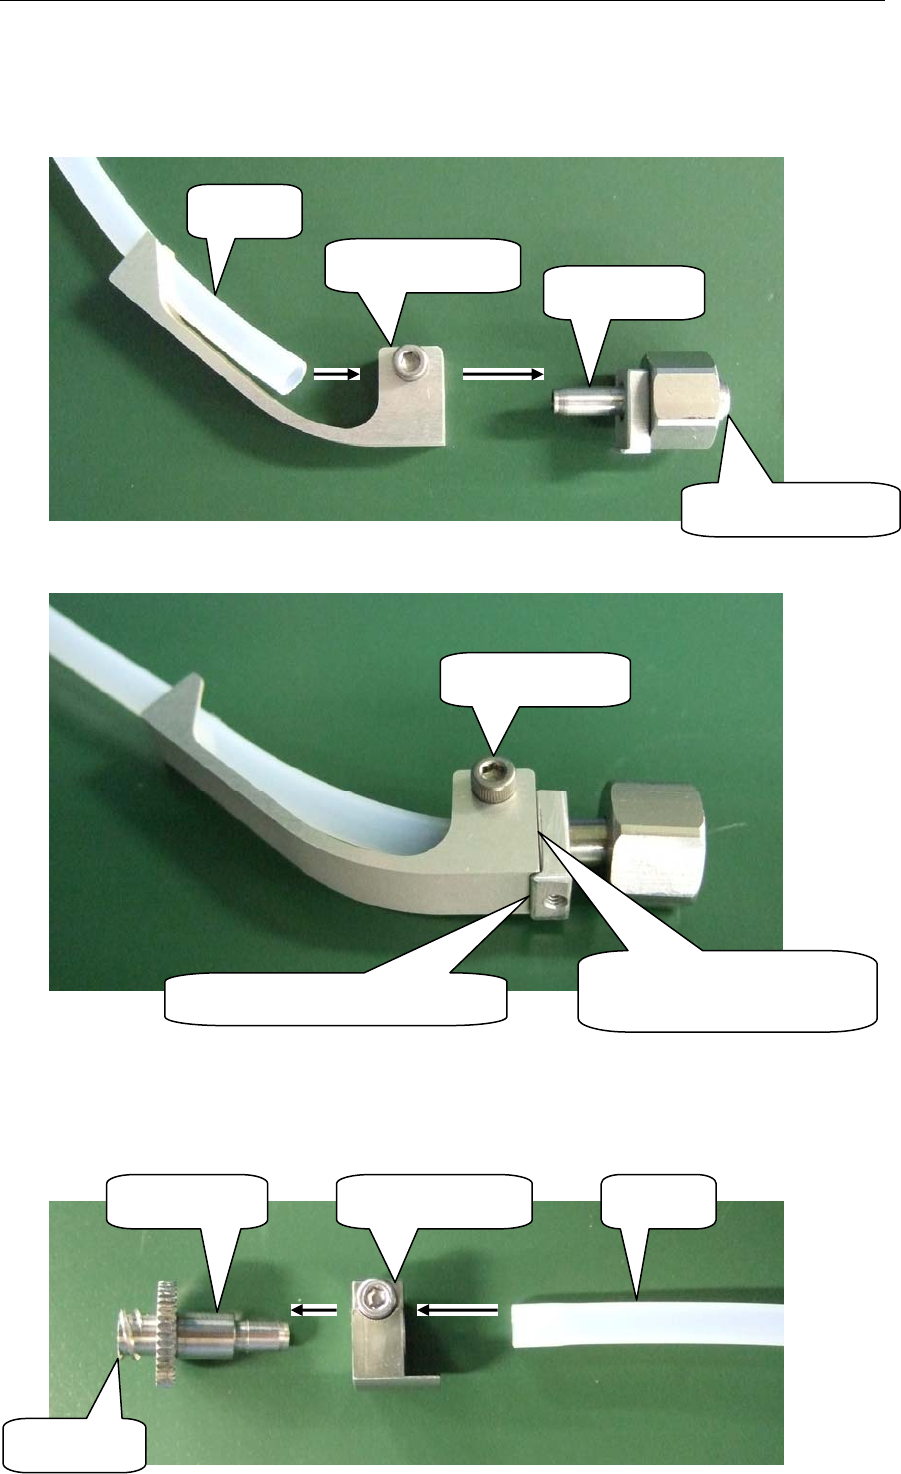
① Reassemble the cartridge body side.
② Pass the tube through the tube clamp hole.
③ Next, insert the tube into the tube joint.
④ With the tube clamp pressed against the tube joint, tighten the bolt.
Be sure that the tube joint orientation is correct at this time.
⑤ Pull lightly on the tube to verify that it doesn't disconnect.
⑥ Reassemble the syringe side.
⑦ Pass the tube through the tube clamp hole.
⑧ Next, insert the tube into the tube joint.
Tube clamp
Tube
Tube joint
Cartridge body side
Tighten this bolt.
Note the tube joint's orientation.
Press the tube clamp against
the tube joint.
Tube clamp Tube Tube joint
Syringe side
Chapter 16 Dispenser
16-37
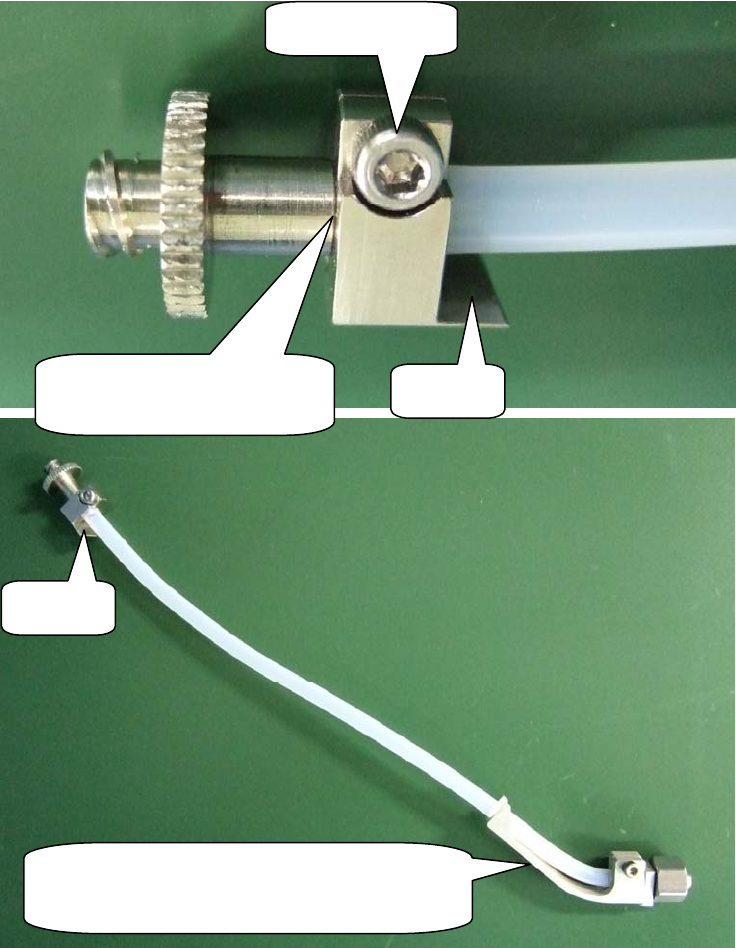
⑨ With the tube clamp pressed against the tube joint, tighten the bolt. Be sure that the
tube joint orientation is correct at this time. As shown in the figure below, the tube
clamp's face "A" should be facing toward the tube clamp's tube receptacle at the
cartridge body side.
⑩ Pull lightly on the tube to verify that it doesn't disconnect.
Tighten this bolt.
Press the tube clamp against
the tube joint.
Face "A"
Face "A"
Face "A" should be facing toward the tube
clamp's tube receptacle at the cartridge body
side.
Chapter 16 Dispenser
16-38
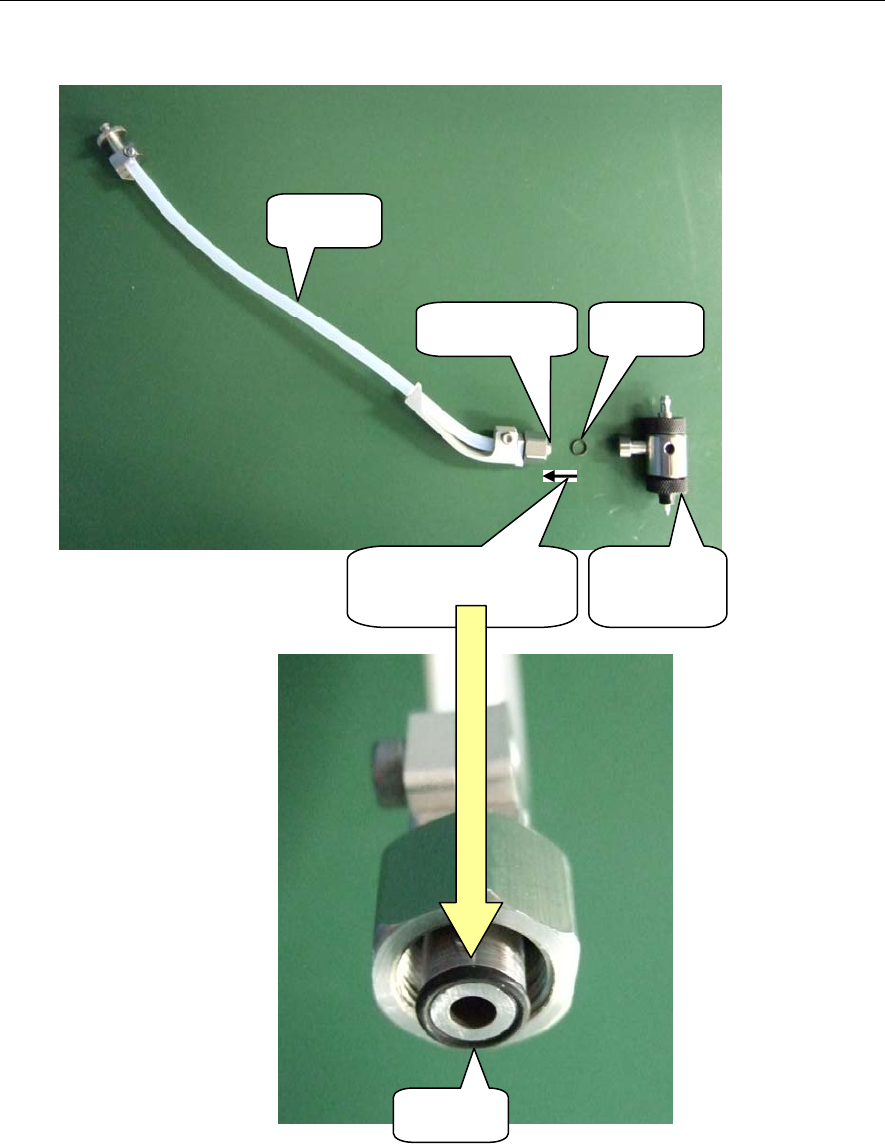
16-5-2-5 Attaching the tube joint
Action:
① Attach the O-ring at the cartridge body side of the assembled tube joint.
Attach the O-ring to
the tube joint.
O-ring
Cartridge
body
Tube
Tube joint
O-ring