M20_Ope_E - 第508页
Chapter 16 Dispenser 16-38 16-5-2-5 Attaching the tube joint Action: ① Attach the O-ring at the cartridge body side of the assembled tube joint. Attach the O-ring to the tube joint. O-ring Cartridge body Tube Tube joint …
Chapter 16 Dispenser
16-37
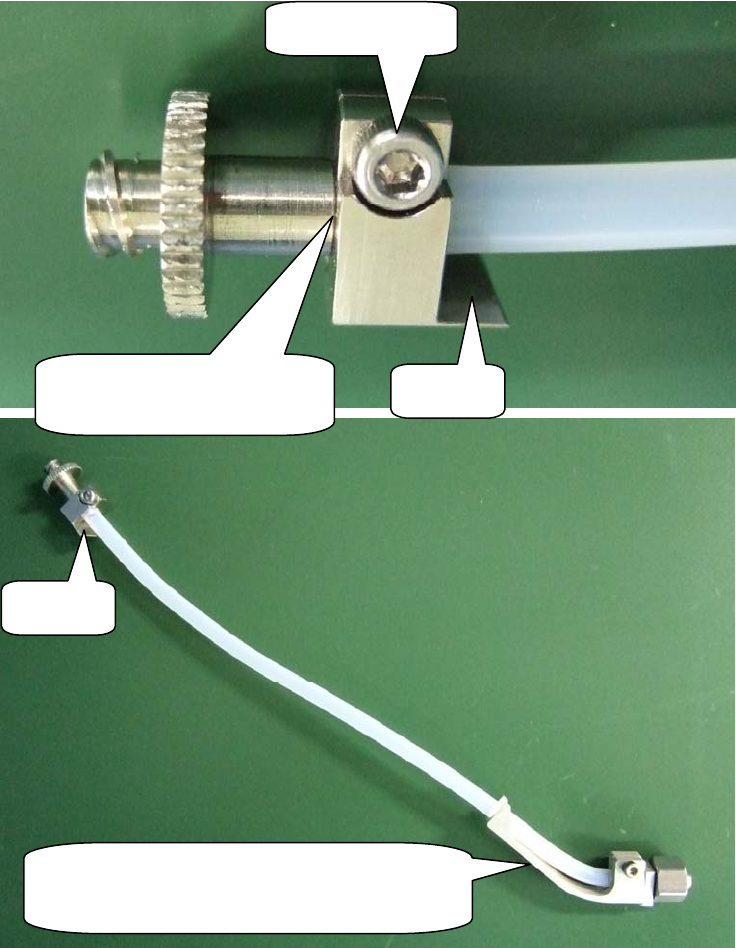
⑨ With the tube clamp pressed against the tube joint, tighten the bolt. Be sure that the
tube joint orientation is correct at this time. As shown in the figure below, the tube
clamp's face "A" should be facing toward the tube clamp's tube receptacle at the
cartridge body side.
⑩ Pull lightly on the tube to verify that it doesn't disconnect.
Tighten this bolt.
Press the tube clamp against
the tube joint.
Face "A"
Face "A"
Face "A" should be facing toward the tube
clamp's tube receptacle at the cartridge body
side.
Chapter 16 Dispenser
16-38
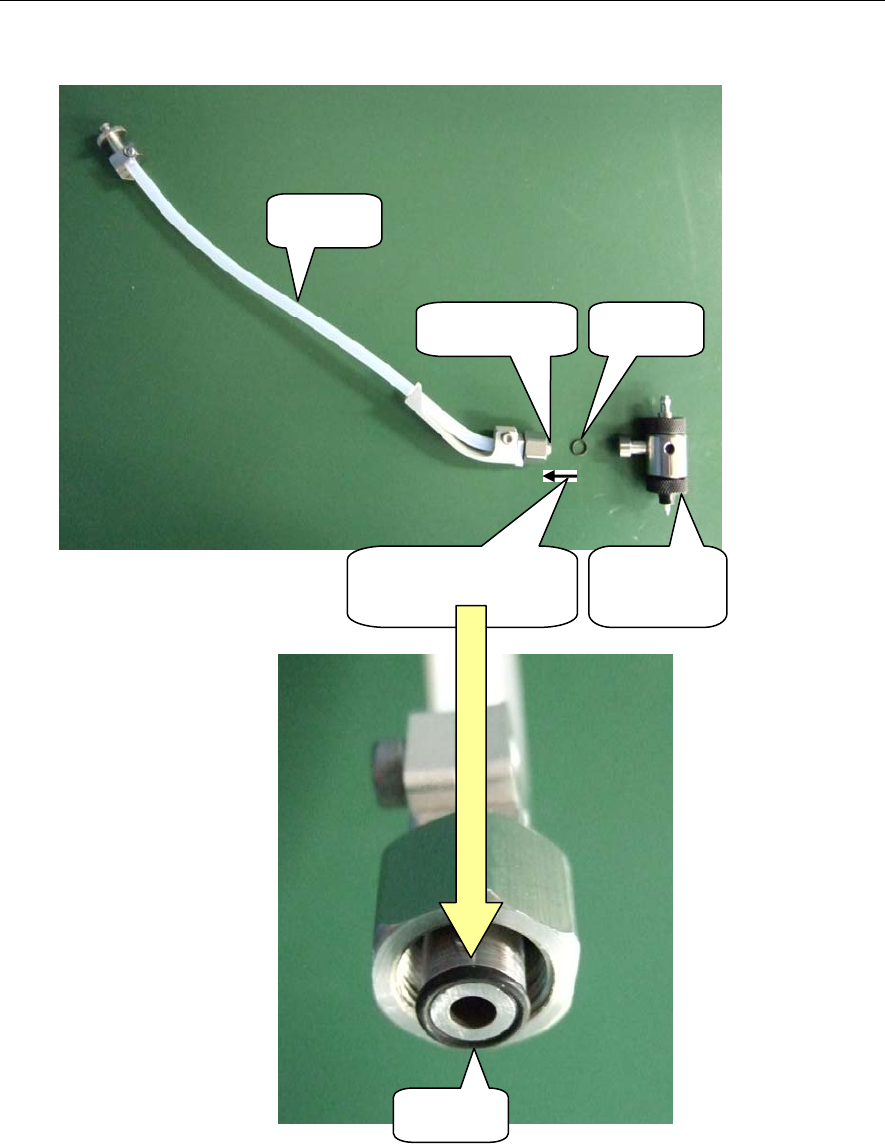
16-5-2-5 Attaching the tube joint
Action:
① Attach the O-ring at the cartridge body side of the assembled tube joint.
Attach the O-ring to
the tube joint.
O-ring
Cartridge
body
Tube
Tube joint
O-ring
Chapter 16 Dispenser
16-39
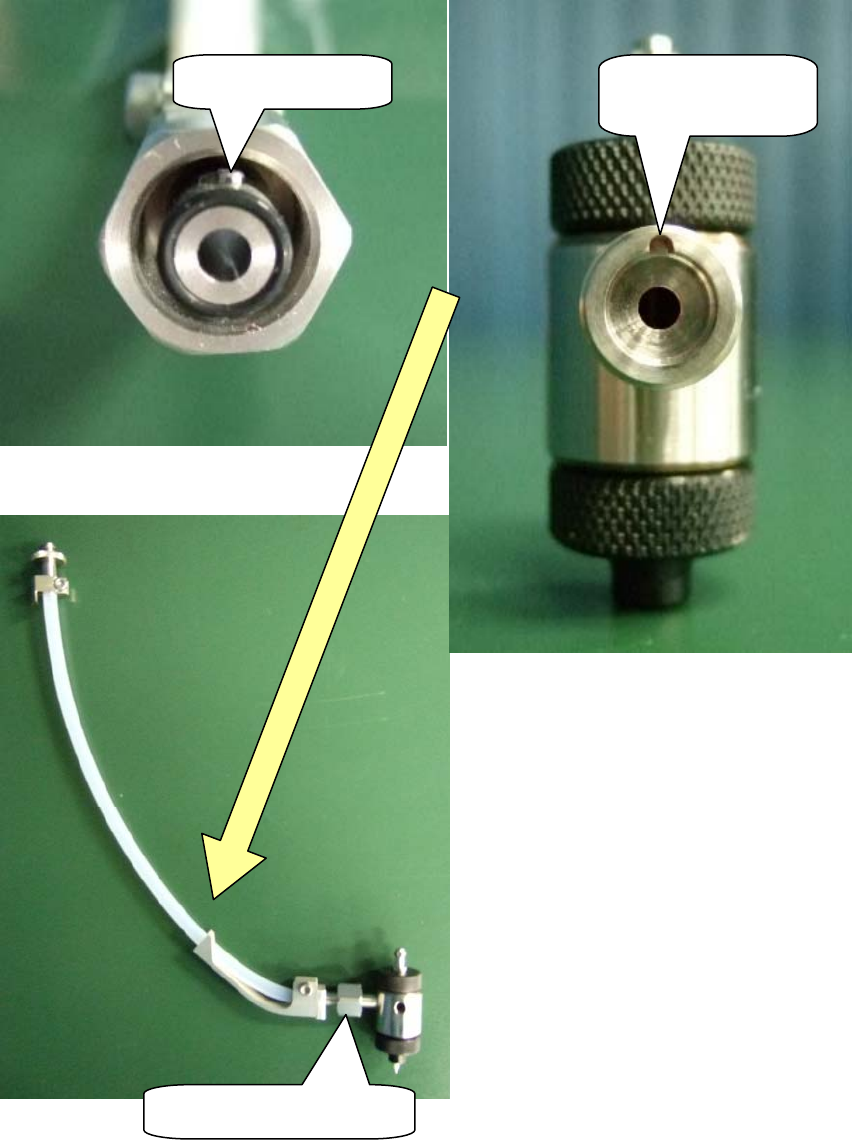
② Align the tube joint's pin with the cartridge body joint's U-cut, then connect them and
partially tighten the nut by hand.
Note: When connecting, the outer circumference of the O-ring can be easily damaged by rubbing.
To prevent this, apply a light coating of grease to the O-ring's outer circumference before connecting.
Note: After installing a screw type dispense head on the mounter, use a torque wrench (spanner type: 14mm x
5Nm) to perform final tightening of the nut (explained in detail later).
Partially tighten this nut.
Tube joint's pin
U-cut at cartridge
body side joint