M20_Ope_E - 第54页
Chapter 2 Creating and Editing a Program 2-10 2-2-1-3 Keyboard Entry & Choose from List There are several data entry methods. This section describes keyboard entry and choose from list used for direct data entry to a…
Chapter 2 Creating and Editing a Program
2-9
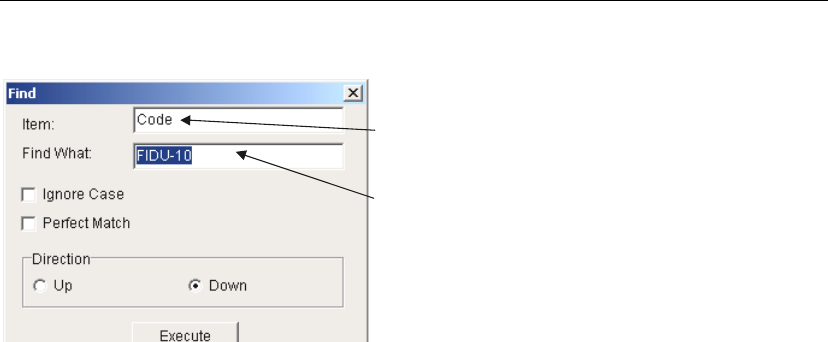
2-2-1-2 Finding Text
Menu: Program>Edit>Find
Library>Component Library>Edit>Find
The item on which the active cell resides is shown.
Replacement is applied to this item.
Enter text to find.
Window: * Up to 38 characters can be searched.
Ignore Case: Specify whether to match capitalization of the text. For example:
When the Find What entry is “IC3”, ic3 is not found.
; When the Find What entry is “IC3”, ic3 is found.
Direction: Select searching direction Up or Down relative to the current cursor
position.
Entering the characters partially is also available.
E.g.) Entering “SOP” searches for “SOP-28”, “TSOP-32” and “TSOP-40” etc.
Note: Wildcard Search is available in [Find What] column. The asterisk (*) is used as a symbol that takes
the place of one or set of unknown characters. The question mark (?) takes the place of one
unknown character.
Chapter 2 Creating and Editing a Program
2-10
2-2-1-3 Keyboard Entry & Choose from List
There are several data entry methods. This section describes keyboard entry and choose from list used
for direct data entry to an entry field.
Prior to making a keyboard entry or choose-from-list entry to a grid editor, the cell
to enter data must be selected.
Keyboard Entry
Keyboard entry means direct data input from the keyboard. Typically used for entry of program
name, comment, reference designator, or operator name.
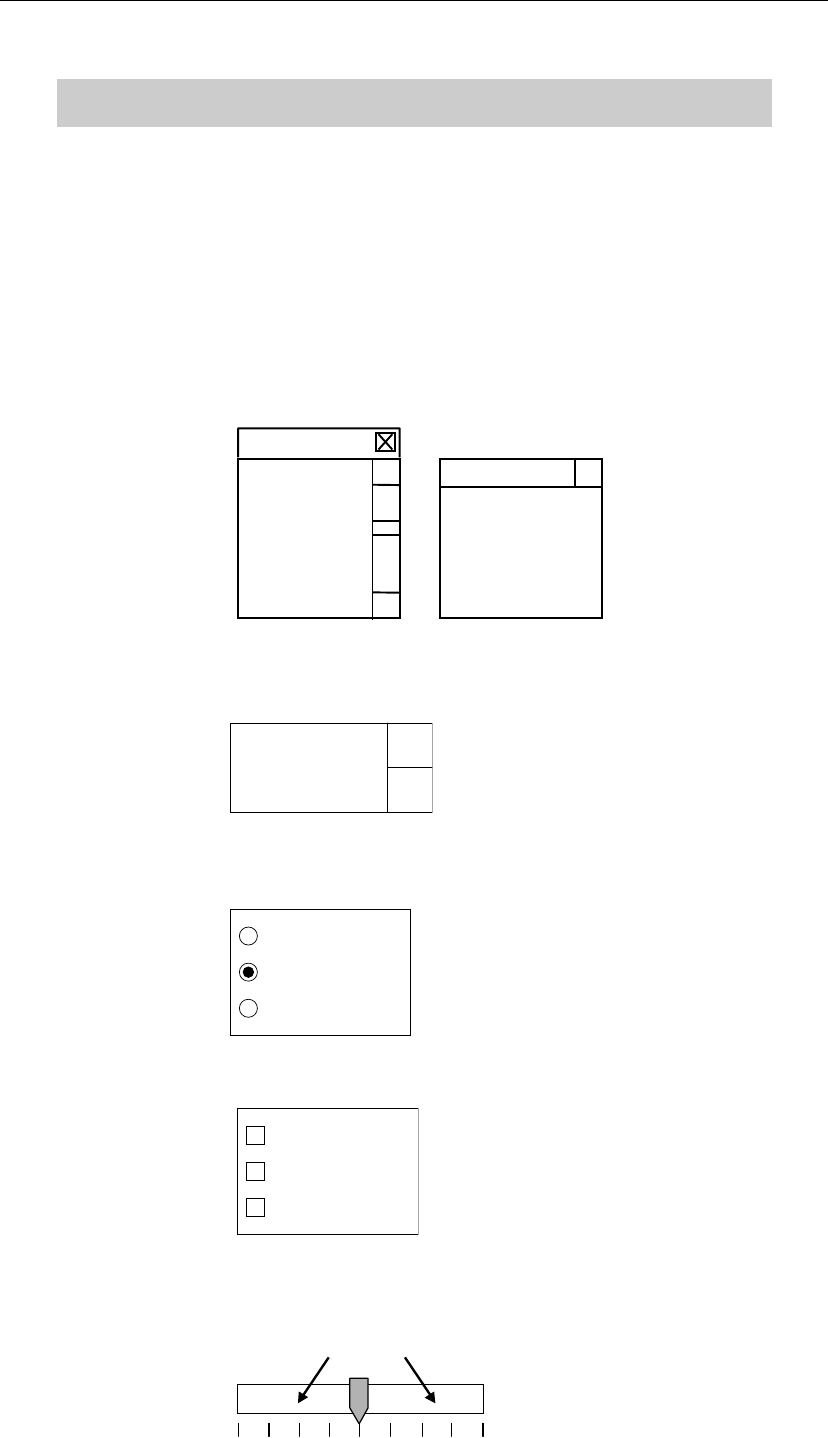
Choose from List
When there are pre-registered choices for entry, you can merely make a choice with the mouse.
There are five choose-from-list styles:
Combo box: A list of available choices is shown. Click a choice and it will be entered
to the entry field.
(Item 4)
(Item 3)
(Item 2)
(Item 1)
(Item 1)
(Item 2)
(Item 3)
Spin box: Click scroll arrows to select an item. Typing directly from the keyboard
is also available.
(Item)
Radio button: Represents mutually exclusive choices. Only one item is selectable at a
time.
(Item 3)
(Item 2)
(Item 1)
Check Box: Click an item to select. You can select as many items as needed.
(Item 3)
(Item 2)
(Item 1)
Slider: Drag the vertical bar to a new setting. The current value is shown to the
right of the scale. Clicking the area shown with the arrows moves the
vertical bar for a division of the graduation.
4
Chapter 2 Creating and Editing a Program
2-11
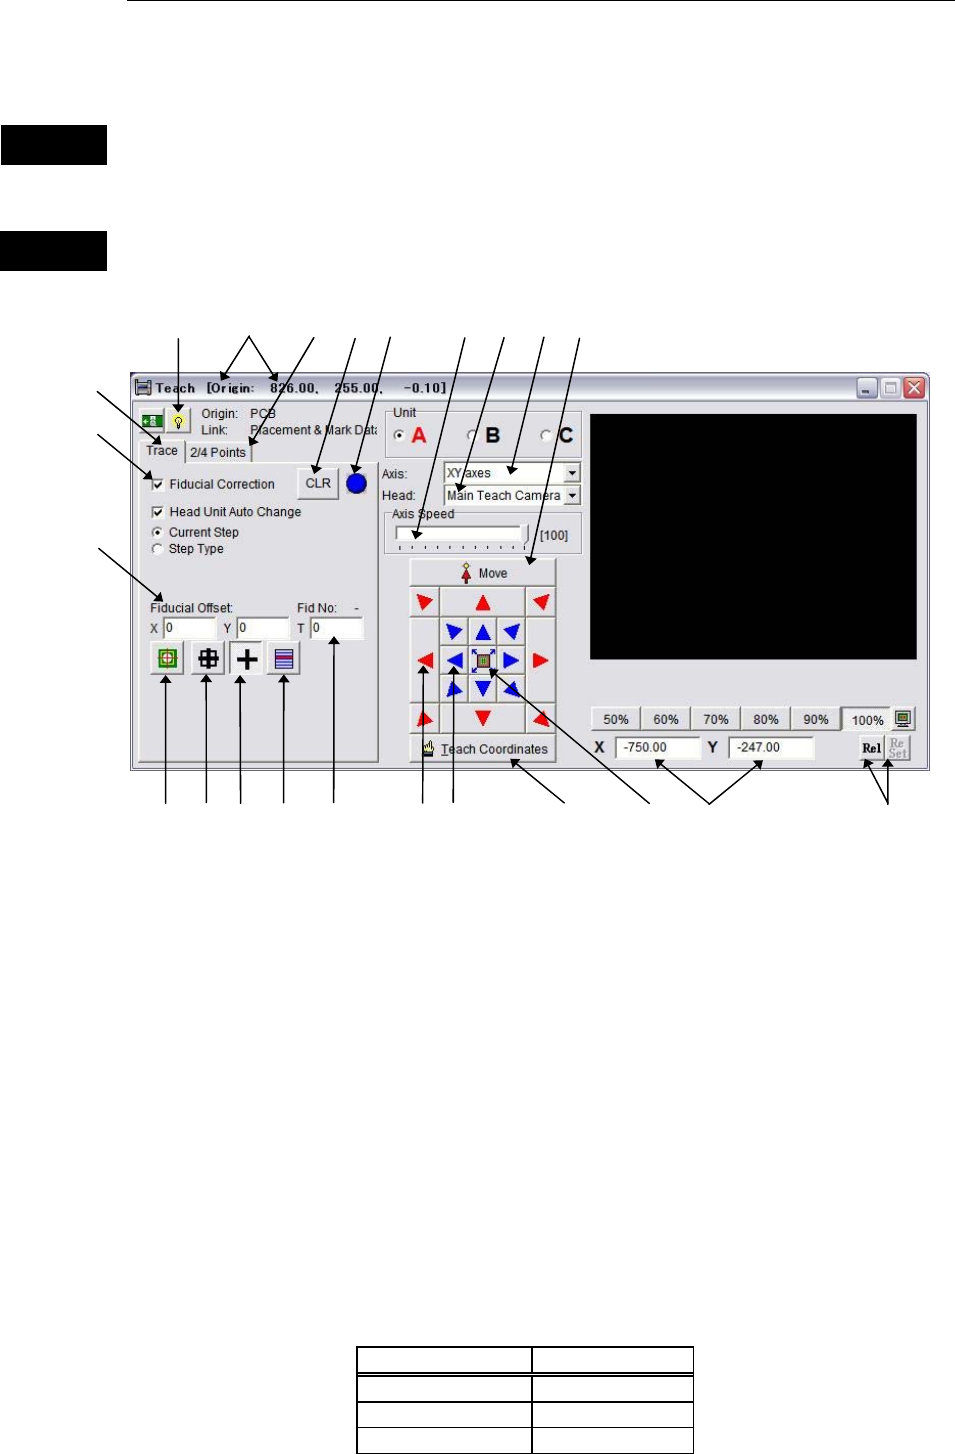
2-2-2 Teach Entry
Teach entry allows for teaching coordinate data to the mounter.
Teach Entry using the Mouse
Teach entry in use of the mouse allows the driving axes to move according to the mouse
movement. When teaching, do not stick head, hands, or other parts of the body inside the
mounter. Serious injury can result. Also make sure non-operators are a safe distance from
the machine.
Before starting teach, make sure no foreign obstacles are left in the mounter or the tray feeder.
Otherwise, costly machine damage can occur.
Window:
1. Origin: Indicates the origin relative to which the obtained coordinates are
defined. The origin’s coordinates from the machine origin are shown
on the title bar.
3. Axis: Specify axis/axes whose coordinate to teach (XY axes/Z axis/T axis).
4. Head: Select a head to use for teaching.
For “XY axes”, select one from Head1 to Head4 (or Head1 to Head6), or
Main Teach Camera .
For “Z axis”, select one from Head1 to Head4 (or Head1-Head6).
5. Axis Speed/Head Travel:
Specify head movement speed (Smooth mode) or head inching
increment (Inching mode).
* Increment: 1% (maximum=100%)
6. Current Coordinates: Indicates the current teach coordinates. Displayed items vary
depending on the specified axis/axes.
Axis Coordinates
XY axes X and Y
Z axis Z
T axis T
Warning
Caution
1
9
8
4
7
5
11
10
16
17
18
19
20
21
12
24
22
15
6
3
23
13
14