M20_Ope_E - 第59页
Chapter 2 Creating and Editing a Program 2-15 2-2-4 Sw itching Scaling of Integrated Vision Window (Teach Screen) On the Teach Screen, Scaling of the Integrated Vi sion Window can be switched by 6 buttons from 50% to 100…
Chapter 2 Creating and Editing a Program
2-14
⑧ Click in the navigator matrix again for final alignment. If necessary, adjust the axis speed for
[Axis Speed]. For fine teaching, use Inner Allow buttons. When the first teach point is aligned
to the camera center, click to stop the head. Click <1st Point> button.
⑨ To obtain the second teach point, repeat steps 7 through 8.
⑩ When the second teach point is aligned to the camera center, click to stop the head. Click
<2nd Point> button. The coordinates of the component center are calculated and entered to
the X, Y fields of the current program step.
⑪ If there are other steps to teach, repeat steps 1 through 11 to teach them. Then click <Close>
button to end.
Switching between Different Windows for Teach Entry
You may open several editor/library windows at a time and switch the line to teach between
windows. In this case, you don’t have to close and reopen the Teach dialog box each time you
switch to a different window. Instead, when you switch to a different window, select the
coordinate setting field and right-click the mouse. This allows the system to identify in which
window you are going to perform teach.
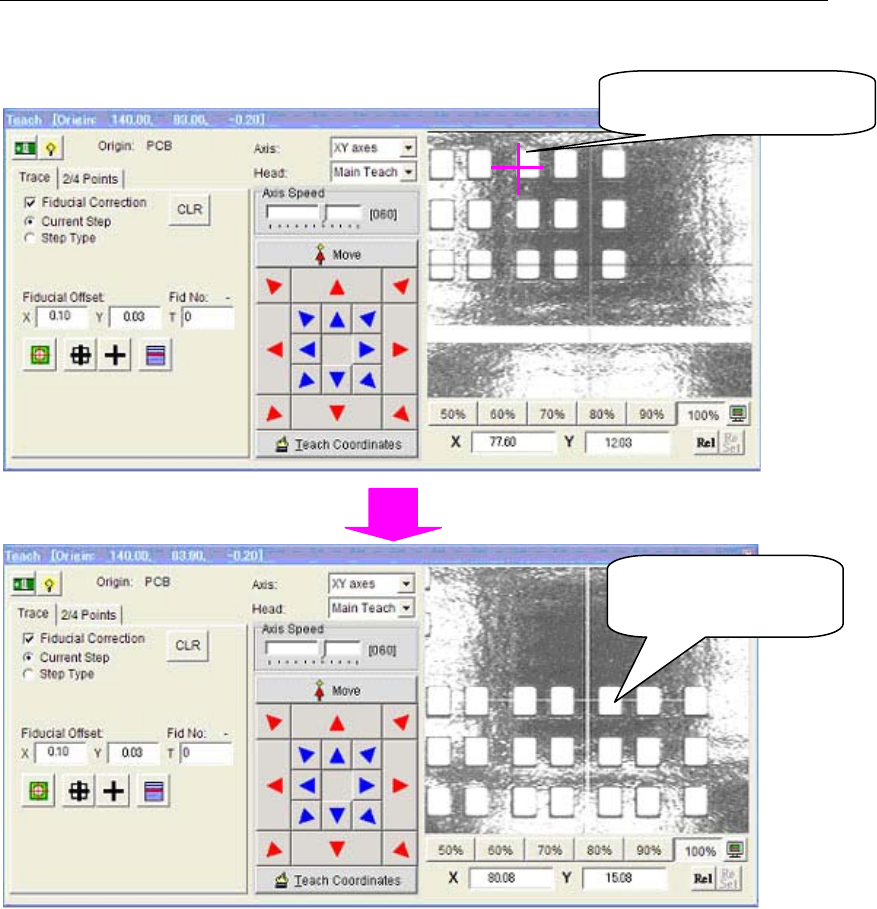
2-2-3 Click Move (Teach screen)
On the Teach Screen, when you double-click on any position of the Integrated Vision Window,
Teaching Camera immediately moves there so that the Camera center meets to the selected
position.
Teaching Camera has
just moved here.
When you double-click
here …
Chapter 2 Creating and Editing a Program
2-15
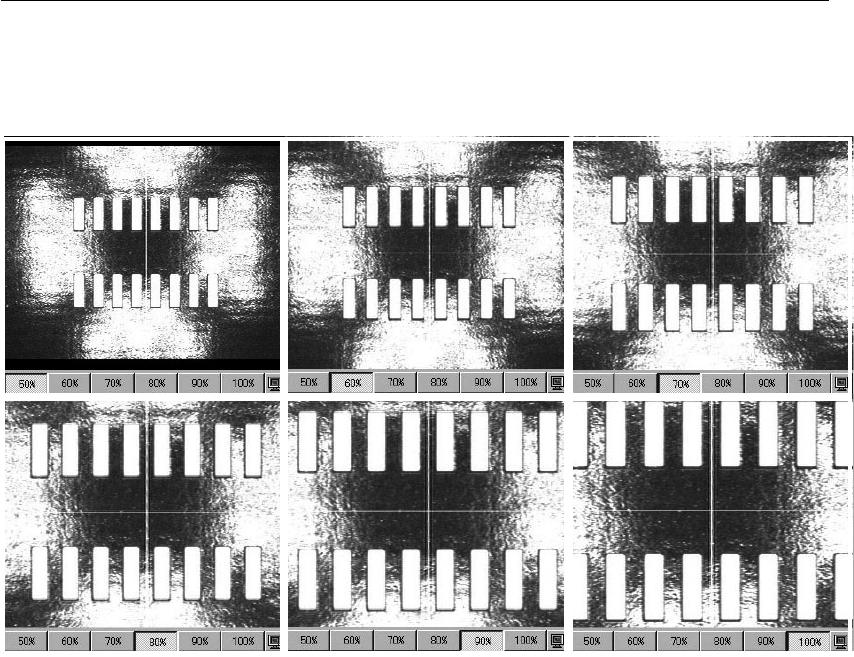
2-2-4 Switching Scaling of Integrated Vision Window (Teach Screen)
On the Teach Screen, Scaling of the Integrated Vision Window can be switched by 6 buttons from
50% to 100%. When 50% is selected, the field of view size of the Vision Window will be same as
that of the Teaching Camera. The bigger scaling, the smaller the field of view size is.
50% 60% 70%
80% 90% 100%
Chapter 2 Creating and Editing a Program
2-16
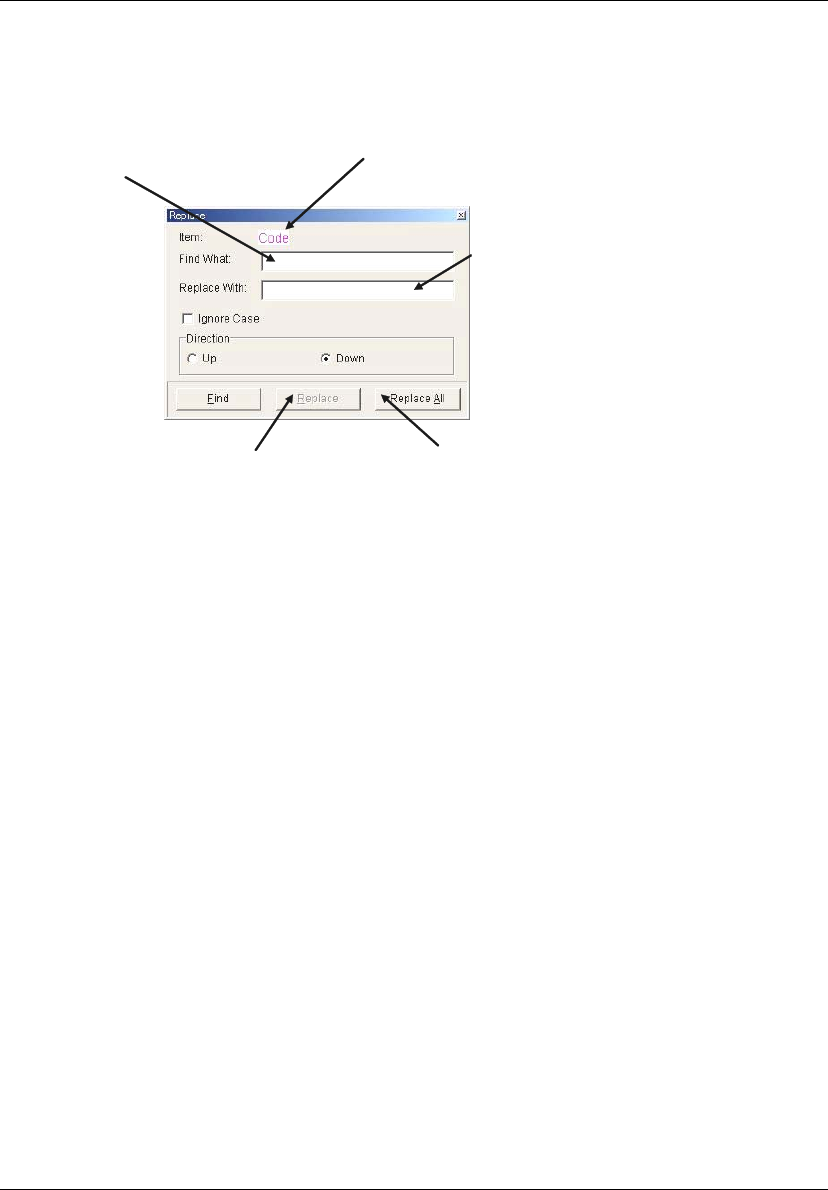
2-2-5 Replacing Text
Menu: Program>Edit>Replace
Library>Component Library>Edit>Replace
Finds specified text and replaces it with new text.
Type text to find.
Replaces all occurrences without
confirmation.
Replaces the current
occurrence.
Type replacement text.
The item on which the active cell
resides is shown. Replacement is
applied to this item.
Window:
Ignore Case: Specify whether to match capitalization of the text. For example:
When the Find What entry is “IC3”, ic3 is not searched.
; When the Find What entry is “IC3”, ic3 is searched.
Direction: Select searching direction Up or Down relative to the current cursor
position.
Find: Start searching to the specified direction. As the first text is found, the
window stops scrolling at where the text is found. Clicking <Find>
button again restarts searching.
Replace: Replace the first found text. To continue searching, click <Find>
button.
Replace All: Replace all the texts found in the specified direction without
confirmation.
Note: When you select some lines by “Select Line” function in advance to perform Replacing Text
command, only the selected lines would be the targets of the Replacing function.
See the description of “Selecting Lines in the Program Editor” on the next page.
Note: Wildcard Search is available in [Find What] column. The asterisk (*) is used as a symbol that takes
the place of one or set of unknown characters. The question mark (?) takes the place of one
unknown character.
2-2-6 Importing CAD Data
You can import CAD data (text files) to the system as an acceptable format program. See Chapter 4
for information.