YSi-X_Ope_E.pdf - 第121页
A-10 Appendix 4. Precautions for X-ray generator 4.1 W ar ming up the X-ray generator Even w hen not using this inspection equipment for long periods of time, periodically start the equipment and warm up the X-r ay gener…
A-9
Appendix
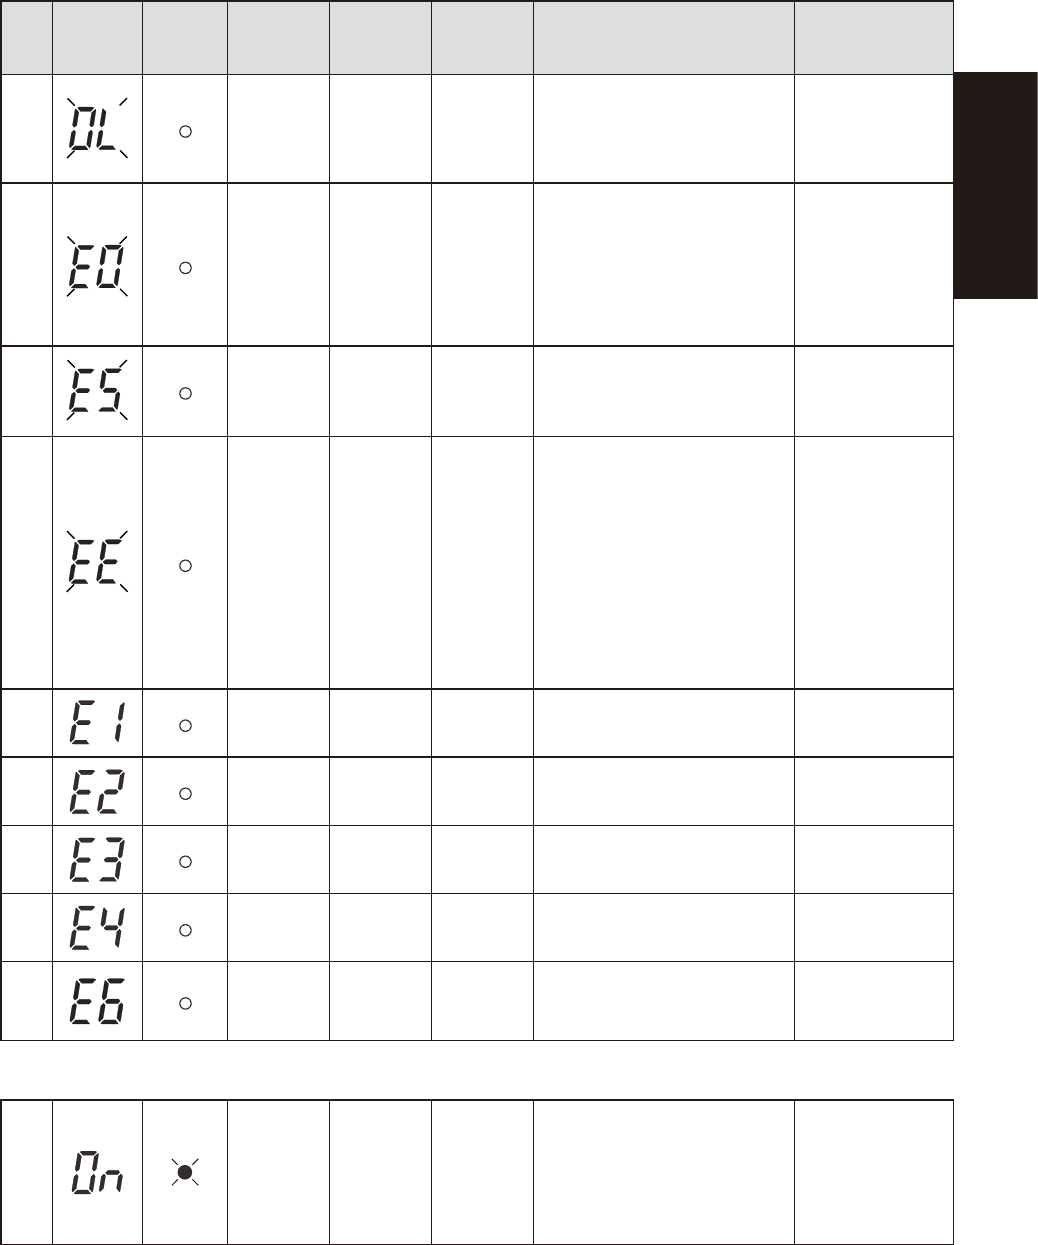
Displays and beeps when equipment failure has occurred
No.
Status
display
Battery
replacement
indicator lamp
Beep Output Charging Description Solution
11
Intermittent
0.5-second
intervals
ON
ON or
discharging
There are too many connected
devices and the rated capacity is
exceeded. If this status continues
for 5 minutes or more, the status
No. 12 occurs and output stops.
Reduce the number
of connected
devices until the
display appears as
in status No. 3.
12
Continuous OFF
ON or
discharging
Stopped due to excess connection
capacity. If the connection capacity
exceeds 120%, this status
immediately occurs without
entering the status No. 11.
Turn OFF this unit
and all connected
devices. Reduce
the number of
connected devices,
and then turn ON
this unit and the
connected devices.
13
Continuous OFF
ON or
discharging
Output stopped due to short-circuit with
the connected devices.
Check that the AC
input of connected
devices is not short-
circuited.
14
Continuous OFF – Stopped because of failure.
Turn OFF this unit
and all connected
devices. Then, turn
the power switch
back ON for this
unit only. If the
display does not
change, there is a
problem with the
UPS.
Contact our sales
office or
representative.
15
Continuous OFF –
Stopped because of excessive
output voltage (over).
(Same as above.)
16
Continuous OFF –
Stopped because of insufficient
output voltage (under).
(Same as above.)
17
Continuous OFF –
Stopped because of excessive
battery charge voltage (over).
(Same as above.)
18
Continuous OFF –
Stopped because of insufficient
battery charge voltage (under).
(Same as above.)
19
Continuous OFF –
Stopped because of abnormal
internal temperature.
(Same as above.)
Displays and beeps for battery replacement
20
Intermittent
2-second
intervals
ON ON
The battery test detected a weak
battery.
Charge the battery.
You can replace the
weak battery with a
separately
purchased
replacement battery
as needed.
A-10
Appendix
4. Precautions for X-ray generator
4.1 Warming up the X-ray generator
Even when not using this inspection equipment for long periods of time, periodically start the equipment and
warm up the X-ray generator.
For details on warming up the X-ray generator, see section 2.1, “Starting”, in Chapter 2.
c
CAUTION
If the X-ray generator is not used for long periods of time, it may malfunction. Periodically warm up the X-ray
generator (once every 3 month or so) to maintain the performance.
4.2 Protective function for the X-ray generator
If the temperature in the X-ray generator is low or the X-ray generator has not emitted X-rays for long periods of
time, the protective function may operate to protect the X-ray generator.
When the protective function is operating, the message “X-RAY ERROR” appears in the status area of the
operation screen. If this error occurs, be sure to use the following recovery procedure to prevent damage to the
X-ray generator.
c
CAUTION
If the correct recovery procedure is not used, the X-ray generator may be damaged and may not start operation, so
use caution.
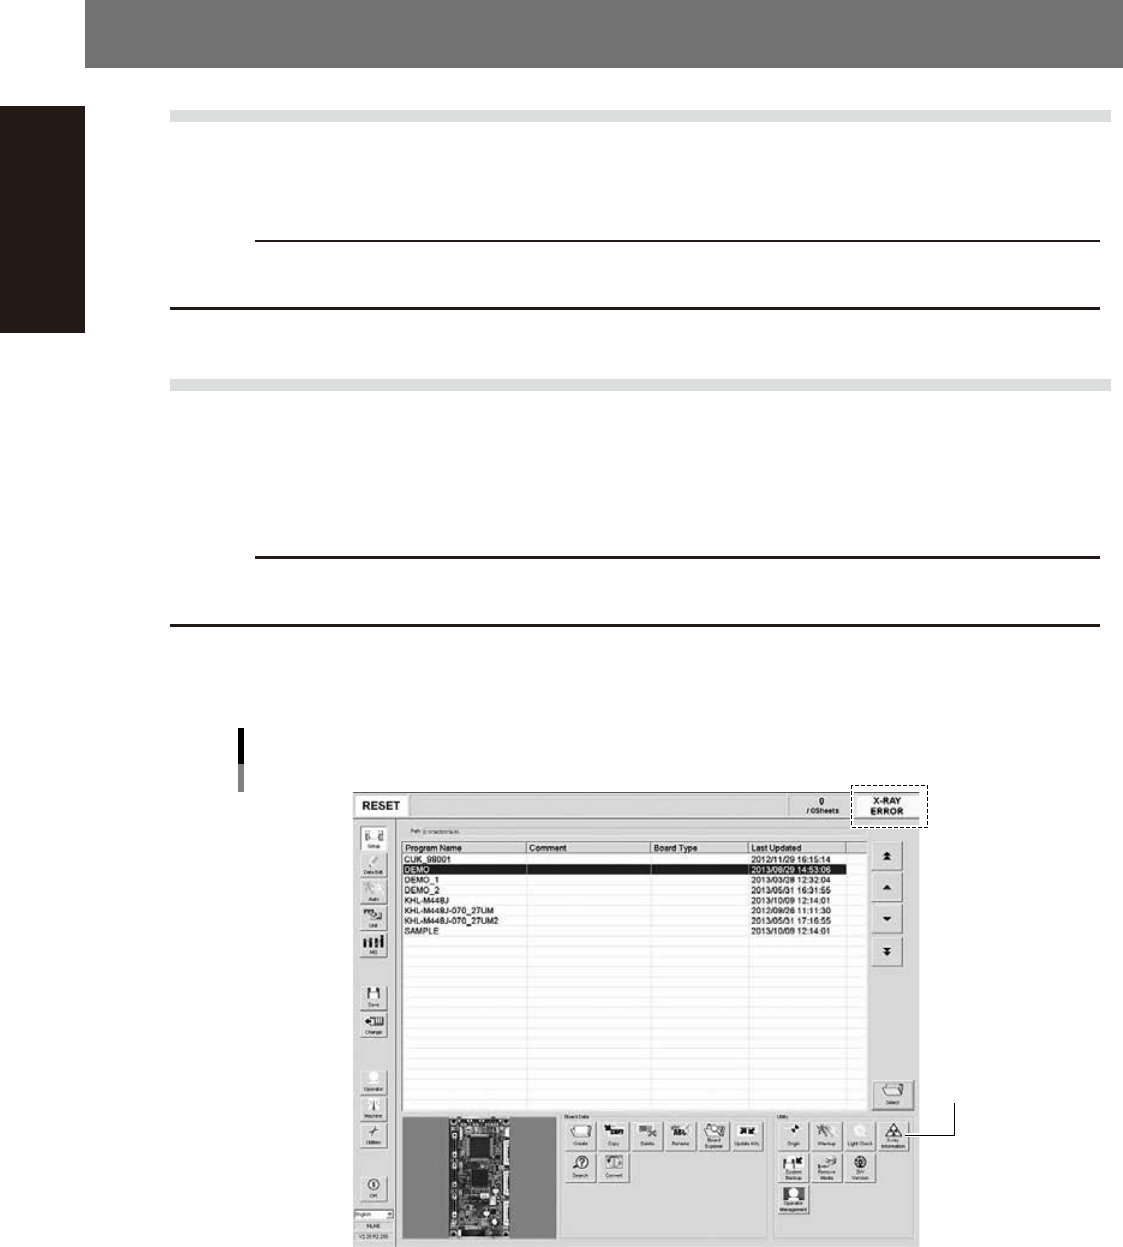
1
On the Setup screen, press the [X-ray Information] button to open the “X-ray
Information” screen.
Operation screen when the X-ray generator protective function is operating
[X-ray Information]
button
24A01-M6-00
A-11
Appendix
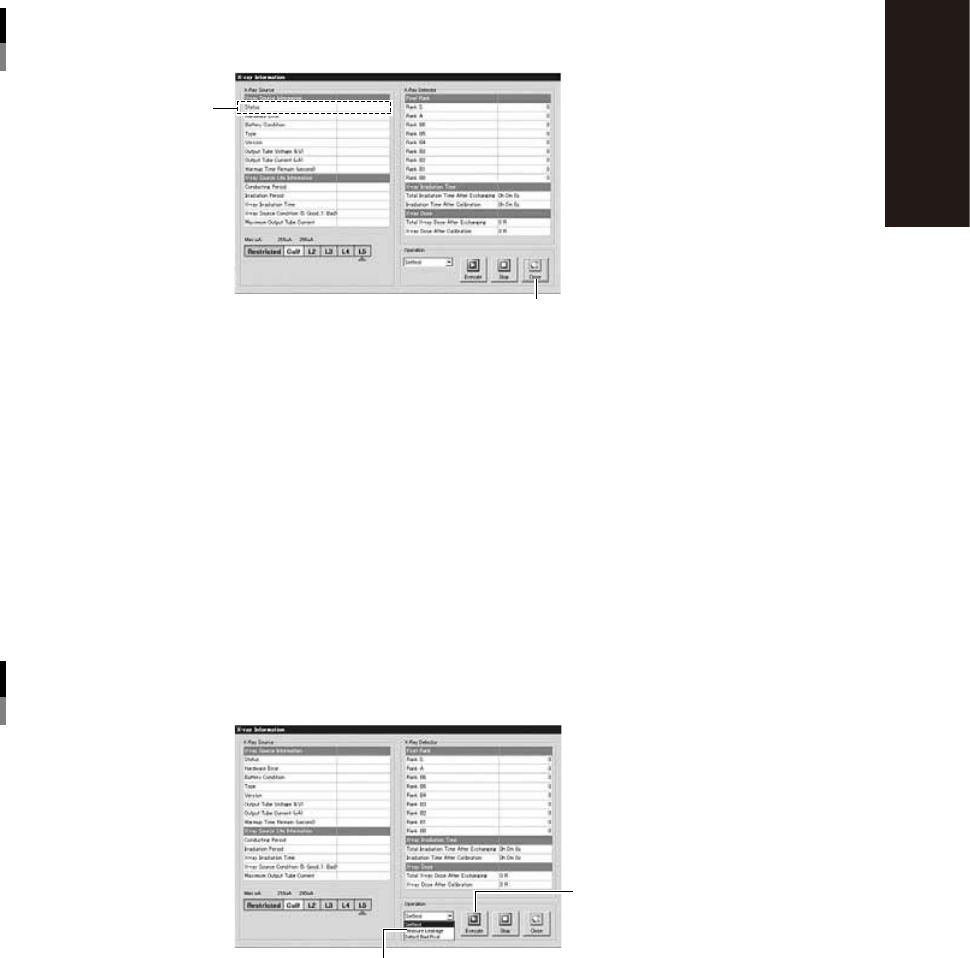
2
Check the status.
1. Check that “Status” of the “X-Ray Source” parameters indicates “4: Over”.
2. Press the [Close] button to close the “X-ray Information” screen.
“X-ray Information” screen
Check “Status”
[Close] button
24A02-M6-00
3
Press the [Off] button and then turn off the machine main power.
To lower the temperature in the X-ray generator to 15°C or below, open the front safety door of the
machine and leave it open for about 30 minutes with the power turned off.
4
Turn on the machine main power and perform return-to-origin.
5
Start warm-up of the X-ray generator.
1. On the Setup screen, press the press the [X-ray Information] button to open the “X-ray Information”
screen.
2. From the pull-down list in the “Operation” group box, select “Warm-up” and press the [Execute]
button.
”X-ray Information” screen
Warm-up
Select “Warm-up”
[Execute] button
24A03-M6-00