YSi-X_Ope_E.pdf - 第46页
1-5 1 Part names and functions 2. Conveyor unit 2. Board stopper 1. Board clamp unit Conveyor unit YSi-X conveyor unit 23106-M6-10 1. Board clamp unit T his unit clamps a board in place for inspection. T here are two cla…
1-4
1
Part names and functions
n
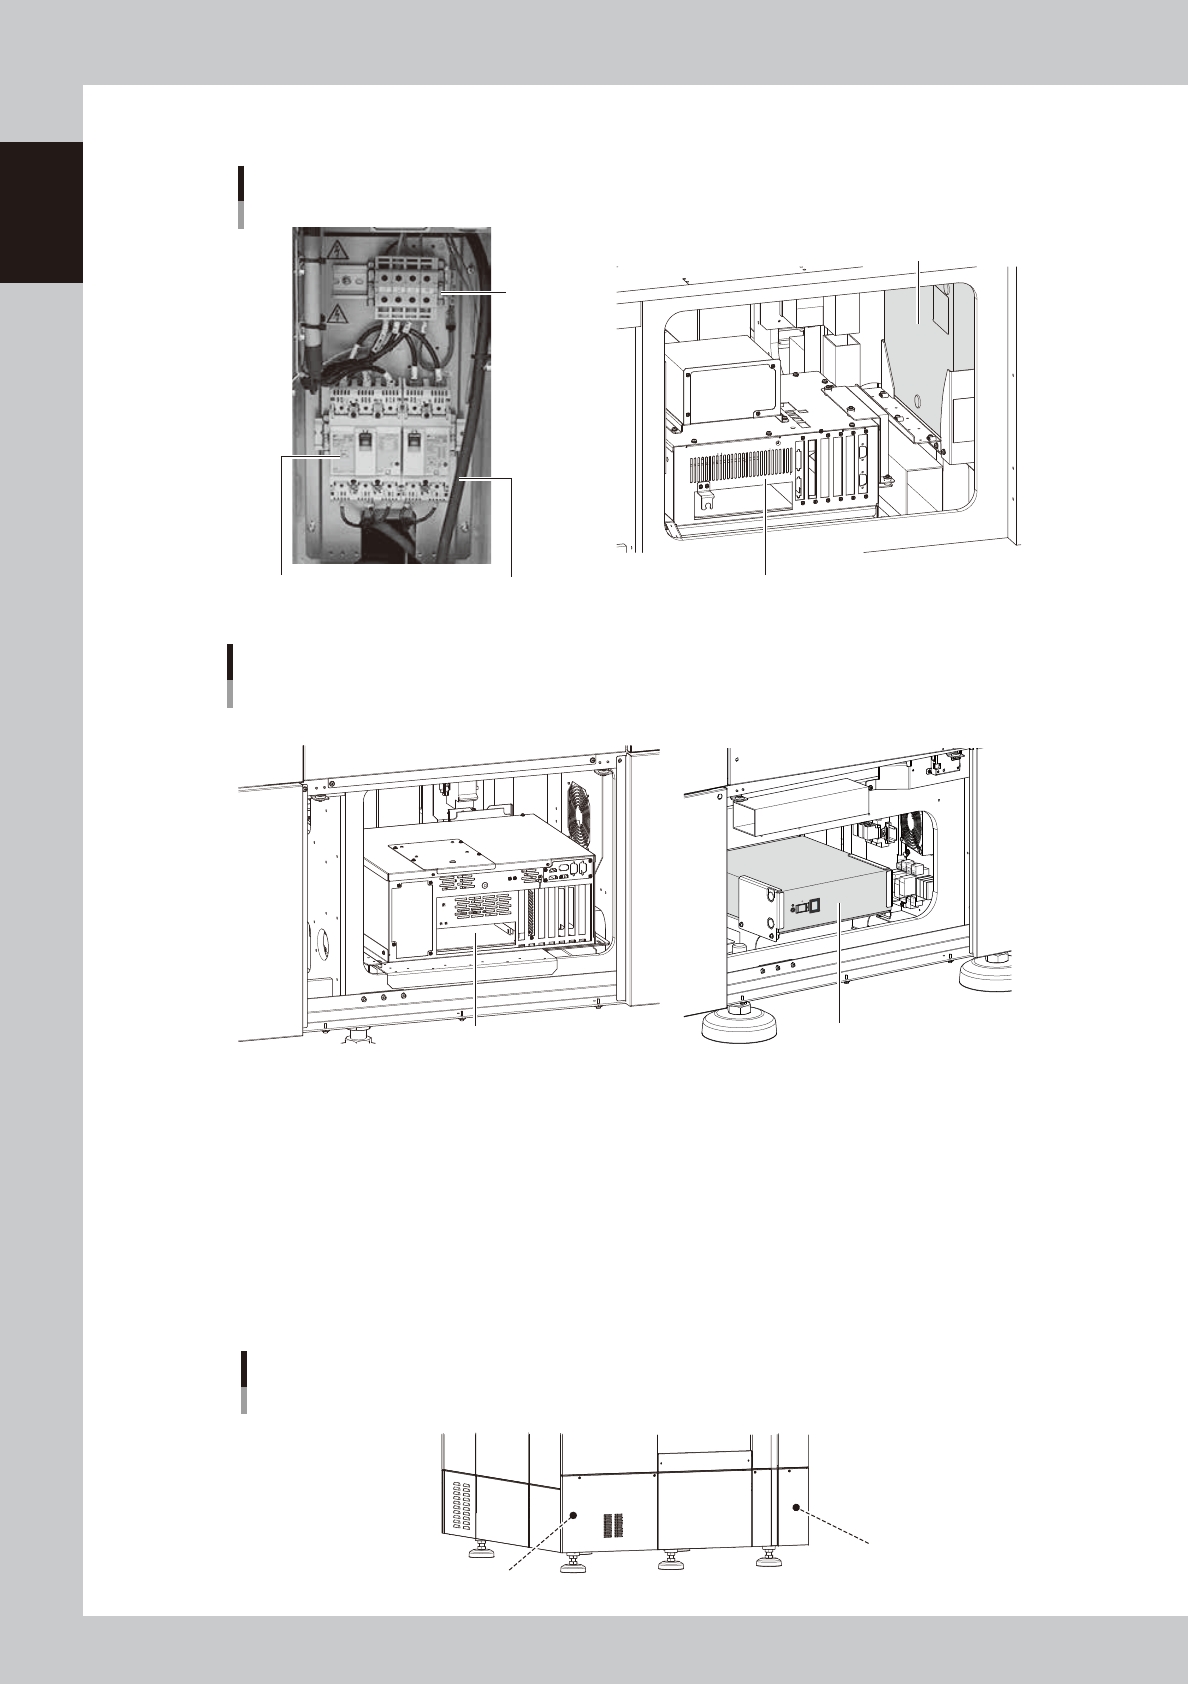
Behind panel (lower front and lower rear)
tooltip
Power
connection
terminals
Main breaker
Main breaker cable
YSi-X main unit
■ Behind lower center of front panel
Controller
UPS
(uninterruptible power supply)
■ Behind lower right of front panel
23104-M6-00
YSi-X main unit
Type HD/Type HB
■ Behind lower center of front panel
Controller UPS (uninterruptible power supply)
■ Behind lower center of rear panel
23109-M6-00
Power terminal block
Connects a 3-phase AC power cable to this terminal block. (For more details, see Appendix 1, "Power connection terminals".)
UPS (uninterruptible power supply)
The UPS retains (backs up) the power even if abnormal conditions such as power failure or voltage fluctuations occur.
(For more details, see Appendix 3, "UPS (uninterruptible power supply)".
n
Machine-to-machine connection connectors
Connector labeled "NEXT INTERFACE" connects to the downstream machine, and the connector labeled "PREVIOUS
INTERFACE" connects to the upstream machine. (For more details, see Appendix 2, "Connection between machines".
Machine-to-machine connection connectors
Behind rear panel
NEXT INTERFACE connector
(For connection to downstream machine)
PREVIOUS INTERFACE connector
(For connection to upstream machine)
23105-M6-10
1-5
1
Part names and functions
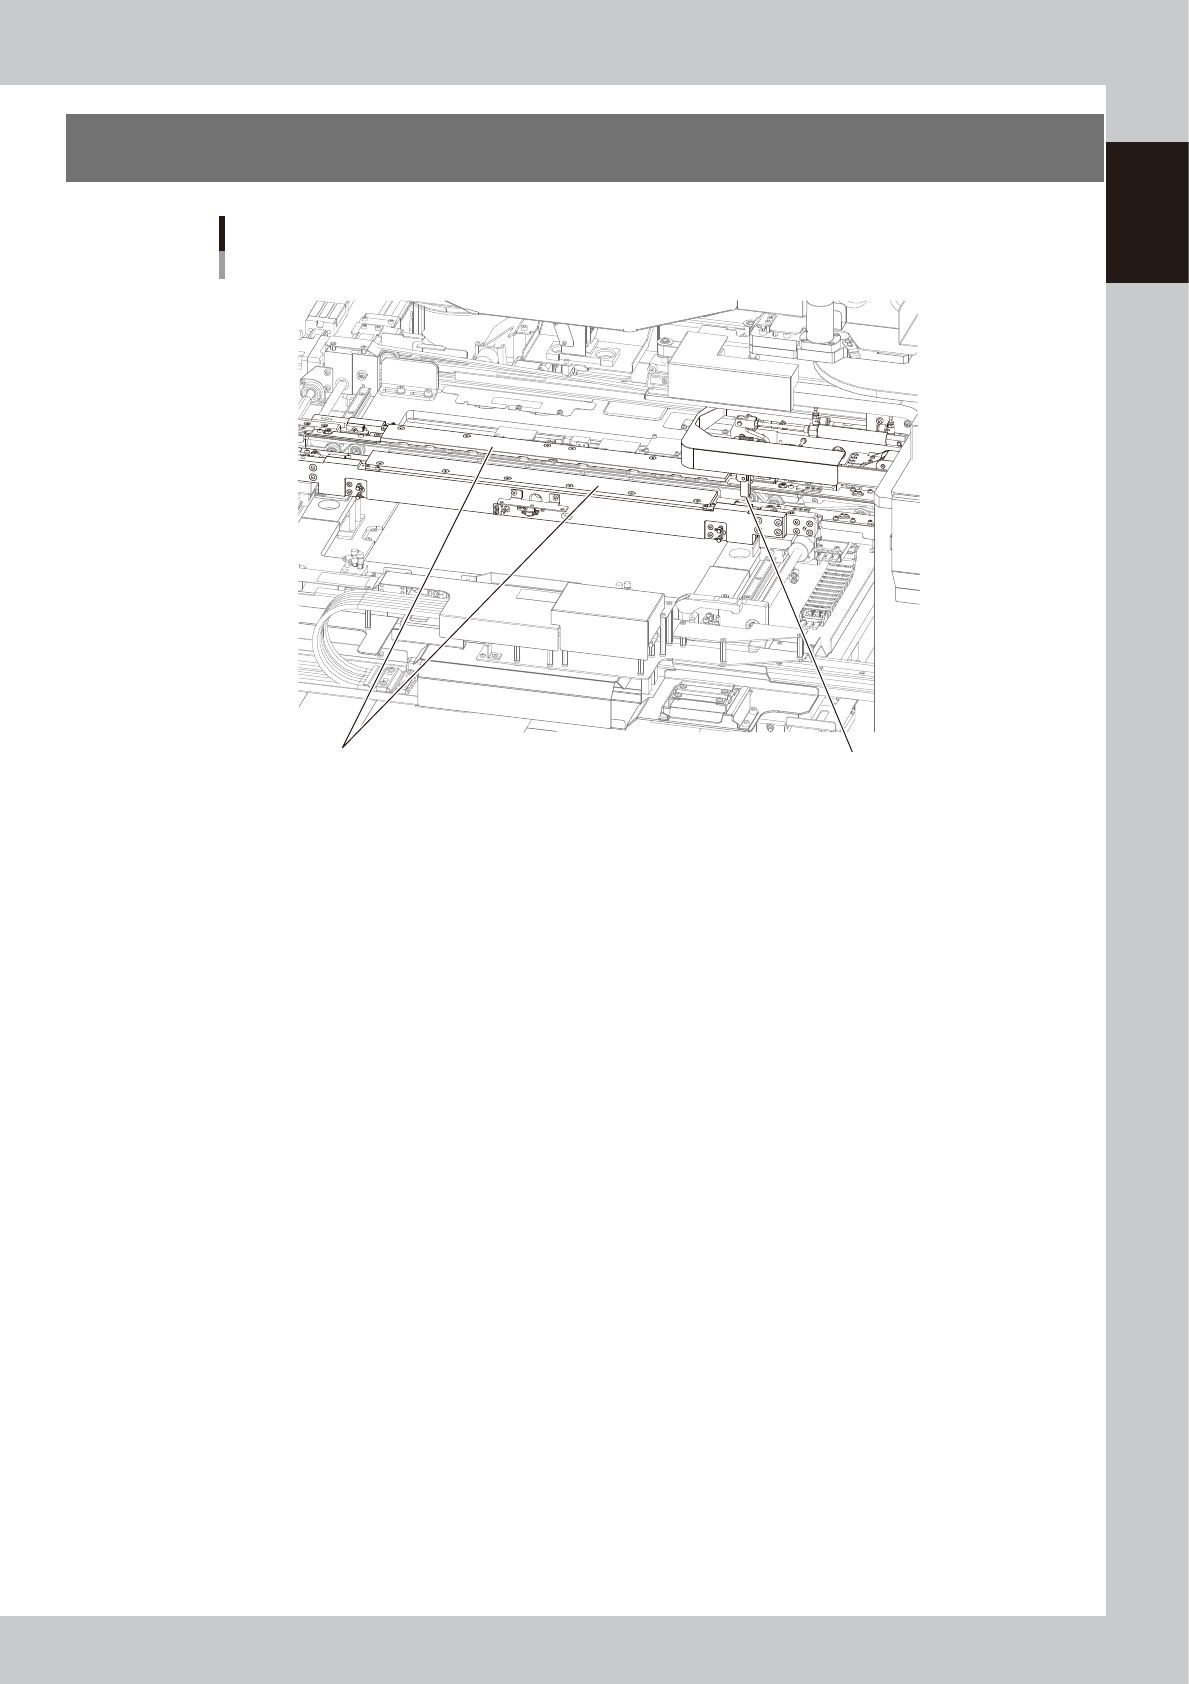
2.
Conveyor unit
2. Board stopper1. Board clamp unit
Conveyor unit
YSi-X conveyor unit
23106-M6-10
1. Board clamp unit
This unit clamps a board in place for inspection.
There are two clamping methods: one is the board clamp that secures the board from the top and bottom and the other is
the side clamp that secures the board by pushing laterally on the board edge (W-axis direction).
2. Board stopper
When a board is carried in on the conveyor, the board stopper stops it in the clamping position.
Board sensor
Board sensors are arranged at the conveyor entrance and exit, and also at the board clamp position.

1-6
1
Part names and functions
3. Laser height sensor
The following explains the laser height sensor used for height measurement.
Laser height sensor
Laser height sensor (rotary type)
HL-axis rotary drive unit (inside cover)
23107-M6 -00
n
Height measurement
Height measurement is one of inspection status (inspection modes).
A laser height sensor is used to measure the height of parts within a step (specified inspection area) to determine whether
the measurement result falls within a user-specified range. When the result is within the specified range, it is determined
to be "OK" (pass). If not, it is determined to be "NG" (fail).
n
Height measurement method
Reference
The height of the reference position is measured as the reference height.
The height of parts is the difference between the reference height and the height obtained by “line measurement” or
“point measurement".
Line measurement (lead coplanarity)
Detects "lead coplanarity" of lead components such as QFP and SOP by measuring their heights.
Point measurement
· Chip floating check
Detects "chip floating" by measuring the height of a chip, which is difficult to find with a vision camera. Also detects
whether or not chip components are mounted.
· BGA coplanarity check
Detects "BGA coplanarity" and lead connection faults due to incomplete placement of a BGA, by measuring the
difference in BGA height.
· Polarity check
Detects a concave mark for polarity by measuring the difference in height, which is difficult to find with a vision
camera.
n
Board warp correction
When performing X-ray inspection, the height of boards can be measured with the laser height sensor to check and
correct the warping of boards.
n
Rotary angle of laser height sensor
The height of parts cannot be measured if the laser beam is blocked by other parts. To avoid this, the angle at which the
laser height sensor measures the height can be selected from 4 directions.
TIP
For instructions on how to use the laser height sensor, see "Laser height sensor" at the end of this manual.