YSi-X_Ope_E.pdf - 第49页
Chapter 2 Basic operation Contents 1. Before operation 2-1 1.1 Canceling emergency stop 2-1 1.2 Clearing an error 2-1 2. Starting and ending the machine and software operation 2-2 2.1 Starting 2-2 2.2 Ending 2-5
1-7
1
Part names and functions
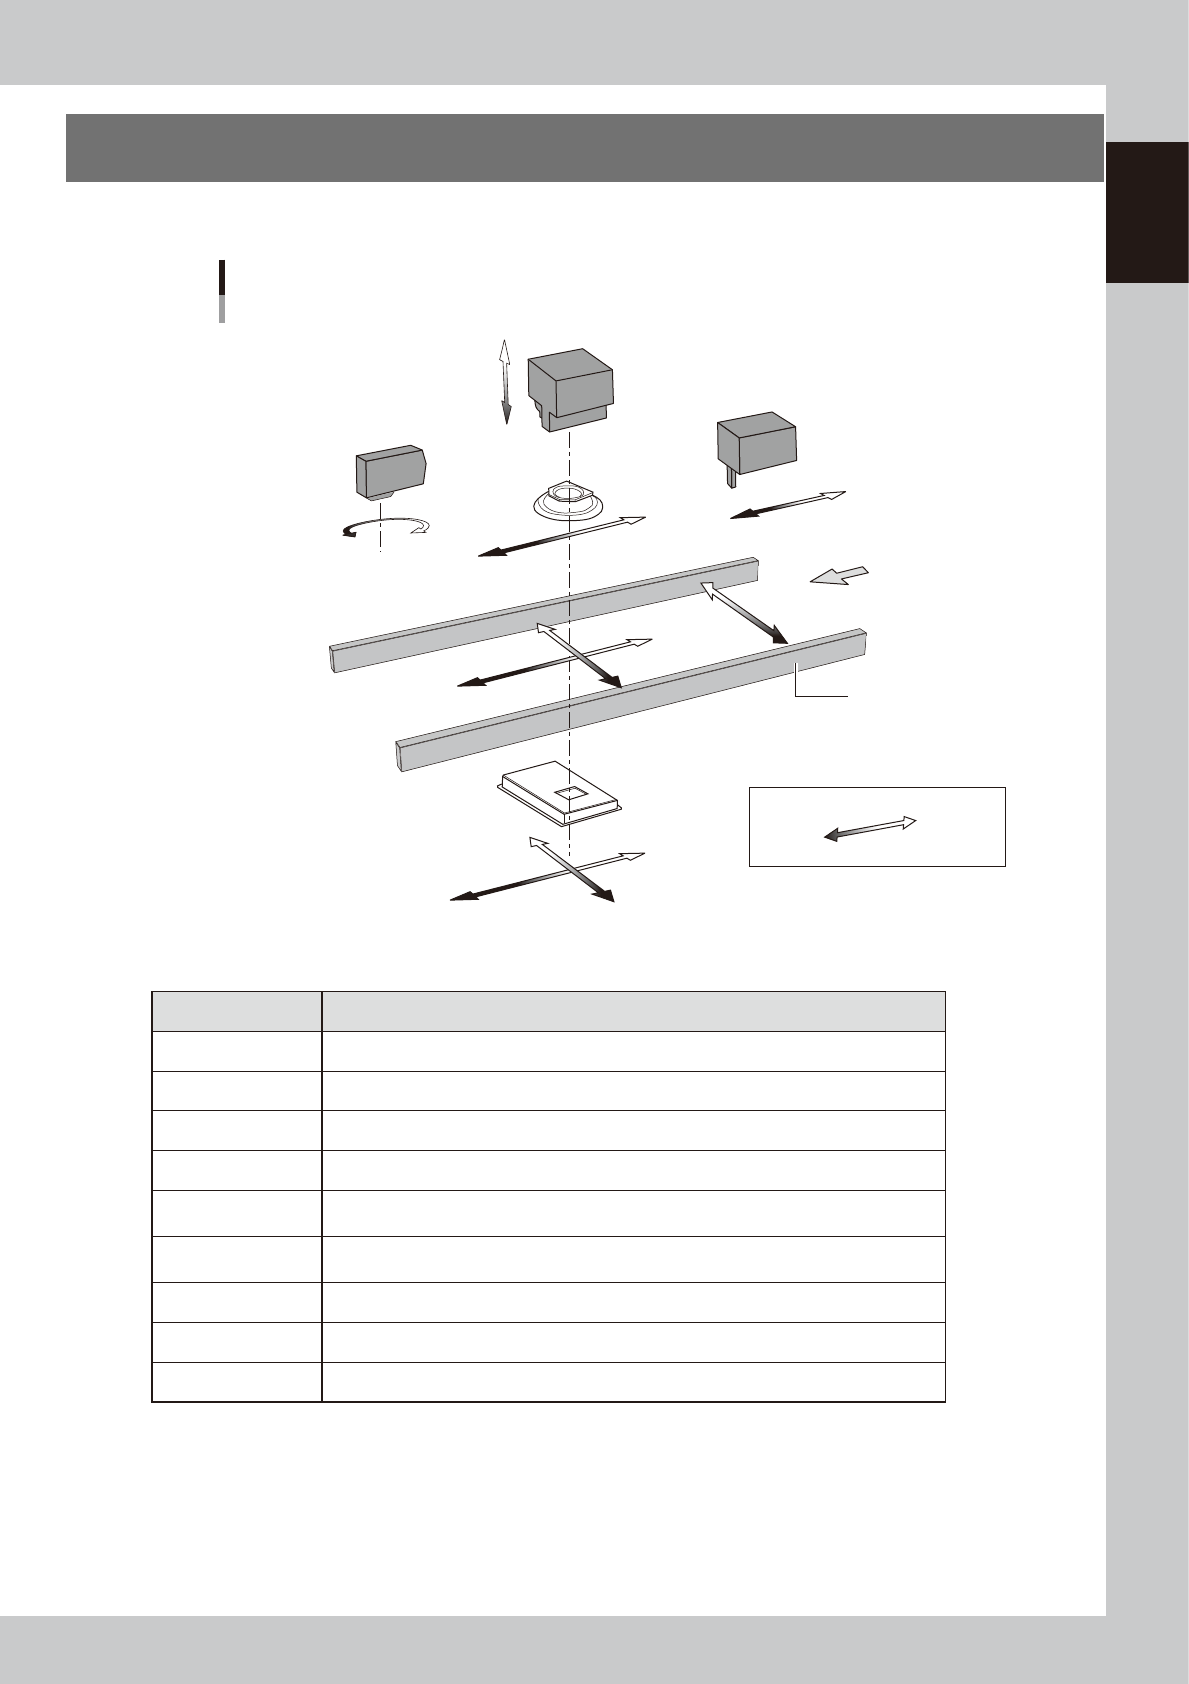
4. Axis configuration
The YSi-X servomotor-controlled axis configuration and movement are shown in the drawing and table below.
YT-axis
MS-axis
HZ-axis
LY-axis
LX-axis
HS-axis
XT-axis
Plus direction
Minus direction
Board
Conveyor rail
Conveyor table
Axis configuration
Example of right-to-left board flow
W-axis
HL-axis
X-ray generator
Optical camera
X-ray camera
X-ray camera table
Laser height sensor
Stopper unit
23108-M6-00
n
Function of each axis
Axis Function
XT-axis Moves the conveyor (board) in parallel with the board transport direction.
YT-axis Moves the conveyor (board) perpendicular to the board transport direction.
W-axis Changes the conveyor width.
MS-axis Moves the stopper unit according to the size (length) of boards transported.
HZ-axis
Changes the distance between the X-ray generator and board. (For zooming of X-ray
images)
HS-axis
Moves the optical camera to lower the X-ray generator. (For moving back the camera to
allow zooming of X-ray images)
LX-axis Moves the X-ray detector in parallel to the board transport direction.
LY-axis Moves the X-ray detector perpendicular to the board transport direction.
HL-axis Rotates the laser height sensor.


2-1
2
Basic operation
1. Before operation
The following explains how to cancel emergency stop and clear errors. Read before operating the machine.
1.1 Canceling emergency stop
Follow these steps to cancel emergency stop.
1
Check safety.
Before continuing the procedure, check the surrounding area for safety.
2
Release the emergency stop button.
When the emergency stop button is pressed, turn it clockwise to release it
3
Press the [READY] button.
Pressing the [READY] button on the operation panel turns on the servomotors.
[READY] button
[READY] button
23201-M6-00
1.2 Clearing an error
If an error occurs a buzzer sounds and a warning screen appears. To clear the error, use the following steps.
1
Turn off the buzzer.
Press the [BUZZER OFF] button on the warning screen to turn off the buzzer.
2
Check the cause of the error.
Possible causes are displayed on the lower part of the warning screen, so check or make a note of the
description.
Warning screen example
24201-M6-00
3
Clear the warning screen.
After removing the cause of the error, press the [OK] button on the warning screen to clear the warning
screen.