YSi-X_Ope_E.pdf - 第71页
4-10 4 Maintenance 4. W eekly inspection n NOTE Before beginning work, remove the rear center panel by referring to section 3.4 “Removing the rear center panel” in this chapter so that you can open and close the rear saf…
4-9
4
Maintenance
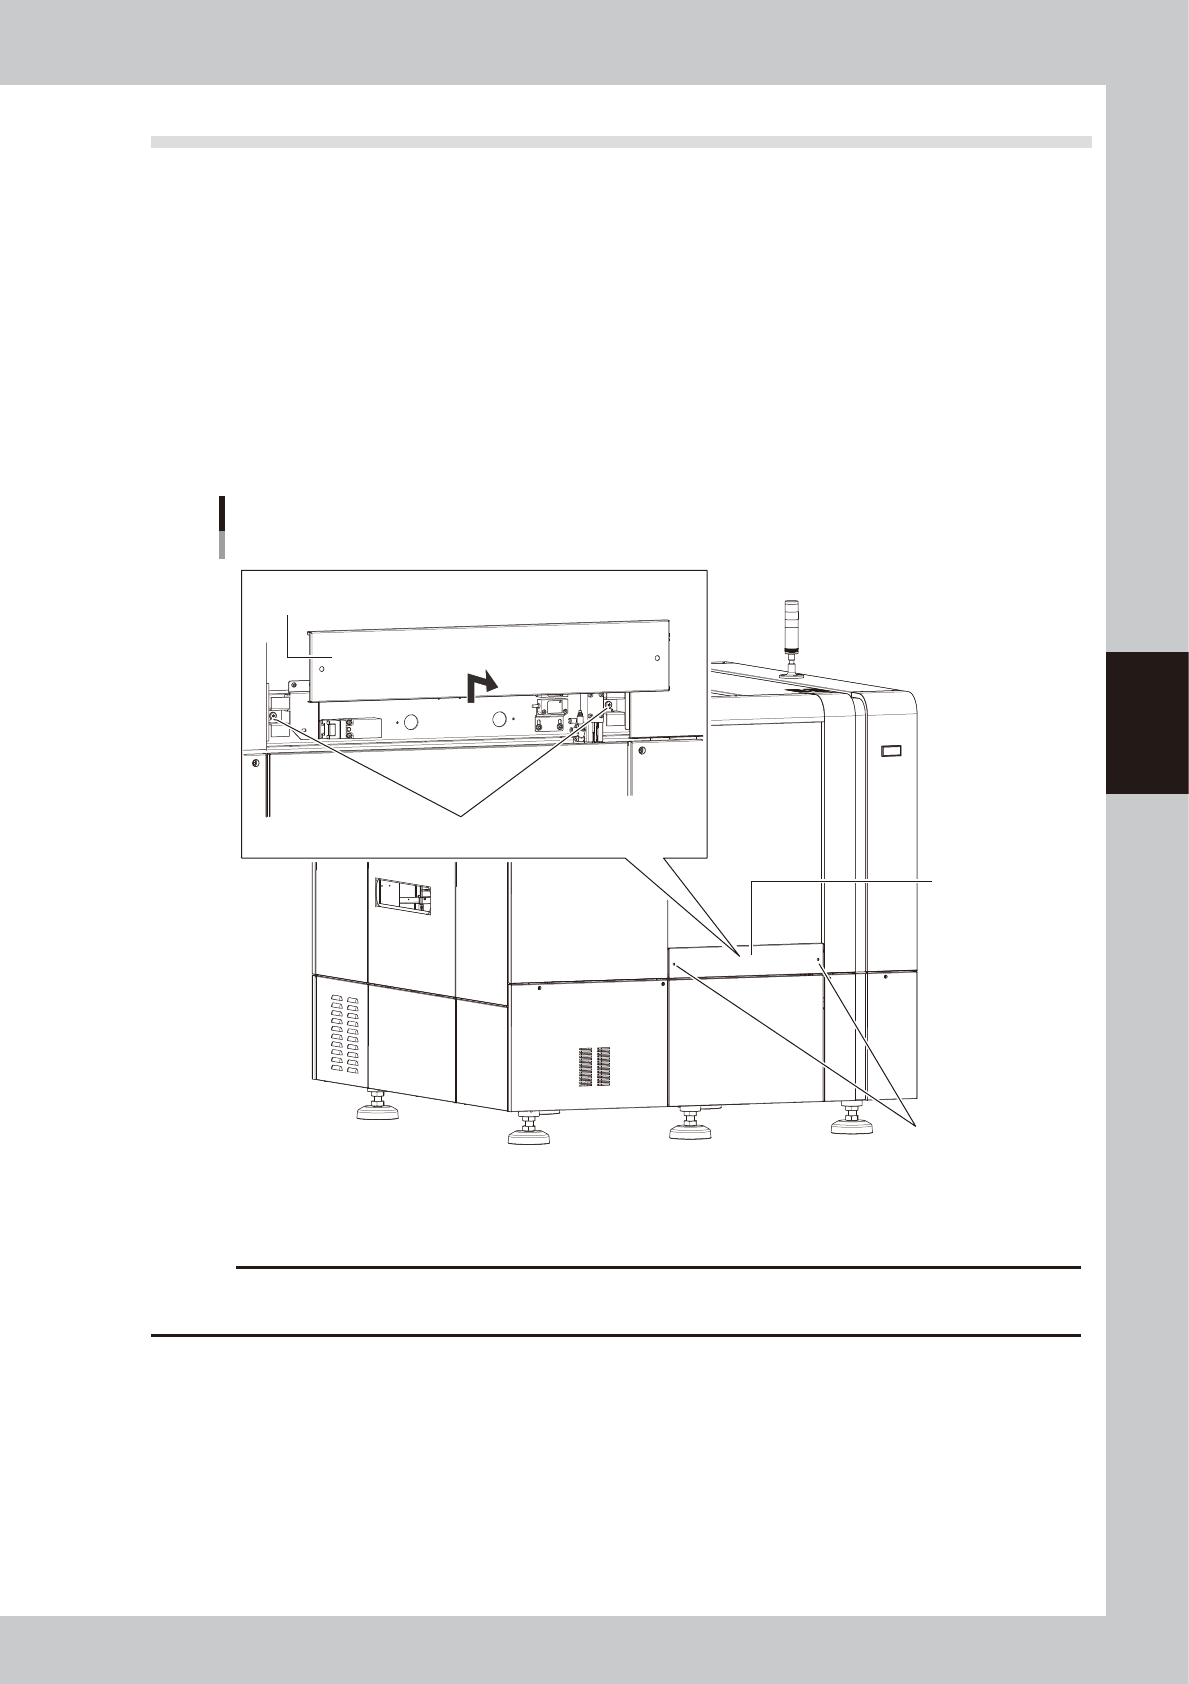
3.4 Removing the rear center panel
To open and close the rear safety door, the rear center panel should first be removed from the inspection
machine. The following describes the procedure for removing the rear center panel.
n
Required tool
• Phillips screwdriver
e
1
Press the emergency stop button to place the machine in emergency stop.
2
Remove the rear center panel from the machine.
1. Use the Phillips screwdriver to loosen the screws (2 screws) securing the panel.
2. Lift the panel straight upward and then pull it out toward you.
Removing the rear center panel
Rear center panel
Screws securing the panel
Remove the panel by lifting it upward.
Screws securing the panel
53403-M6-10
To reattach the rear center panel, reverse the procedure in step 2.
c
CAUTION
When the maintenance is complete, be sure to reattach the rear center panel. The machine does not operate if the
rear center panel is left removed.
4-10
4
Maintenance
4. Weekly inspection
n
NOTE
Before beginning work, remove the rear center panel by referring to section 3.4 “Removing the rear center panel” in
this chapter so that you can open and close the rear safety door. After finishing the work, reattach the rear center
panel.
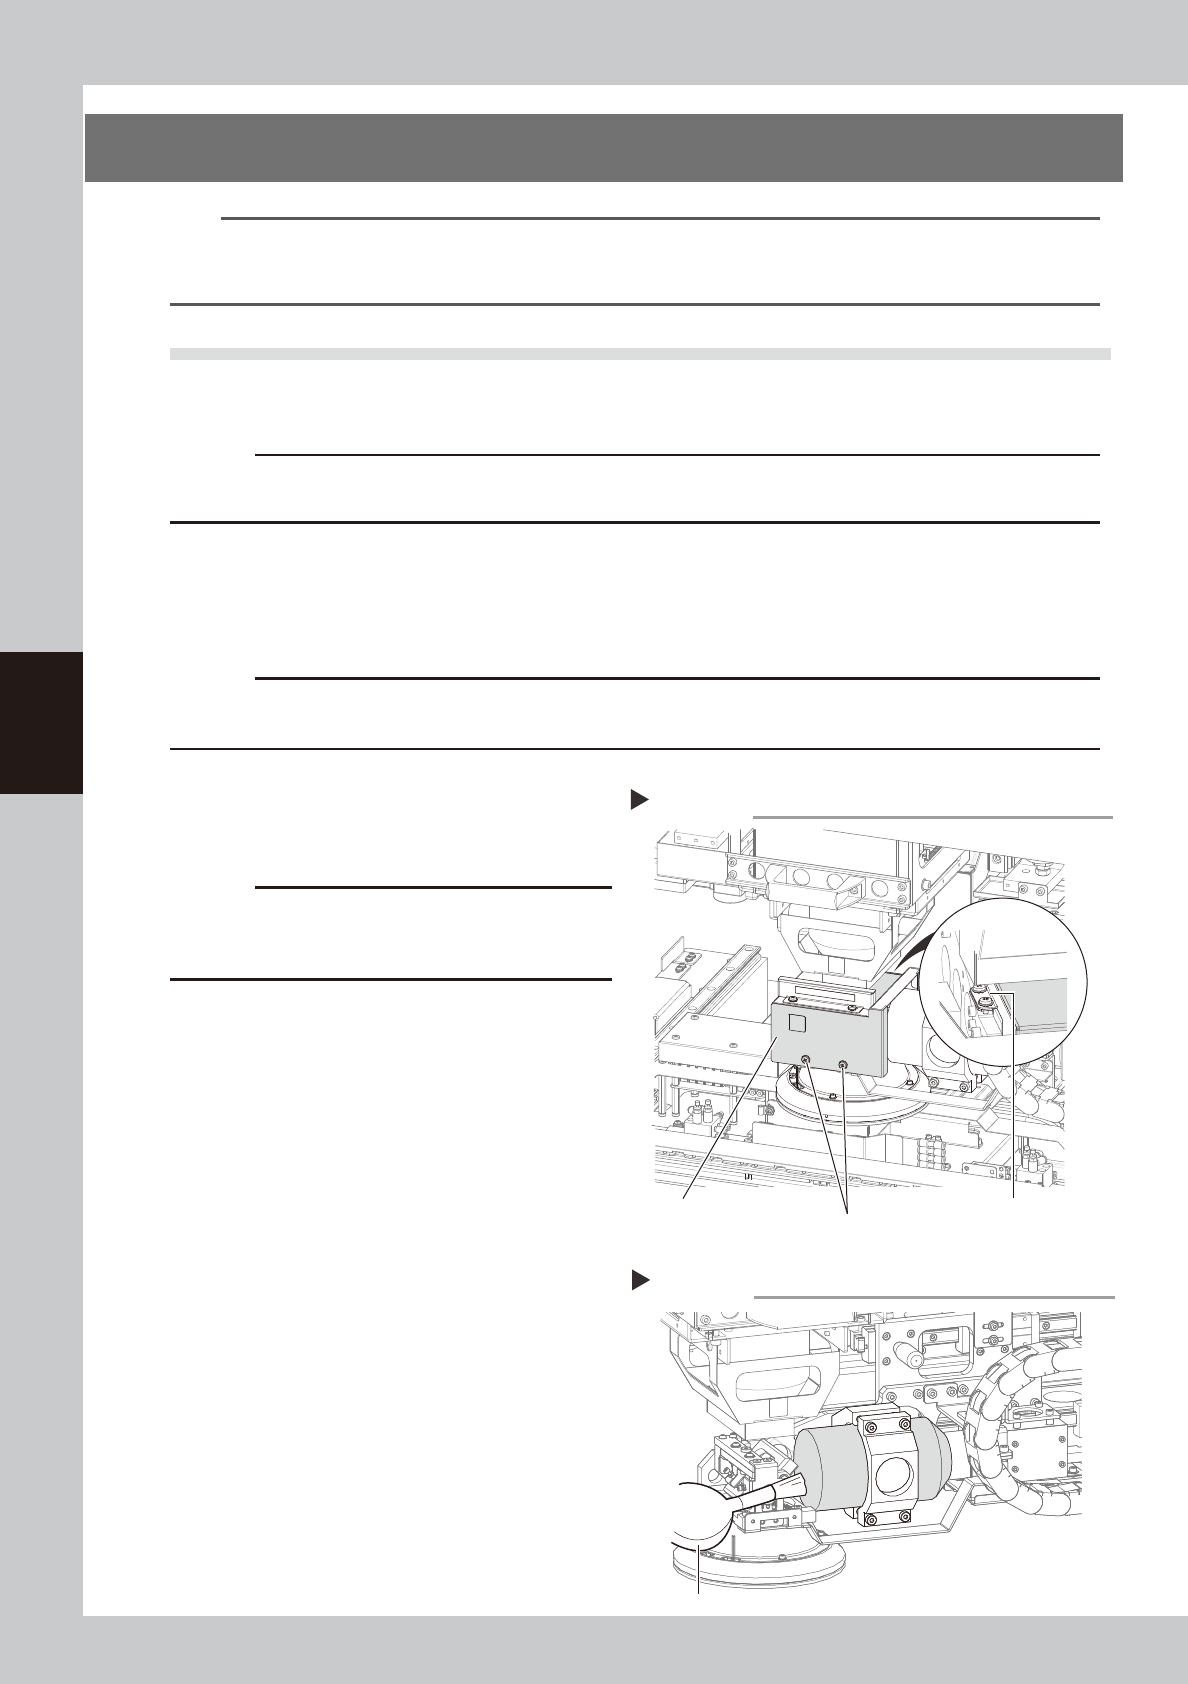
4.1 Cleaning the camera lighting unit
Dirt or dust particles sticking to the lighting unit of the optical camera can cause recognition errors during
inspection. Weekly inspection and cleaning are recommended to prevent this problem.
c
CAUTION
Do not apply strong force or shock to the camera unit and lighting unit during cleaning. Optical axis adjustment might
become unreliable.
n
Required tools
• Phillips screwdriver
• Lent-free cleaning wipe
• Optical lens brush
c
CAUTION
The inner side of the camera cover uses lead to shield X-rays. Wear gloves for protection from lead when handling the
camera cover.
e
1
Press the emergency stop button.
The machine must be in emergency stop to
ensure safety during work.
c
CAUTION
To ensure safety, make sure that the machine power
switch is off or the emergency stop button is pressed
before starting work.
2
Open the safety door on the rear of
the machine.
3
Remove the optical camera cover.
1. Wear gloves for protection from lead and
then use the Phillips screwdriver to
remove the screws securing the camera
cover.
2. Remove the camera cover while being
careful not to drop it and place it on a
flat surface
53404-M6-00
4
Clean the lens surface and mirror
surface.
Use the lens brush to clean dust off the lens
and mirror.
If dust still persists, use lens cleaner to clean
the lens and mirror.
53405-M6-00
5
Reattach the optical camera cover.
To reattach the cover to the optical camera,
reverse the procedure used to remove the
cover.
Removing the optical camera cover
Step 3
Screws securing the cover
(2 screws on outer side)
Screws securing the cover
(2 screws on inner side)
Optical camera cover
Cleaning the lens
Step 4
Optical lens brush
4-11
4
Maintenance
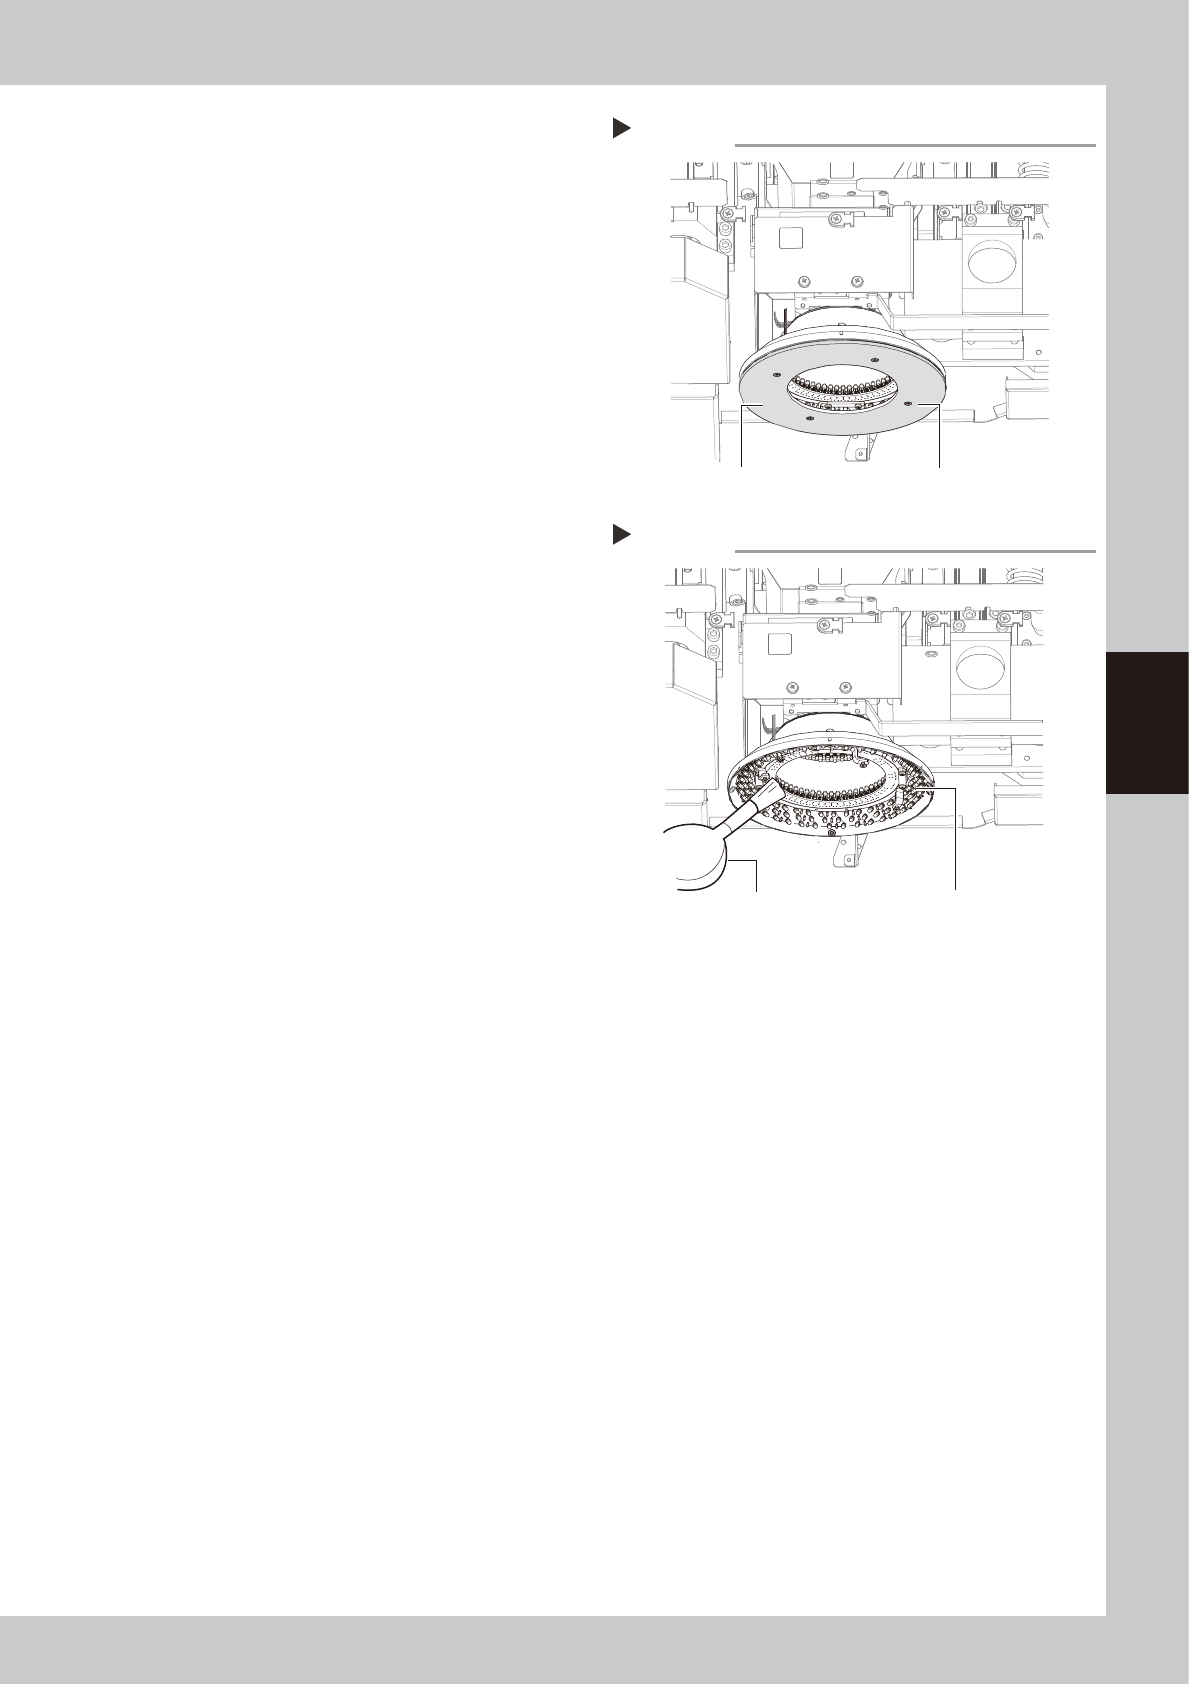
6
Remove the diffuser plate.
Using the Phillips screwdriver, remove the
four screws holding the diffuser plate and
remove the diffuser plate.
53406-M6-00
7
Clean the diffuser plate.
Remove dirt and dust on the entire diffuser
plate with a paper wipe.
8
Remove dust on the lighting unit of
the inspection camera, using a lens
blower brush.
53407-M6-00
9
Reattach the diffuser plate.
Reattach the diffuser plate in the reverse
order of the removal procedure.
Removing the diffuser plate
Step 6
Diffuser plate mounting screw (four screws)
Diffuser plate
Cleaning the lighting for optical camera
Step 8
Optical lens brush
Camera lighting