YSi-X_Ope_E.pdf - 第78页
4-17 4 Maintenance 5.2.4 Cleaning and greasing the YT -axis guides n Required tools • Lent-free cleaning wipe • Grease gun • Specified grease (NSL) c CAUTION W ear protective glasses and gloves when handling grease. e 1 …
4-16
4
Maintenance
5.2.3 Cleaning and greasing the YT-axis ball screws
n
Required tools
• Lent-free cleaning wipe
• Grease gun
• Specified grease (NSL)
c
CAUTION
Wear protective glasses and gloves when handling grease.
e
1
Make the preparations for the
cleaning and greasing work.
1. Press the emergency stop button to put
the machine into emergency stop.
2. Open the [Unit]-[Conveyor] tab and
press the [Stopper] button to raise the
board stopper.
2
Open the front and rear safety
doors of the machine.
3
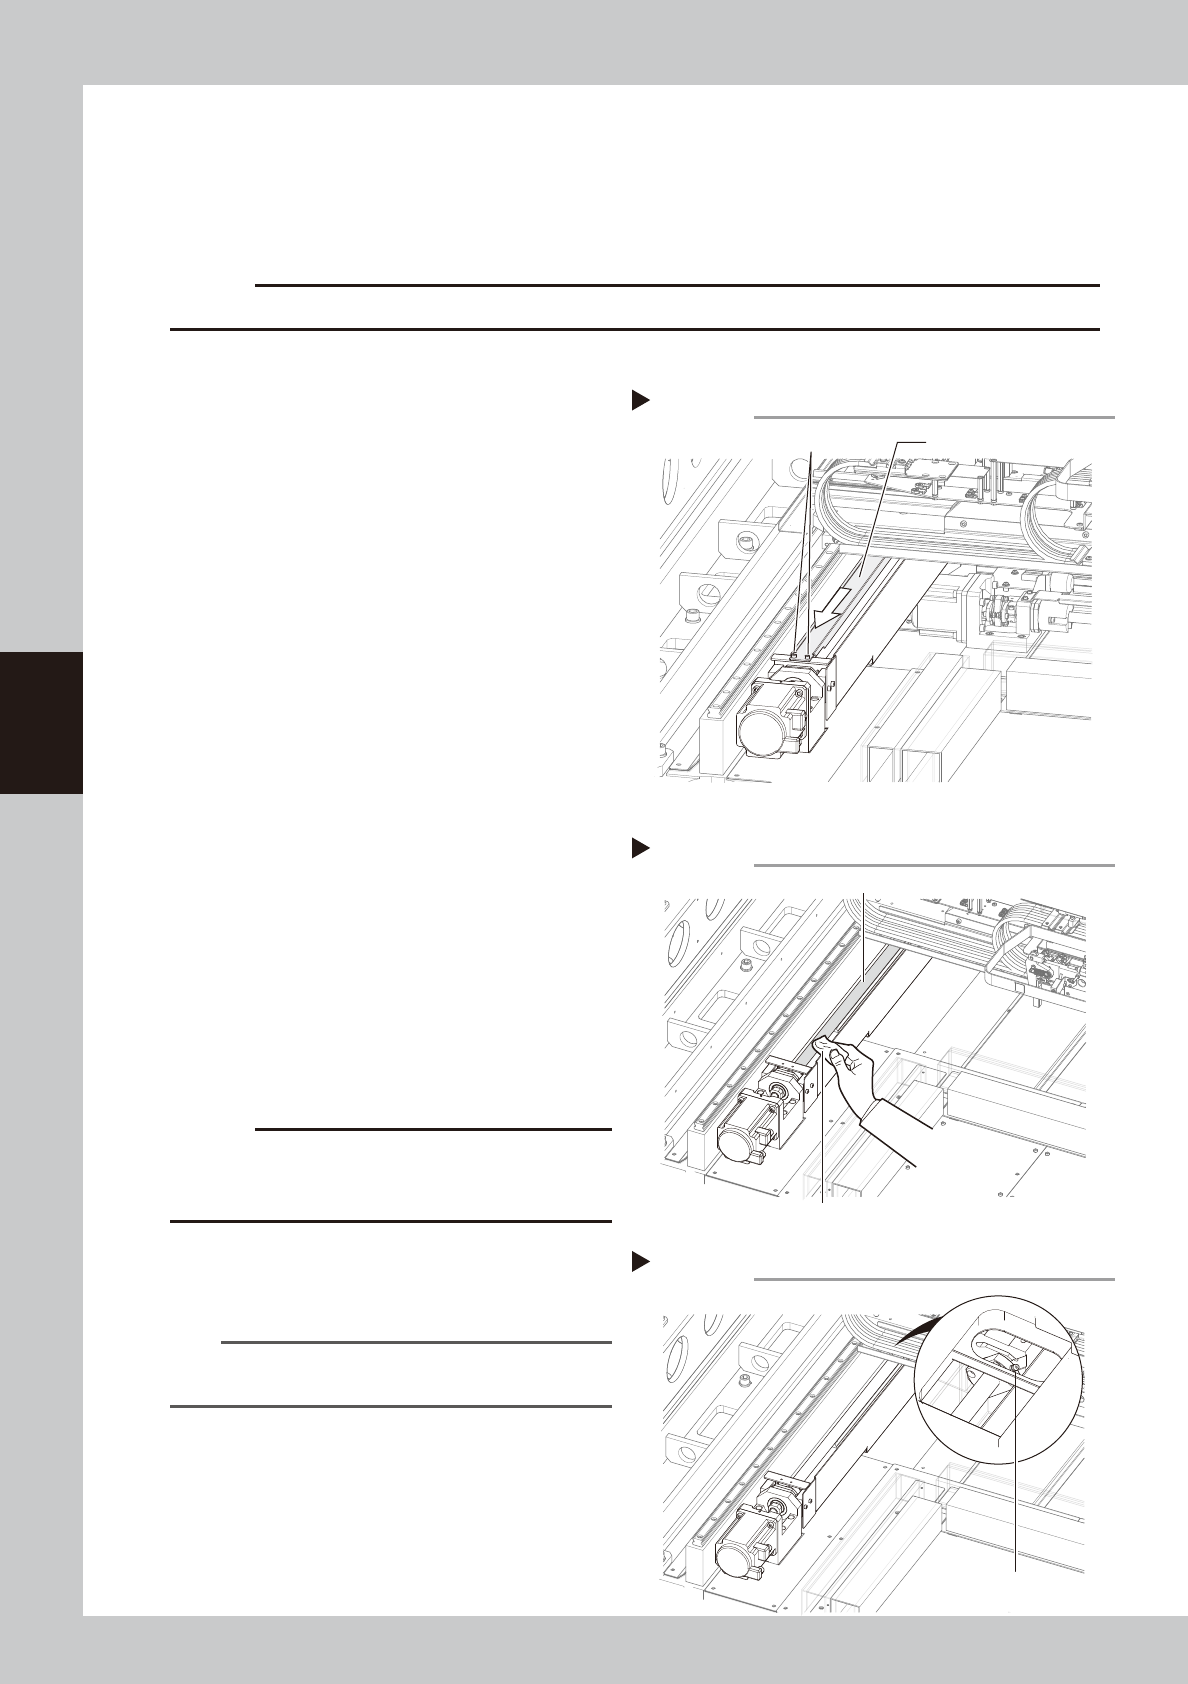
Remove the grease spattering
prevention cover.
Move the conveyor table back and forth,
and then remove the grease spattering
prevention cover.
1. Use the Phillips screwdriver to remove the
screws (two each on the front and rear
sides) securing the grease spattering
prevention cover.
2. Remove the grease spattering prevention
cover by pulling it to the front side of the
machine.
53413-M6-00
4
Clean the ball screws.
1. Hold the handle and move the conveyor
table to the rear side.
2. Wipe away the old grease and dirt from
the entire ball screw with a paper wipe.
3. Move the conveyor table to the front
side and wipe the ball screw from the
rear side as well
.
53414-M6-00
c
CAUTION
Wipe away the old grease and dirt in the lead groove
of the ball screw.
Also check that no debris or residue
remains in the lead groove.
5
Inject new grease.
Use the grease gun to inject the specified
grease (NSL) into the grease nipple (1 place).
53415-M6-00
n
NOTE
See Chapter 5, “Lubrication points”, for details on the
lubrication points and grease gun nozzles.
6
Wipe away excess grease
.
Move the conveyor table back and forth
several times by hand and wipe away
excess grease with a paper wipe.
7
Reattach the grease spattering
prevention cover.
Reattach the cover using the reverse of the
removal procedure.
Removing YT-axis grease spattering prevention cover
Grease spattering prevention cover
Mounting screw
Step 3
Cleaning the YT-axis ball screw
Step 4
Paper wipe
YT-axis ball screw
Lubricating the YT-axis ball screw
Step 5
Grease nipple
4-17
4
Maintenance
5.2.4 Cleaning and greasing the YT-axis guides
n
Required tools
• Lent-free cleaning wipe
• Grease gun
• Specified grease (NSL)
c
CAUTION
Wear protective glasses and gloves when handling grease.
e
1
Make the preparations for the
cleaning and greasing work.
1. Press the emergency stop button to put
the machine into emergency stop.
2. Open the [Unit]-[Conveyor] tab and
press the [Stopper] button to raise the
board stopper.
2
Open the front and rear safety
doors of the machine.
3
Clean the guides.
1. Hold the handle and move the conveyor
table to the rear side.
2. Wipe away the old grease and dirt from
the entire guide with a paper wipe.
3. Move the conveyor table to the front
side and wipe the guide from the rear
side as well.
53416-M6-00
c
CAUTION
Also wipe clean the slide groove of each guide.
4
Inject new grease.
Use the grease gun to inject the specified
grease (NSL) into the grease nipple.
There are 3 grease nipples each for the left
and right guides (total of 6 places).
53417-M6-00
n
NOTE
See Chapter 5, “Lubrication points”, for details on the
lubrication points and grease gun nozzles.
5
Wipe away excess grease
.
Move the conveyor table back and forth
several times by hand and wipe away
excess grease with a paper wipe.
Cleaning the YT-axis guide
Step 3
YT-axis guide
Paper wipe
Lubricating the YT-axis guide
Step 4
Grease nipple

4-18
4
Maintenance
5.2.5 Cleaning and greasing the LX-axis ball screws
n
Required tools
• Hex wrench (2.5mm)
• Lent-free cleaning wipe
• Grease gun
• Specified grease (NSL)
c
CAUTION
Wear protective glasses and gloves when handling grease.
e
1
Make the preparations for the
cleaning and greasing work.
1. Press the emergency stop button to put
the machine into emergency stop.
2. Open the [Unit]-[Conveyor] tab and
press the [Stopper] button to raise the
board stopper.
2
Open the front and rear safety
doors of the machine.
3
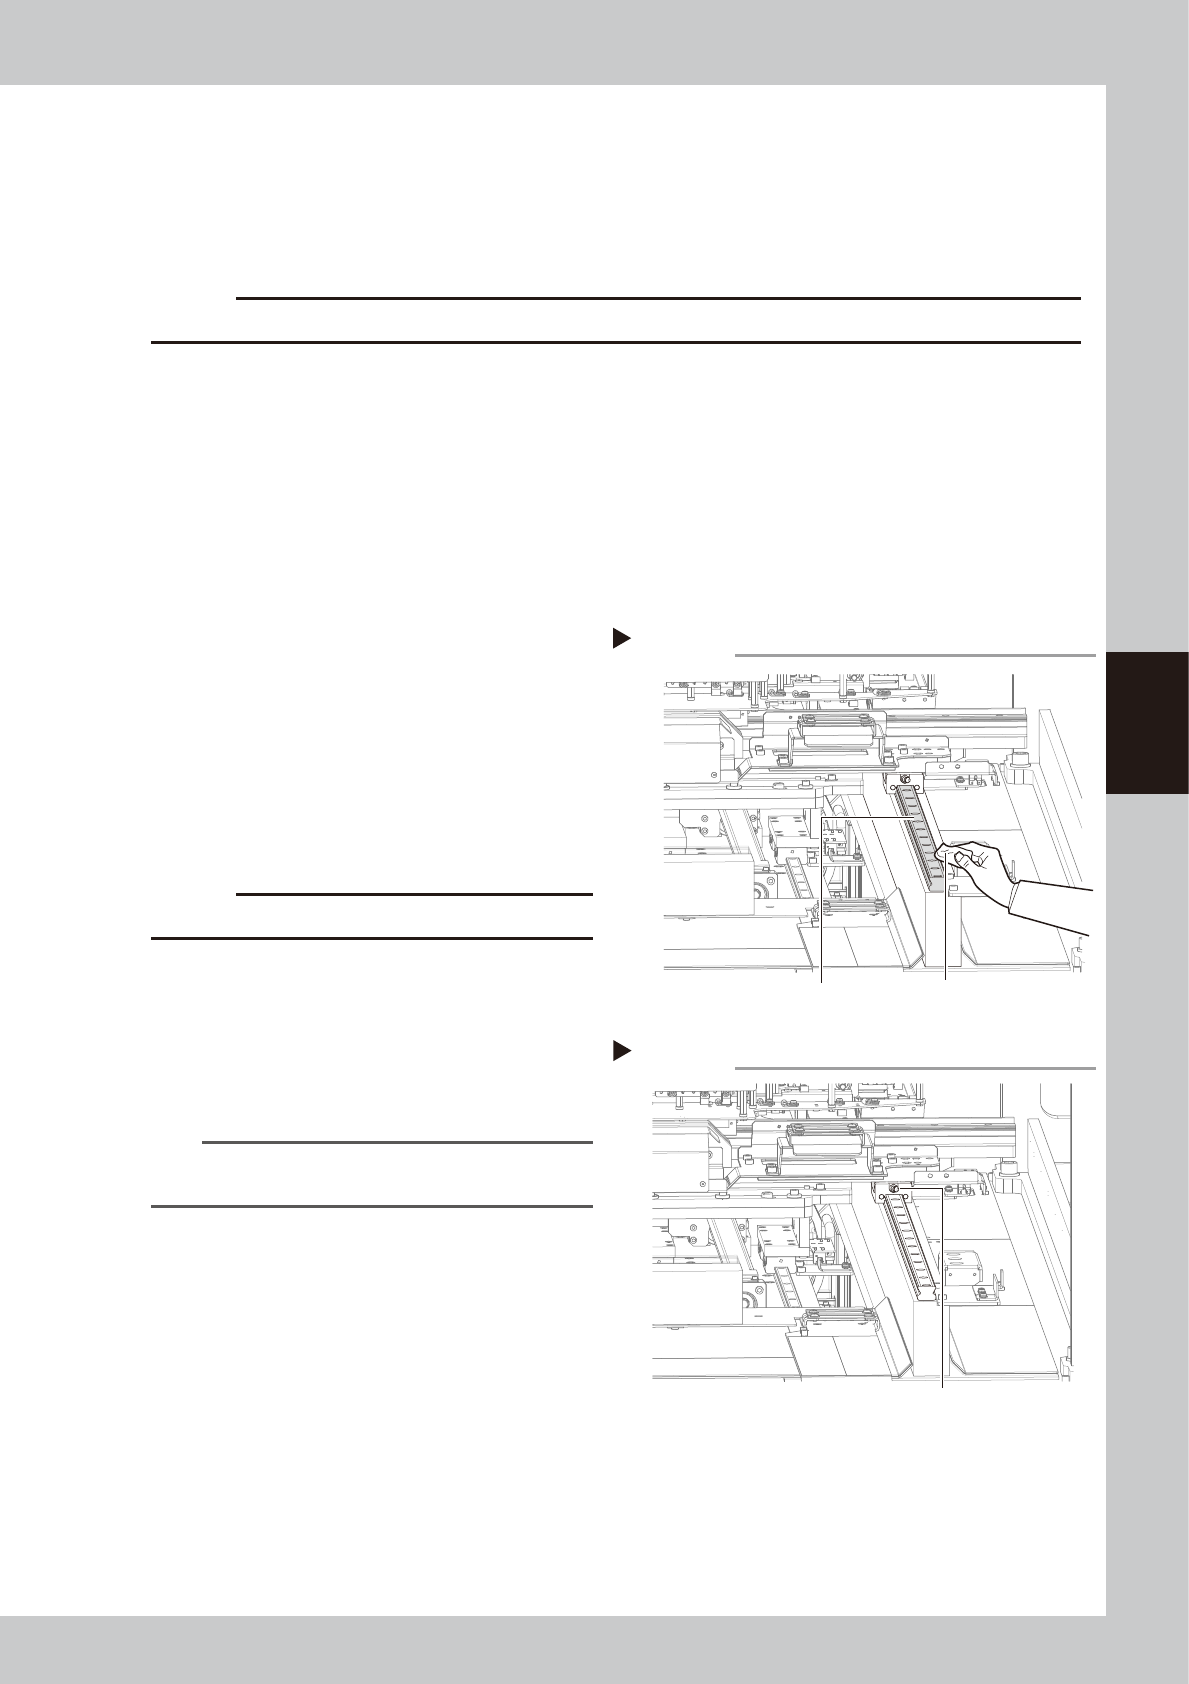
Remove the grease spattering
prevention cover.
1. Move the conveyor table to the front
side.
2. Use the hex wrench (M3) to remove the
screws (two each on the front and rear
sides) securing the grease spattering
prevention cover and remove the cover.
53418-M6-00
4
Clean the ball screws.
Move the X-ray camera table by hand to
the left and right several times and then
wipe away the old grease and dirt from the
entire ball screw with a paper wipe.
53419-M6-00
c
CAUTION
Wipe away the old grease and dirt in the lead groove
of the ball screw.
Also check that no debris or residue
remains in the lead groove.
5
Inject new grease.
Use the grease gun to inject the specified
grease (NSL) into the grease nipple (1 place)
.
53420-M6-00
n
NOTE
See Chapter 5, “Lubrication points”, for details on the
lubrication points and grease gun nozzles.
6
Wipe away excess grease
.
Move the X-ray camera table by hand to
the left and right several times and then
wipe away excess grease with a paper
wipe.
7
Reattach the grease spattering
prevention cover.
Reattach the cover using the reverse of the
removal procedure.
Removing LX-axis grease spattering prevention cover
Grease spattering prevention cover
Mounting screw
(two each on left and right sides)
Step 3
Cleaning the LX-axis ball screw
Step 4
Paper wipe
LX-axis ball screw
Lubricating the LX-axis ball screw
Step 5
Grease nipple Ball screw