YSi-X_Ope_E.pdf - 第91页
4-30 4 Maintenance 6.1.3 Cleaning and greasing the MS-axis guides n Required tools • Lent-free cleaning wipe • Grease gun • Specified grease (NSL) c CAUTION W ear protective glasses and gloves when handling grease. e 1 P…

4-29
4
Maintenance
6.1.2 Cleaning and greasing the W-axis guides
n
Required tools
• Lent-free cleaning wipe
• Specified grease (NSL)
c
CAUTION
Wear protective glasses and gloves when handling grease.
1
Widen the conveyor width to the
maximum.
Perform return-to-origin to widen the
conveyor width to the maximum.
e
2
Press the emergency stop button.
The machine must be in emergency stop to
ensure safety during work.
3
Open the safety door on the rear of
the machine.
4
Clean the guides.
Wipe away the old grease and dirt from the
entire guide with a paper wipe.
53432-M6-00
c
CAUTION
Also wipe clean the slide groove of each guide.
5
Change the conveyor width.
1. Close the rear safety door of the
machine and release emergency stop.
2. Open the [Unit]-[Conveyor] tab and
press the [Width] button. When the
“Conveyor” dialog box appears, enter
“100” or so in the "Target Width" box and
press [OK].
The conveyor width will change to the
specified size.
e
6
Press the emergency stop button
again.
7
Open the rear safety door of the
machine.
8
Clean the guide.
Using a paper wipe, remove the old grease
and dirt on the guides where you could not
clean in step 4.
c
CAUTION
Also wipe clean the slide groove of each guide.
9
Apply grease the guides.
Apply the specified grease (NSL) by hand
uniformly over the entire guides.
53433-M6-10
0
Wipe away excess grease
.
Wipe away excess grease with a paper
wipe.
Cleaning the W-axis guide
Step 4
W-axis guide
Paper wipe
Lubricating the W-axis guide
Step 9
4-30
4
Maintenance
6.1.3 Cleaning and greasing the MS-axis guides
n
Required tools
• Lent-free cleaning wipe
• Grease gun
• Specified grease (NSL)
c
CAUTION
Wear protective glasses and gloves when handling grease.
e
1
Press the emergency stop button.
The machine must be in emergency stop to
ensure safety during work
.
2
Open the front safety door of the
machine.
3
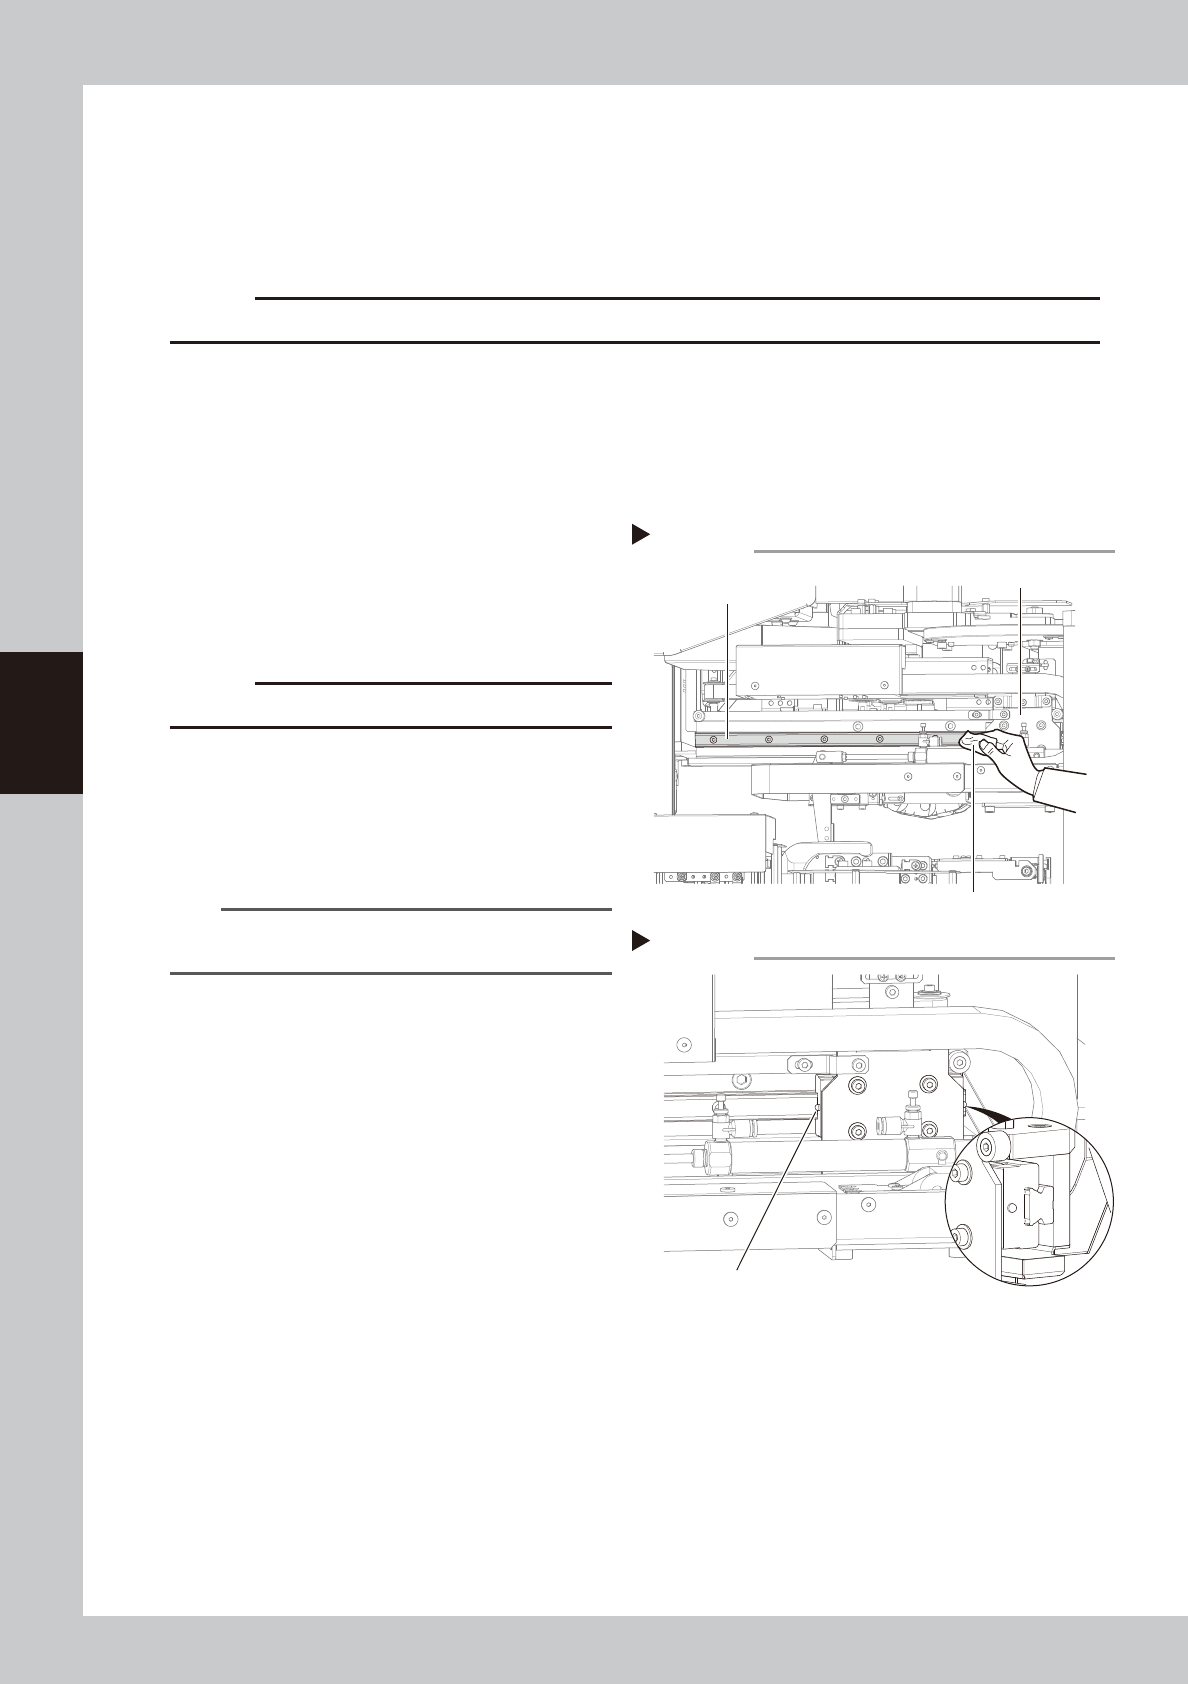
Clean the guides.
Move the stopper unit back and forth by
hand and wipe away the old grease and
dirt from the entire guide with a paper wipe.
53434-M6-10
c
CAUTION
Also wipe clean the slide groove of each guide.
4
Inject new grease.
Use the grease gun to inject the specified
grease (NSL) into the grease nipple (2
place).
53435-M6-10
n
NOTE
See Chapter 5, “Lubrication points”, for details on the
lubrication points and grease gun nozzles.
5
Wipe away excess grease
.
Move the stopper unit back and forth by
hand and then wipe away excess grease
with a paper wipe.
Cleaning MS-axis guide
Step 3
MS-axis guide
Stopper unit
Paper wipe
Lubricating the MS-axis guide
Step 4
Grease nipple
Grease nipple
4-31
4
Maintenance
6.2 Inspecting and cleaning the air filter
Air/mist filters are used to prevent oil, mist and other impurities in the air compressor from penetrating into the
machine. These filters should be inspected and cleaned periodically as instructed below. (The filter closer to
the air coupler is the air filter and the other one is the mist filter.)
c
CAUTION
The air coupler should be disconnected to safely perform the work. When disconnecting it, be careful not to allow oil,
water, or impurities to splash outward. Also take care since a large air exhaust sound is produced when disconnecting
the air coupler.
n
Required tools
• Air blow tool
• Paper wipe
n
Cleaning the filter cup
1
Check the inside of the filer cup.
Check for oil or water deposits in the filter
cup through the window. If the window is
dirty, follow the steps below to clean the
filter cup.
TIP
The drain cock at the bottom of the filter cup is an
auto-drain type. It automatically drains the oil or water
when deposited in the cup. We recommend
connecting a hose to this drain cock.
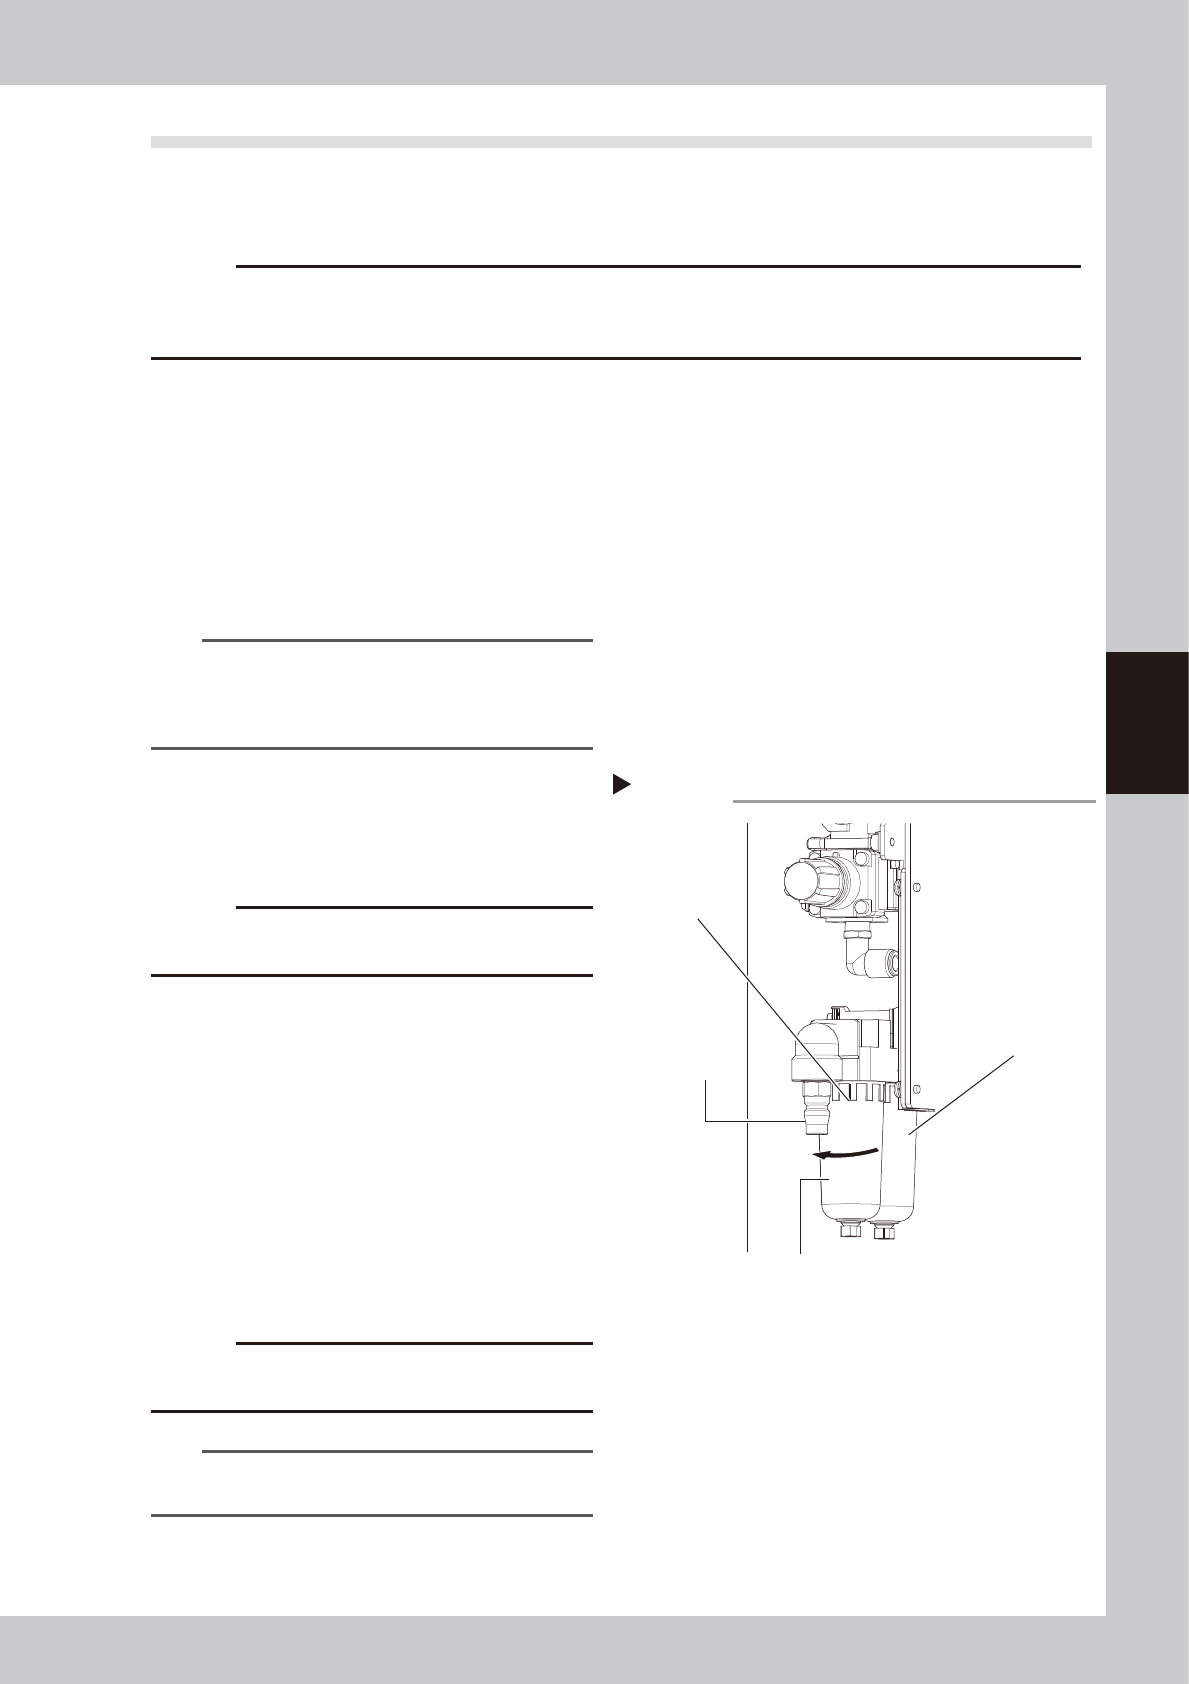
2
Remove the filter cup.
Turn the filter cup to the left and pull it down
to remove it.
53436-M6-00
c
CAUTION
An O-ring is fitted to the filter cup. Be careful not to lose
it when removing the filter cup.
3
Clean the inside of the filter cup.
1. Lightly clean the filter cup with water.
2. Then, pour water-diluted neutral
detergent into the filter cup and clean
the inside while shaking it.
3. Blow air onto the filter cup using the air
blow tool and then wipe away the
moisture in the filter cup with a paper
wipe.
4
Reattach the filter cup.
Reattach the filter cup by turning it to the
right.
c
CAUTION
An O-ring is fitted to the filter cup. Be careful not to
forget to fit it in place.
n
NOTE
Leave the filter cup removed to clean the air filter as
explained in the next procedure.
Removing the filter cup
Step 2
Filter cup
Remove the
air coupler.
Air filter
Oil and mist filters