N7201A652E.pdf - 第298页
NPM- TT2 EJM1EE-MB-04 O-03 Produc- tion data teaching 4-2-2 -3 ● Before the PCB recognition teach, check in NPM-DGS that the sof t switch ‘PCBRecog’ (P.4-1-14) of the created data is set to [ON]. ● If a PCB width is not …
NPM-TT2 EJM1EE-MB-04O-03
Setting
change
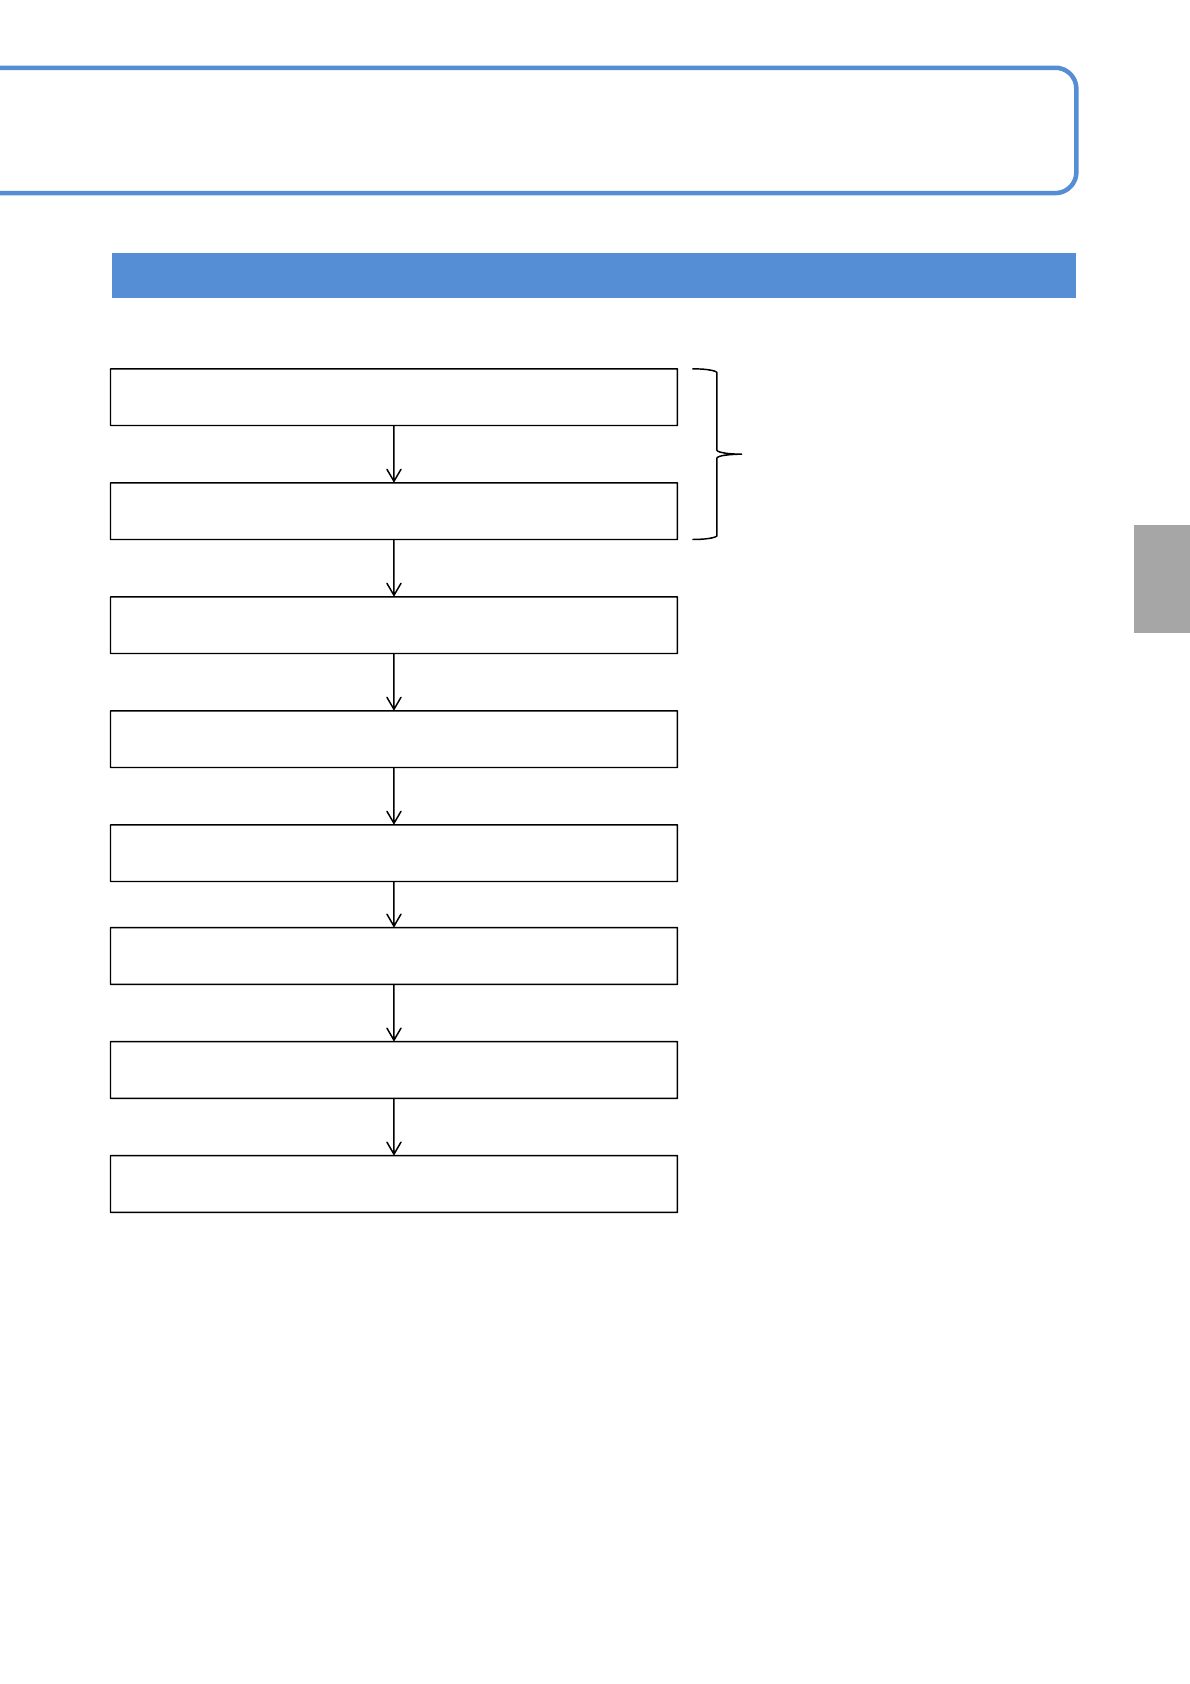
Teaching Flow
Inputting the PCB data
Inputting the PCB recognition data
Starting the teaching
Setting the lamp values
Recognition
Created on NPM-DGS
← Unnecessary if the automatic
lamp setting is selected
Saving data
Recognition Test
Teaching is complete
4-2-2-2
NPM-TT2 EJM1EE-MB-04O-03
Produc-
tion data
teaching
4-2-2-3
●Before the PCB recognition teach, check in NPM-DGS that the soft switch ‘PCBRecog’ (P.4-1-14) of the
created data is set to [ON].
●If a PCB width is not matched, adjust it (→P.2-5-4)
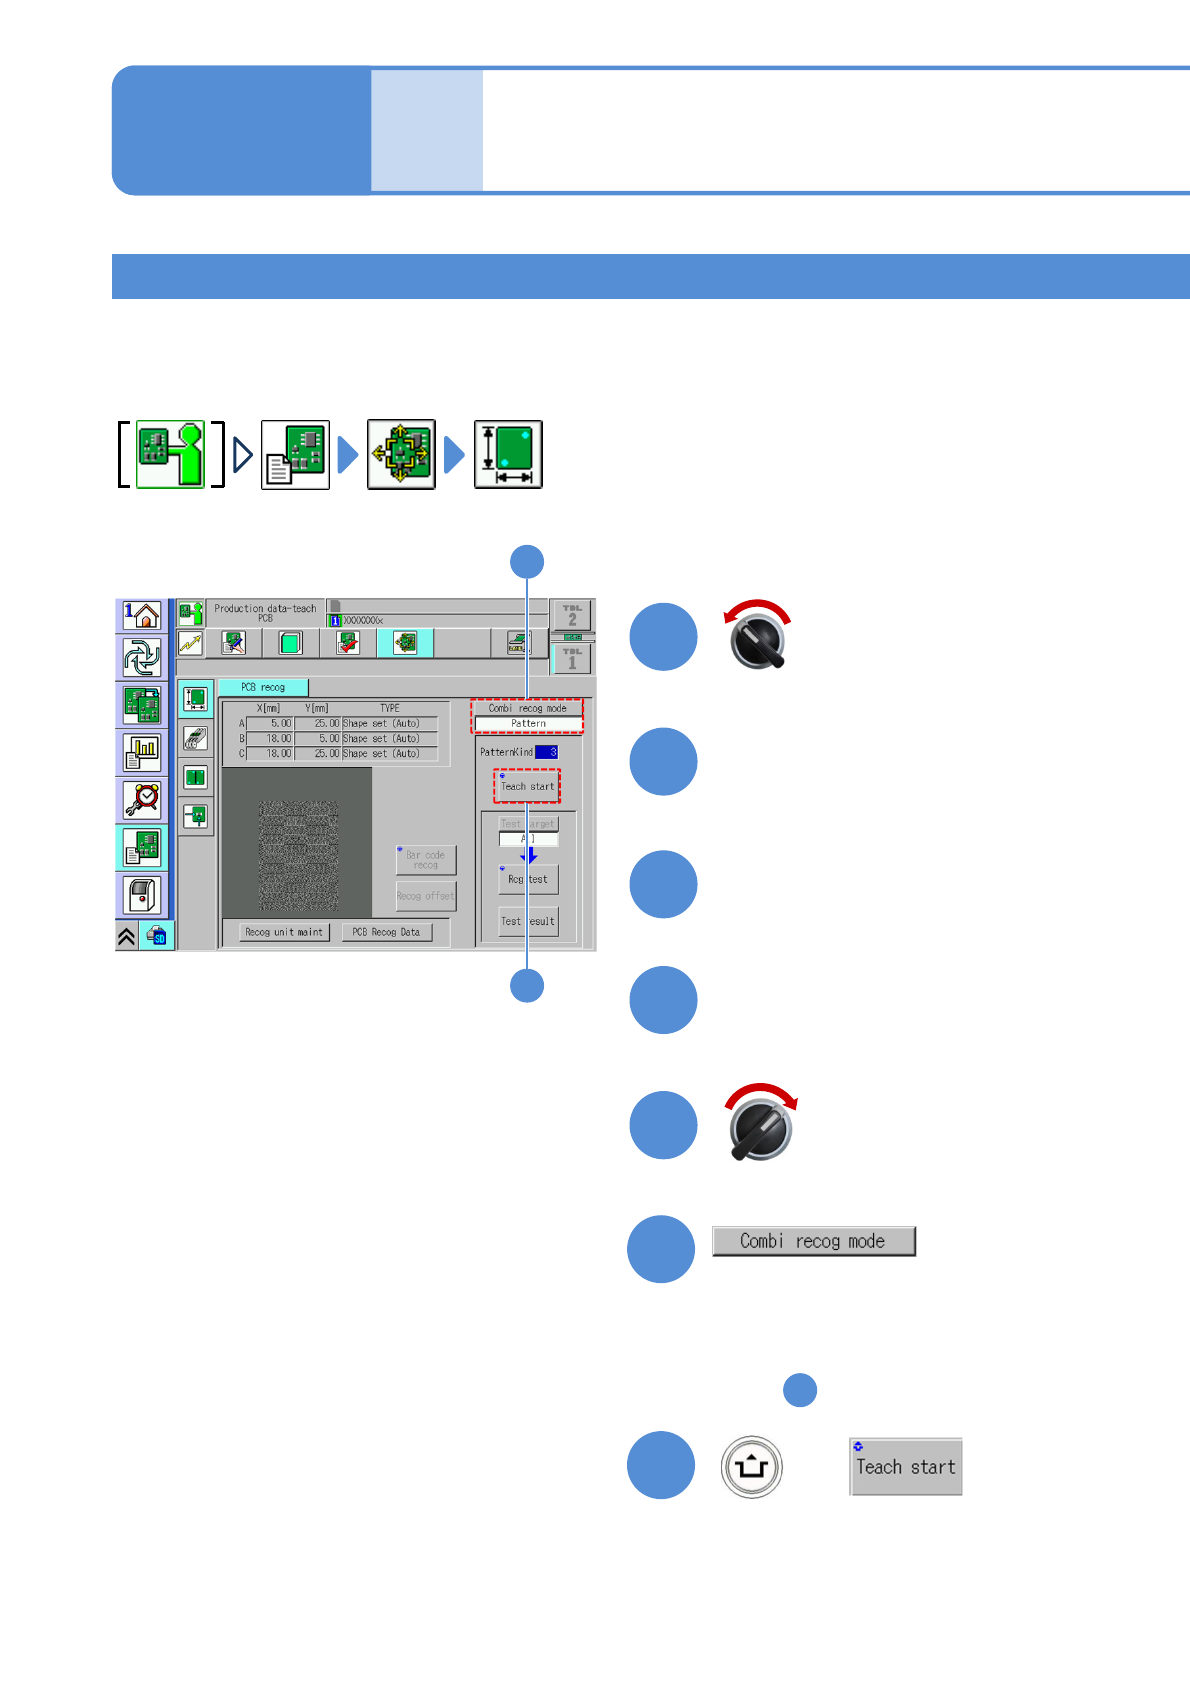
Teaching 1
PCB recognition teach
2
Open the safety cover
1
2
Set a PCB on the PCB entrance
3
4
Close the safety cover
5
Operating procedure
4-2-2
+
6
Servo switch OFF
Servo switch ON
(The PCB is loaded and clamped at the
unloading position. The head camera
moves to the recognition mark position)
7
6
7
●Select recognition mode that you want
to perform teaching.
7
■If it is not displayed
To
NPM-TT2 EJM1EE-MB-04O-03
10
9
8
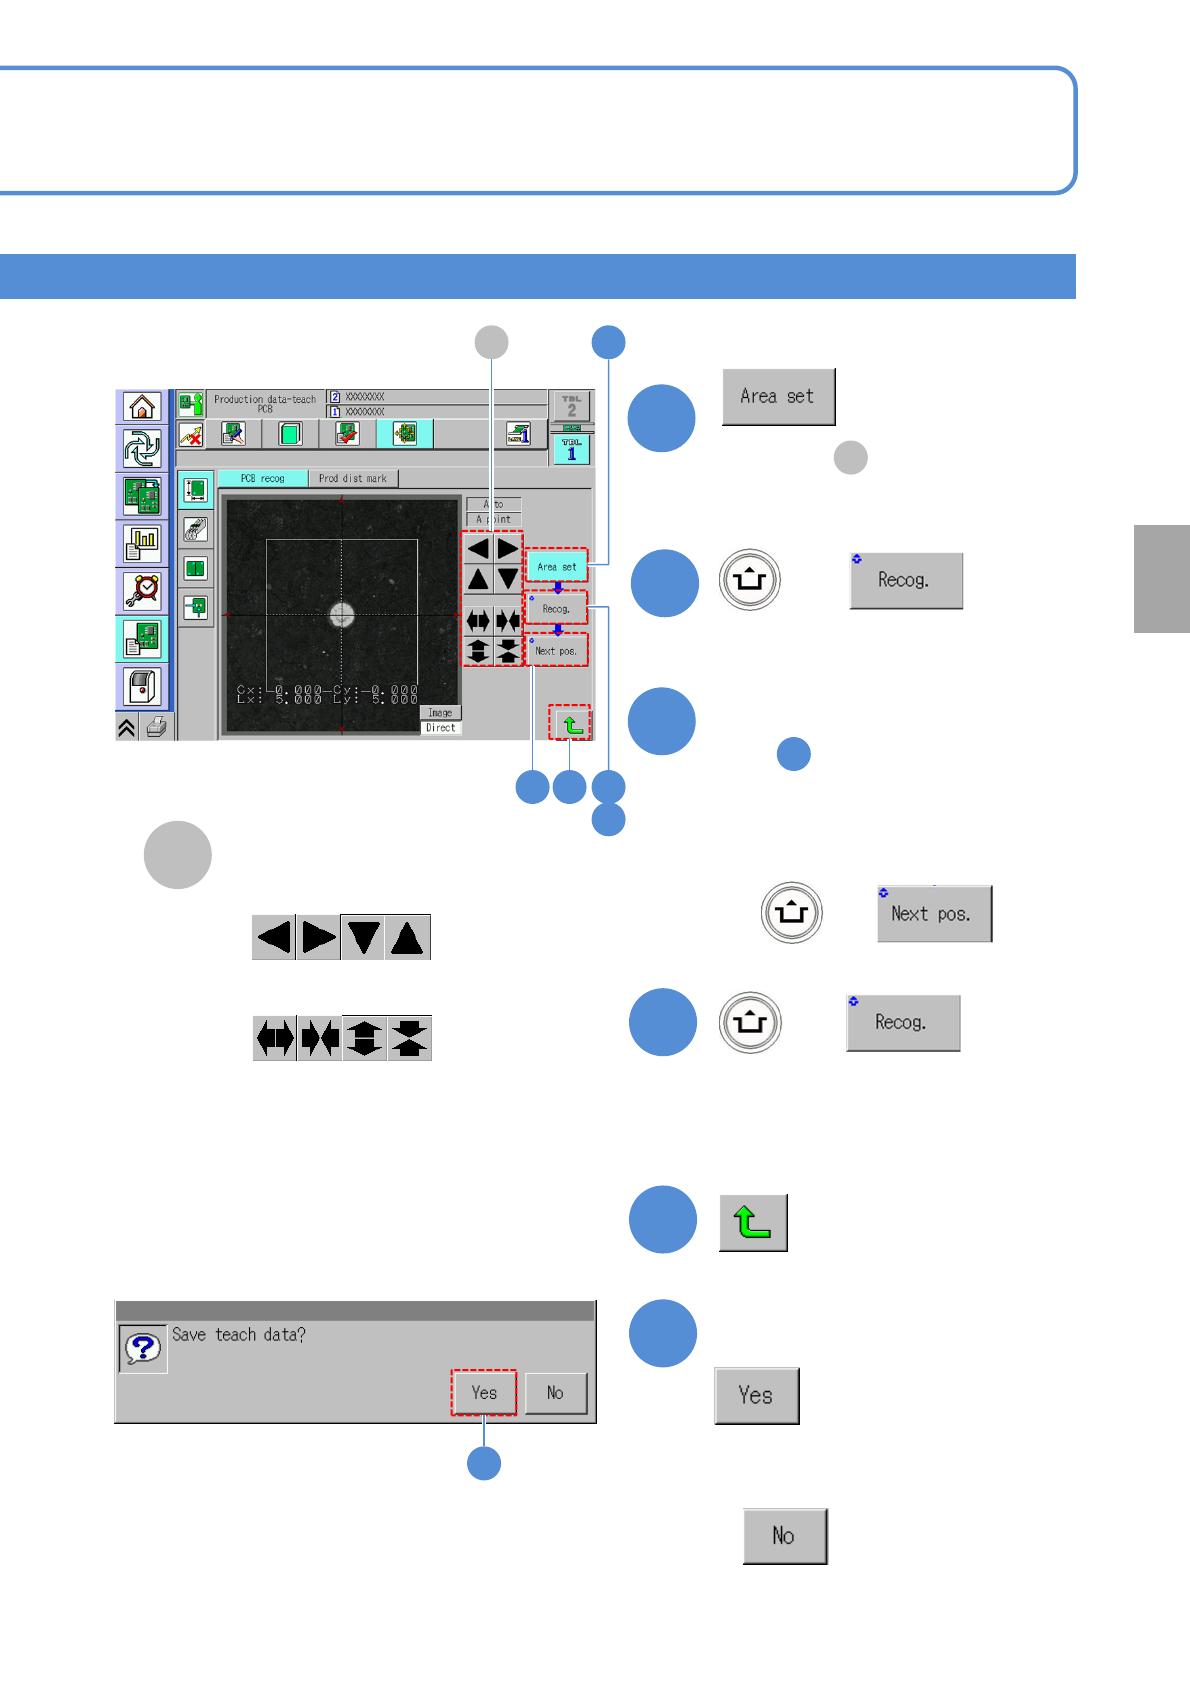
●Adjust in to change position
and size are changed in the
recognition area.
A
Recognition area adjustment
+
■To adjust the position
■To resize
A
(The recognition result is displayed)
12
■For one recognition mark
4-2-2-4
to
■For two or three recognition
marks
+
11
+
(The recognition result is displayed)
●If there are three recognition marks,
execute again.
12
Confirm the message
13
■When you do not save the
teach result
13
Setting
change
10
8A
9
12
11