User Manual SIPLACE Linear Dipping Unit 2 X.pdf - 第41页
4 Operation 4.1 Settings in SIPLACE Pro User Manual SIPLACE Linear Dipping Unit 2 X 05/2020 41 Defining a standard dipping plate ► In the Tools Tree View , select the dipping plate to be defined (1) . ► In the Object Pr…
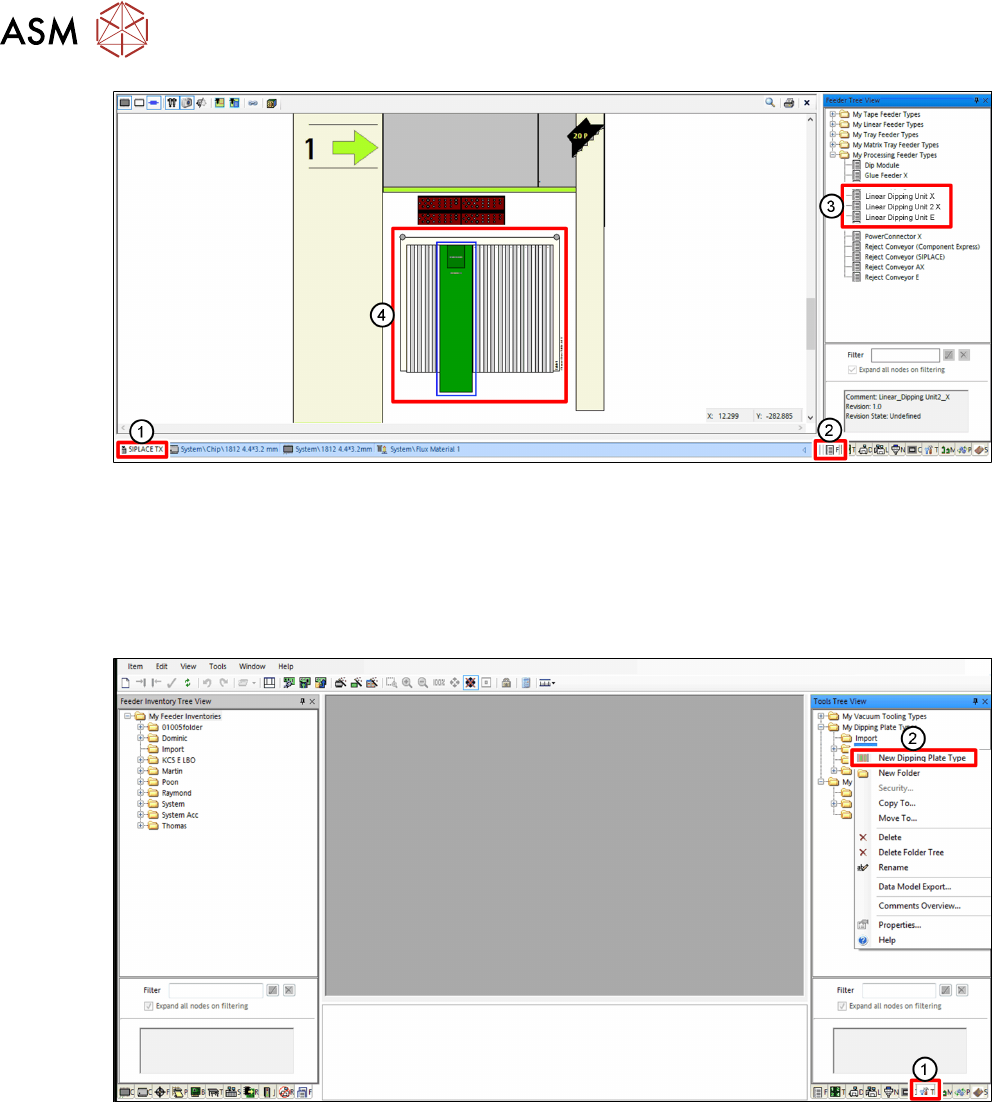
4 Operation
4.1 Settings in SIPLACE Pro
40 User Manual SIPLACE Linear Dipping Unit 2 X 05/2020
► In SIPLACE Pro, click on the Setup tab(1).
► Click on the Feeder Tree View tab(2).
► Drag the relevant LDU from the tree view(3) to the desired track of the changeover table(4).
4.1.2 Defining the dipping plate
Creating a dipping plate object
► In SIPLACE Pro, click on the Tools tab(1).
► In the Tools Tree View, right-click on the folder you want to add a new dipping plate to.
► Select New Dipping Plate Type from the menu(2).
There are 3 dipping plate types that can be used with the LDU 2 X:
●
Standard dipping plates with one cavity of a fixed depth
●
Special dipping plates with multiple cavities of fixed depths (cavities on one dipping plate can
have different sizes and depths)
●
Auto Cavity dipping plates with one cavity of an adjustable depth (only for LDU 2 X with Auto
Cavity option)

4 Operation
4.1 Settings in SIPLACE Pro
User Manual SIPLACE Linear Dipping Unit 2 X 05/2020 41
Defining a standard dipping plate
► In the Tools Tree View, select the dipping plate to be defined(1).
► In the Object Properties area, select Multiple Fixed Cavity Depths from the Plate Type
menu(2).

4 Operation
4.1 Settings in SIPLACE Pro
42 User Manual SIPLACE Linear Dipping Unit 2 X 05/2020
► Click on the Insert icon(1) or, alternatively, right-click on the gray area and select Insert from
the menu(2)
.
► Enter the appropriate coordinates and the cavity depth in the corresponding fields(1).
Cavity Depth: Depth of the cavity
Left X / Left Y: Lower left corner of the cavity
Right X / Right Y: Upper right corner of the cavity
The coordinates and the depth of the cavity are displayed in the display area(2).