User Manual SIPLACE Linear Dipping Unit 2 X.pdf - 第75页
4 Operation 4.12 Fitting User Manual SIPLACE Linear Dipping Unit 2 X 05/2020 75 (1) The LDU moves the lifting axis down. (2) The LDU moves the squeegee to the front. ► (3) Place the flux tank onto the dipping plate and p…
4 Operation
4.12 Fitting
74 User Manual SIPLACE Linear Dipping Unit 2 X 05/2020
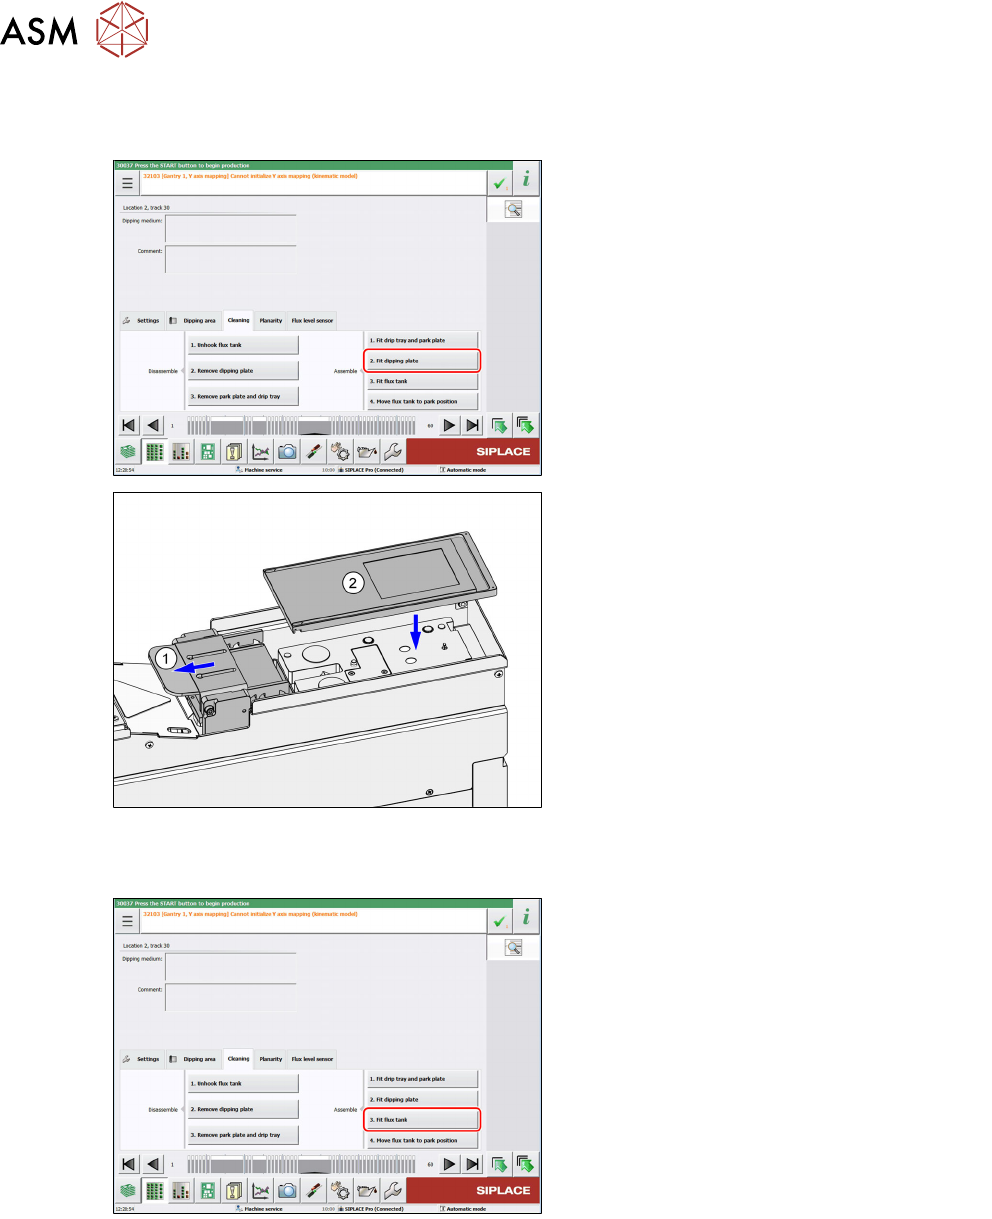
Fitting the dipping plate
Prerequisites: The drip tray and the park plate are fitted. The dipping plate is not yet fitted.
► Click on the Fit dip plate button.
(1) The LDU moves the squeegee back over the
park plate and moves the lifting axis up.
► (2) Fit the dipping plate in the orientation
shown.
Fitting the flux tank
Prerequisites: The park plate and the dipping plate are fitted.
► Click on the Fit flux tank button.
4 Operation
4.12 Fitting
User Manual SIPLACE Linear Dipping Unit 2 X 05/2020 75
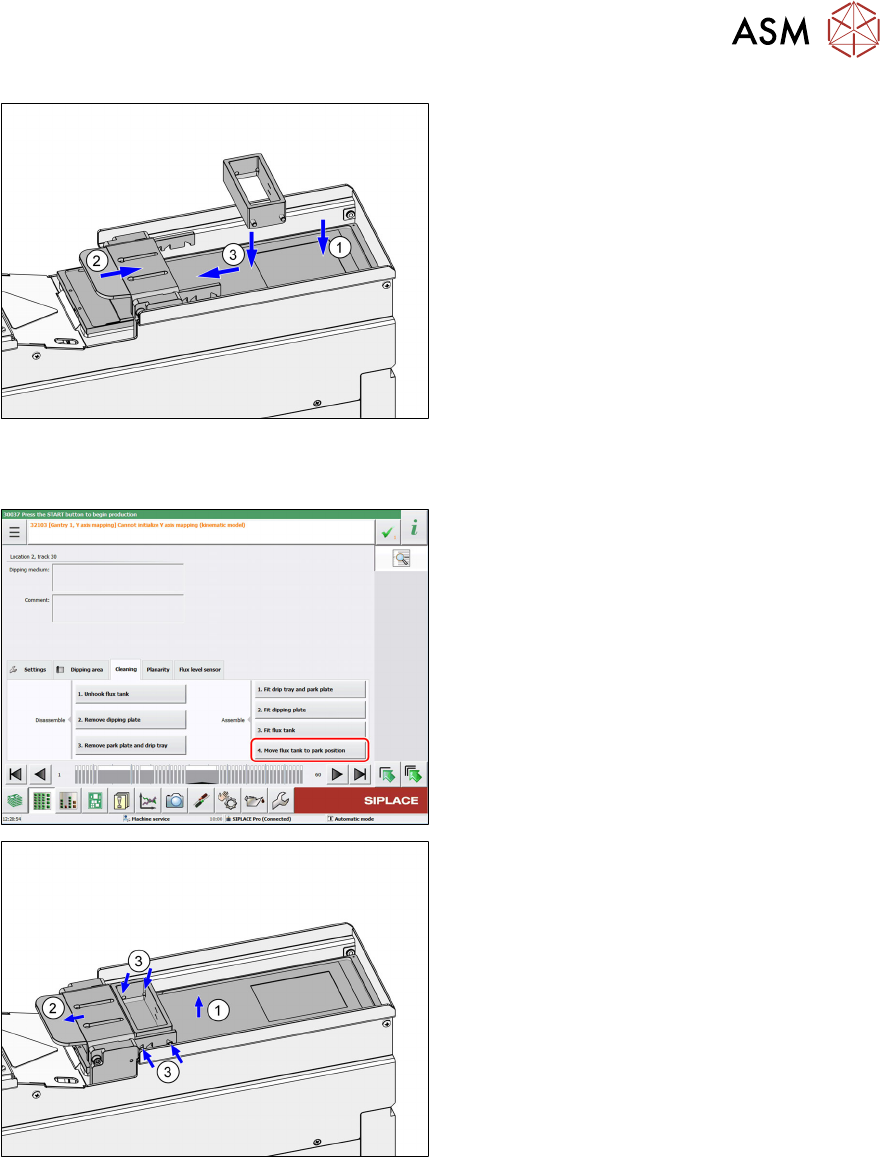
(1) The LDU moves the lifting axis down.
(2) The LDU moves the squeegee to the front.
► (3) Place the flux tank onto the dipping
plate and push it under the downholder to
the fixed stop.
Moving the flux tank to the park position
Prerequisites: The park plate and the dipping plate are fitted.
► Click on the Move flux tank to park posi-
tion button.
(1) The LDU moves the lifting axis to the zero
position while the downholder locks the flux
tank.
(2) The LDU moves the squeegee back over the
park plate.
► (3) Ensure that the four pins of the flux
tank engage correctly in the retaining
clamp of the downholder.
4 Operation
4.13 Aligning
76 User Manual SIPLACE Linear Dipping Unit 2 X 05/2020
4.13 Aligning
NOTICE
Target group: standard operator
The procedure described is a regular task that can be carried out by any trained operator.
You need the following tools to align the LDU:
●
Allen key 3 mm
●
Allen key 10 mm
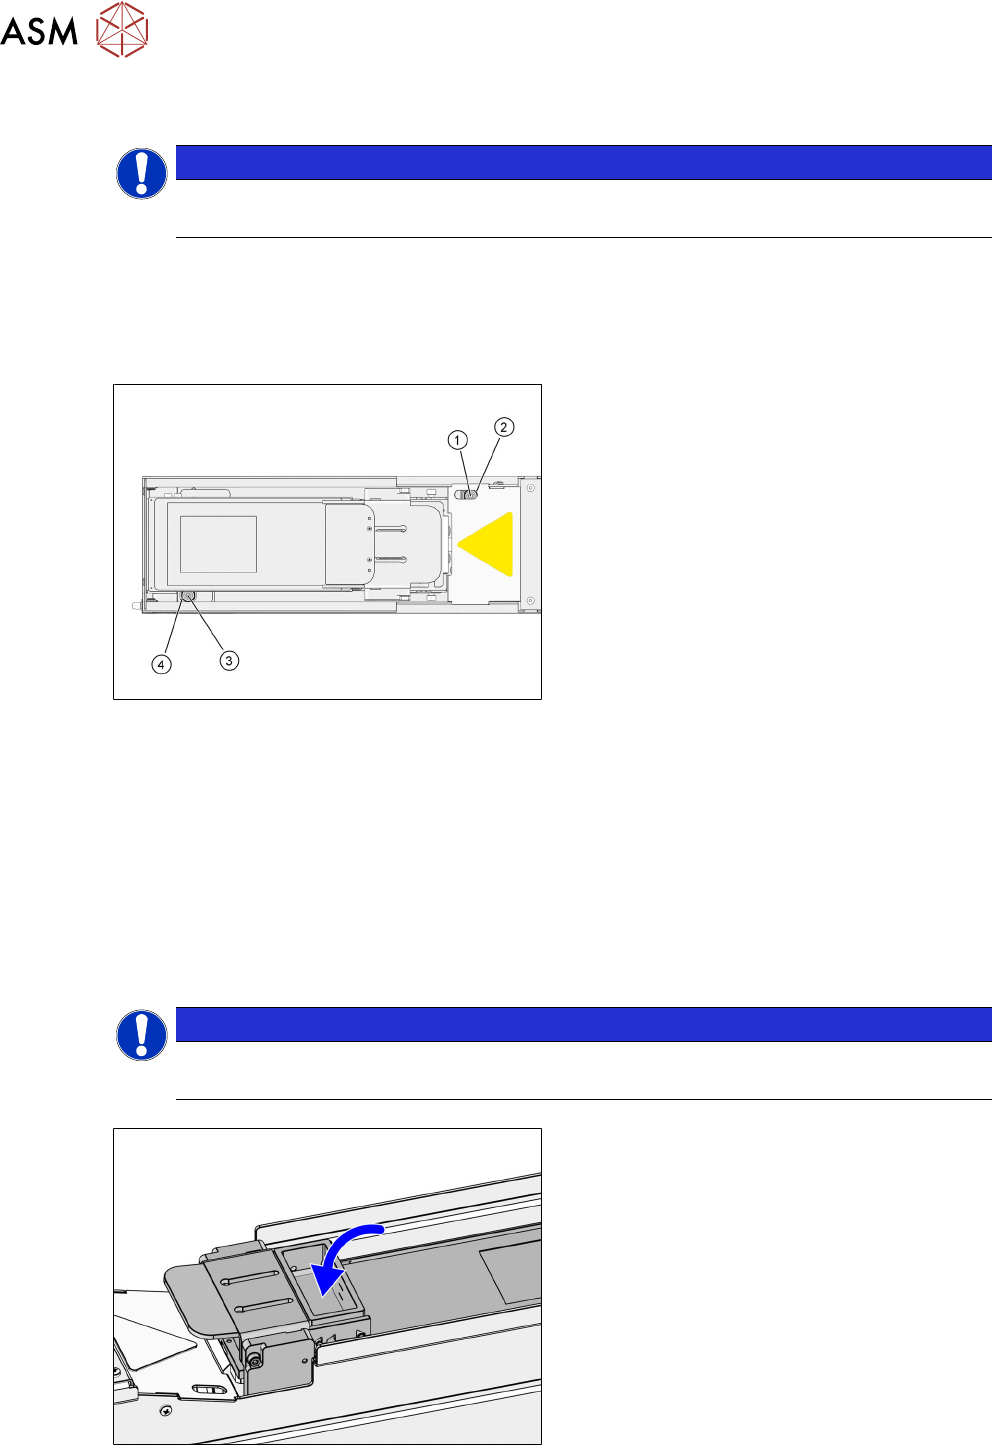
The screws for aligning the LDU are easily accessible from above:
1. Rear fixing screw (Allen screw 3mm)
2. Rear adjustment screw (Allen screw
10mm)
3. Front fixing screw (Allen screw 3mm)
4. Front adjustment screw (Allen screw
10mm)
Each of the two pairs consisting of fixing screw and adjustment screw is arranged concentrically.
► Loosen the two fixing screws (1) and (3) with an Allen key of size 3mm.
► Align the dipping plate with the two adjustment screws (2) and (4) (Allen key 10 mm).
Rotating one of the adjustments screws clockwise will lift the dipping plate at this position.
Rotating one of the adjustment screws counterclockwise will lower the dipping plate at this position.
One revolution of the adjustment screws corresponds to lifting or lowering by 0.5mm.
► Tighten the two fixing screws (1) and (3) with a maximum torque of 0.75Nm.
4.14 Filling in flux
NOTICE
Target group: standard operator
The procedure described is a regular task that can be carried out by any trained operator.
► Fill in the flux in the flux tank.