TR7600 SIII_Camera_Calibration_en_v_2_0_2 - 第23页
Test Research, Inc. TR7600 SIII Ser ies User G uide – Cam era Calibr ation 17 registry. 12) Choose another resolution to calibrate and repeat the steps from 1) to 11). 13) After c amera shift calibration com pleted for a…
Test Research, Inc.
16 TR7600 SIII Series User Guide – Camera Calibration
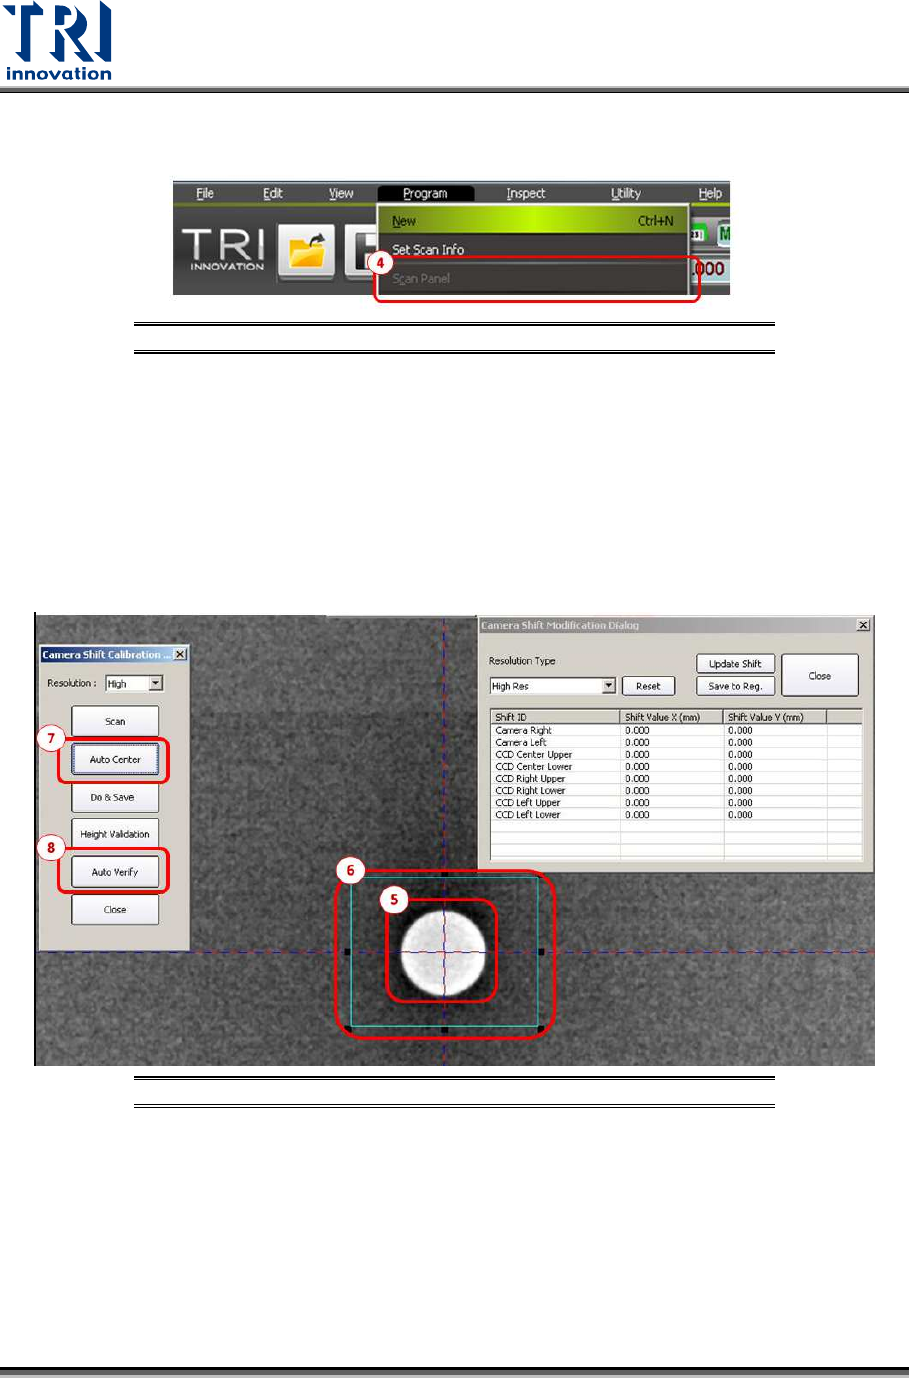
4) Press [Scan Panel]. (Please do use the [Scan Panel] in the toolbar of the main program,
instead of the “Scan” button in the pop-out window.)
Figure 18: Camera Shift Calibration Steps
5) Find a single white hole on the screen. Left click the mouse at the center of the white
hole twice to make the intersection of the cross line is located at the center of the white
hole.
6) Enlarge the square box to enclose the white hole.
7) Click [Auto Center] and the square box will enclose the white hole closely.
8) Press [Auto Verify] and then the machine will scan the calibration board three times and
do the calibration. When camera shift calibration is done, another dialogue will pop up.
Figure 19: Camera Shift Calibration Steps
9) Press [V] and the number keys [1], [2], [3], [4], [5], [6], [7], [8], [9] on the key board to
see if all the scanned images are almost at the same place without too much
displacement.
10) If all the scanned images are almost at the same place, the camera shift calibration is
successful. If not, the calibration is considered fail and need to repeat the calibration
steps from 1) to 9) until the camera shift calibration is successful. Then click [Update].
11) Press [Update Shift] and [Save to Reg.] in sequence to update the parameters in the
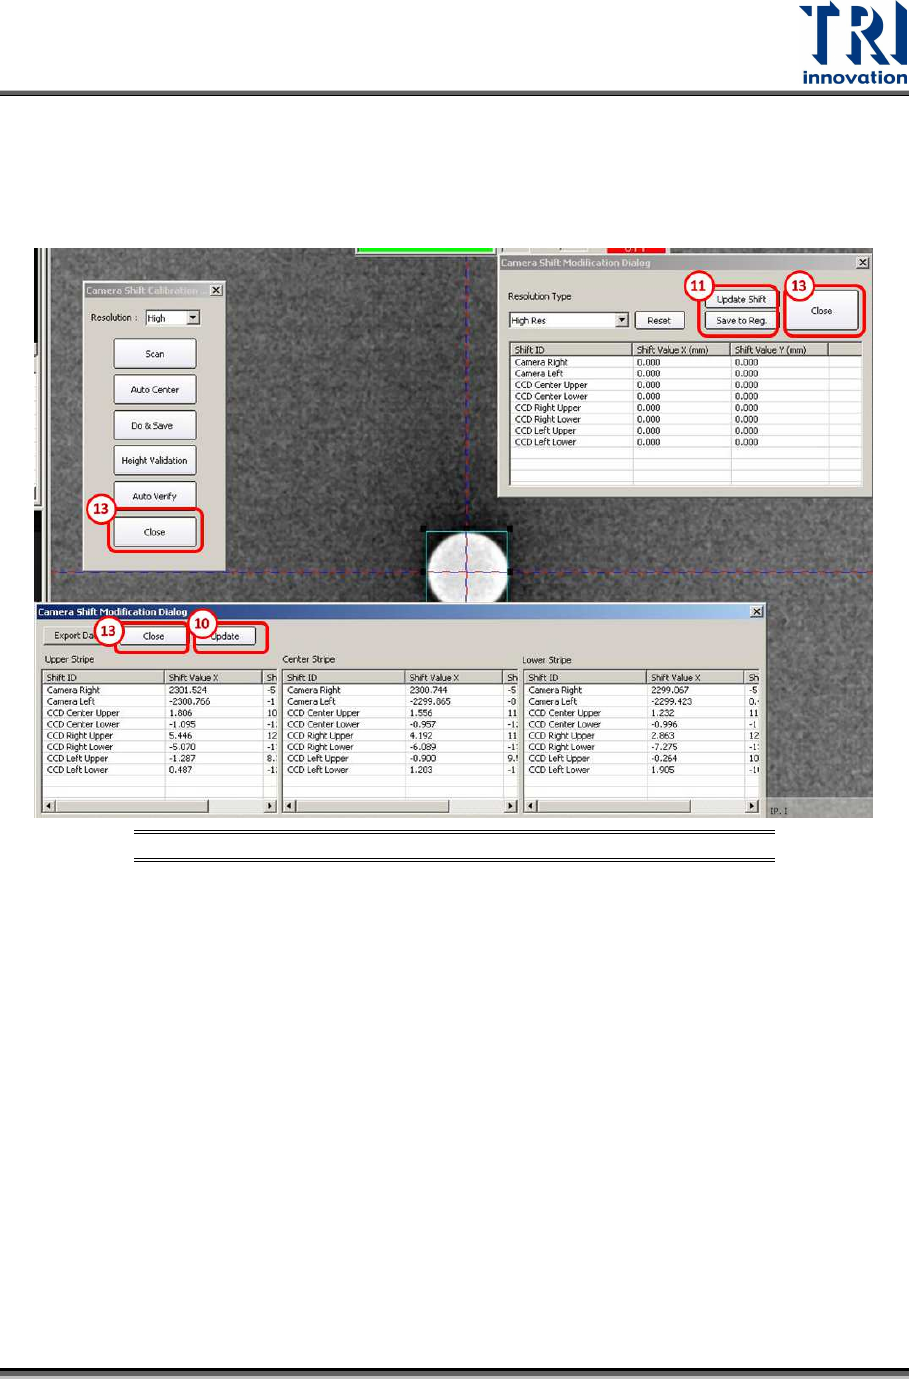
Test Research, Inc.
TR7600 SIII Series User Guide – Camera Calibration 17
registry.
12) Choose another resolution to calibrate and repeat the steps from 1) to 11).
13) After camera shift calibration completed for all resolutions, press [Close] in all dialogues
to exit.
Figure 20: Camera Shift Calibration Steps
Note: Calibration could be accomplished more easily by choosing a white hole that is
not near to overlap region.

Test Research, Inc.
18 TR7600 SIII Series User Guide – Camera Calibration
2.3 Center Alignment Calibration
Note: Generally, this calibration is not required. Please check with TRI FAEs before
performing this calibration. Without professional assistance, calibration that failed
may cause issues which are difficult to resolve.
Go to [Utility] [System Calibration ] [Center Alignment]
Figure 21: Utility/System Calibration/Center Alignment
Only calibrate for the low resolution by following procedure below.
1) Key in -50000 and 0 respectively in X Distance and Y Distance dialog boxes.
2) Click [Set].
Figure 22: Center Alignment Calibration Steps
3) Go to [Program] and press [Scan Panel].