TR7600 SIII_Camera_Calibration_en_v_2_0_2 - 第34页
Test Research, Inc. 28 TR7600 SI II Series User Guide – Camera Ca libration 3 2D C A ME RA A ND L ASER C A LIBR ATI ON Hard ware Introduction During the calibration process, adjust 2D camera and lens positions.. Figure…
Test Research, Inc.
TR7600 SIII Series User Guide – Camera Calibration 27
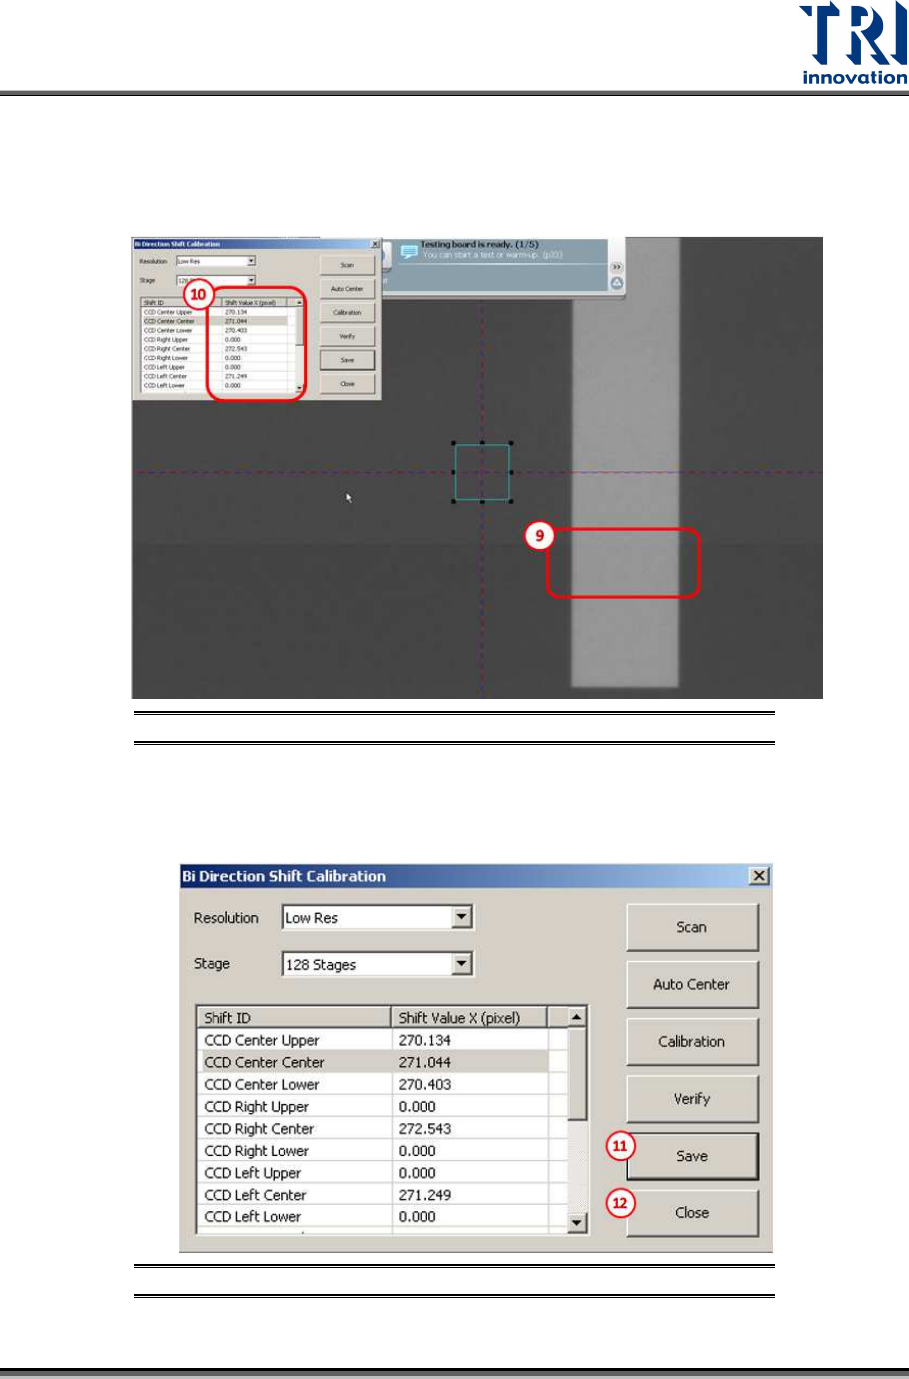
9) Please confirm the bi-direction images are well connected without offset by checking
whether the rectangle scanned image is normal or not.
10) If offset does exist, repeat the bi-direction calibration or change the [Shift Value X] until
the calibration succeeds.
Figure 37: Bi-Direction Shift Calibration steps
11) Press [Save] to save the change to the registry file.
12) Press [Close] to finish the calibration process.
Figure 38: Bi-Direction Shift Calibration steps
Test Research, Inc.
28 TR7600 SIII Series User Guide – Camera Calibration
3 2D
C
AMERA AND
L
ASER
C
ALIBRATION
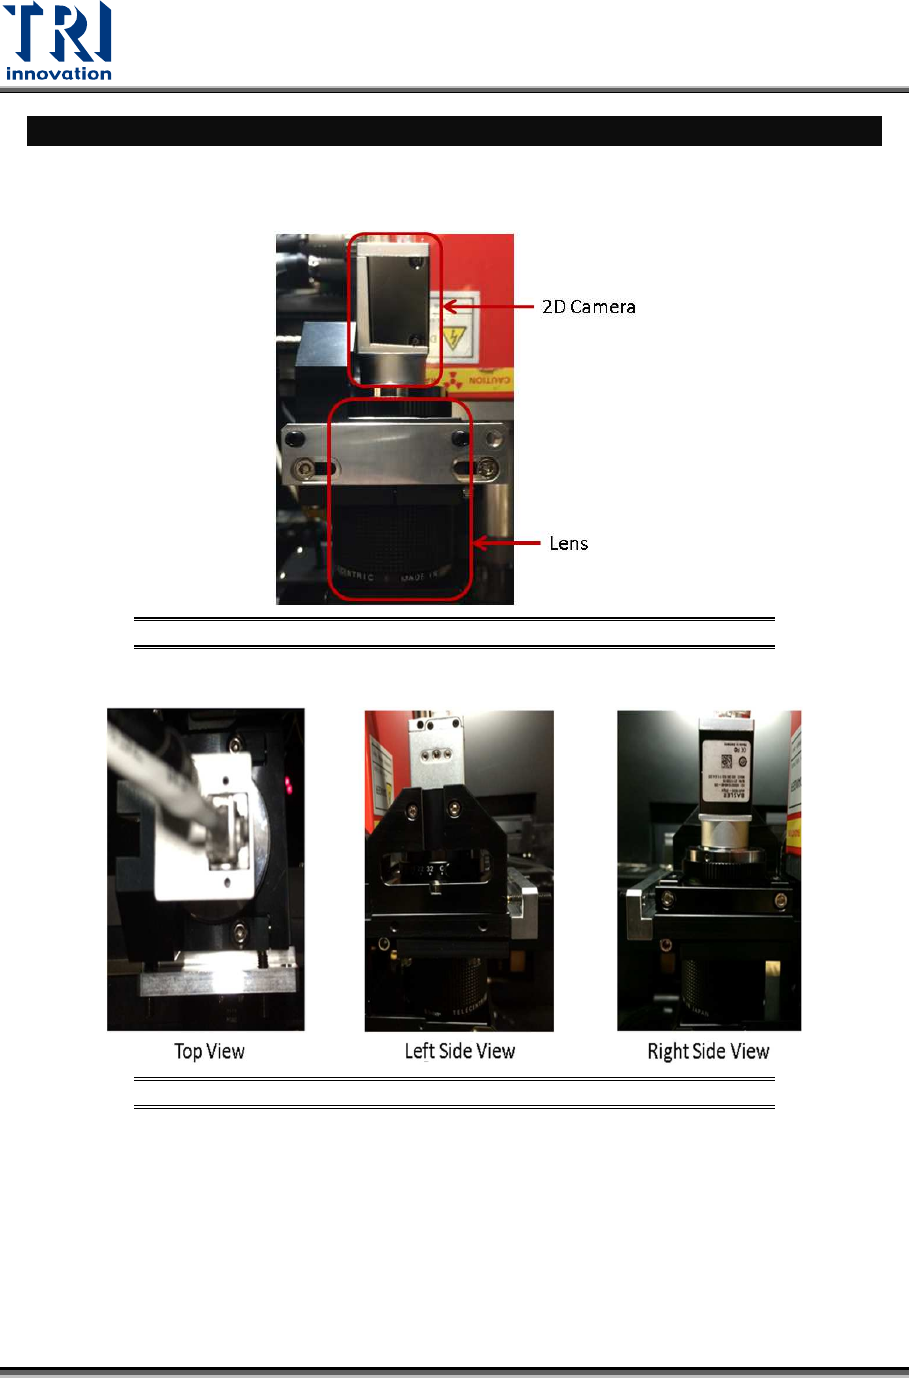
Hardware Introduction
During the calibration process, adjust 2D camera and lens positions..
Figure 39: Front View
Figure 40: Top View/ Right Side View/Left Side View
Test Research, Inc.
TR7600 SIII Series User Guide – Camera Calibration 29
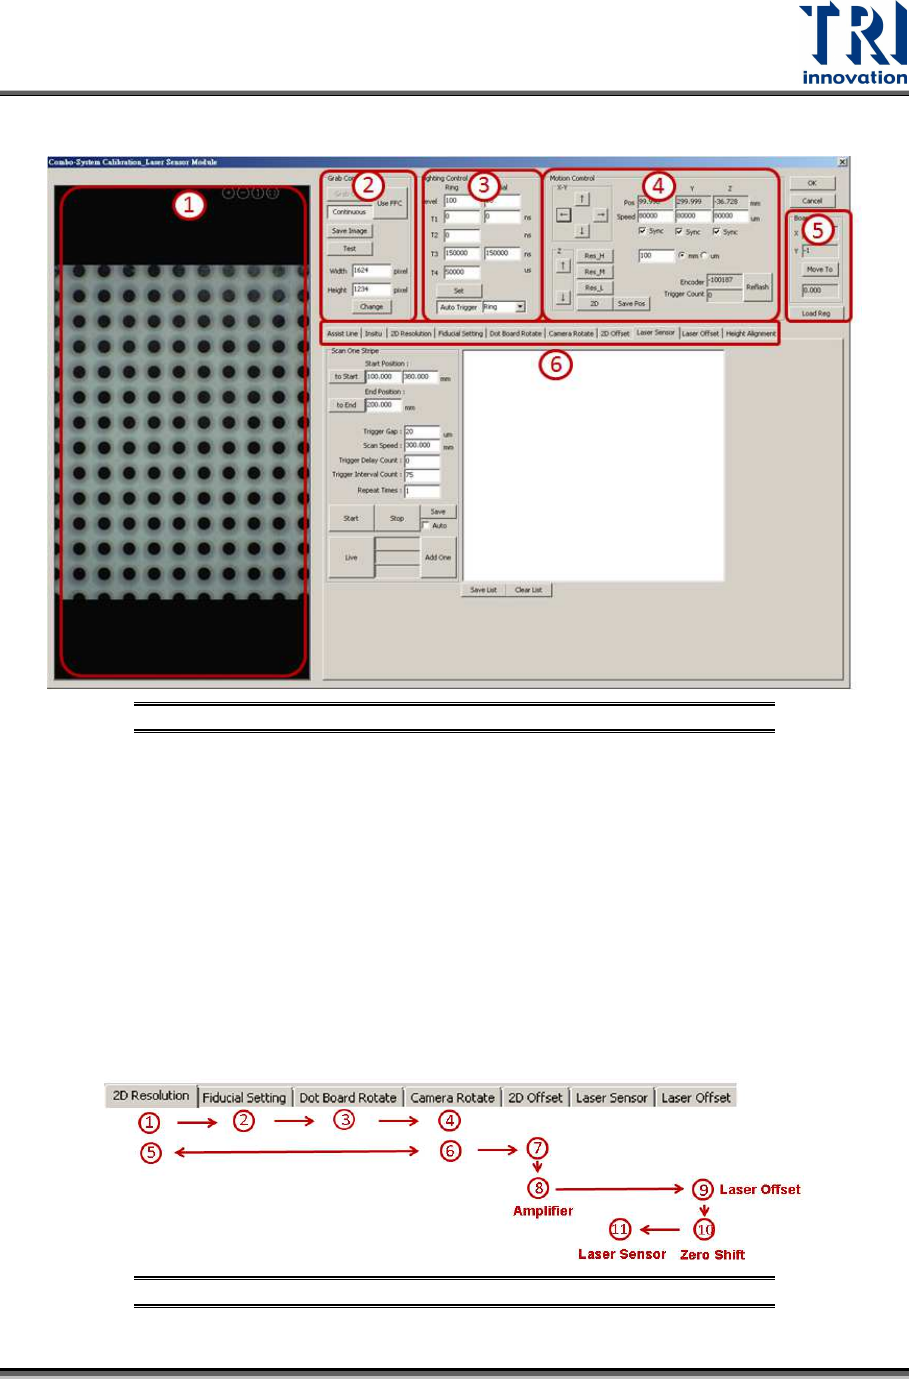
Calibration Window Introduction
Figure 41: Calibration Window
1) 2D Image Window
2) Grab Image Control
3) Lighting Source Control
4) Motion Control
5) Calibration Board Parameters
6) Calibration Flow
Calibration Procedure
Perform 2D camera calibration and laser calibration independently.
• In order to perform the calibrations, users can follow step (1)~(11) as indicated
below.
Figure 42: Calibration Procedure