TR7600 SIII_Camera_Calibration_en_v_2_0_2 - 第53页
Test Research, Inc. TR7600 SIII Ser ies User G uide – Cam era Calibr ation 47 8) Click on [P1(XRay)]. 9) Find a s ingle circle. Put this circle at the c enter of the cross line and enlarge the box to confine it. Figure 7…
Test Research, Inc.
46 TR7600 SIII Series User Guide – Camera Calibration
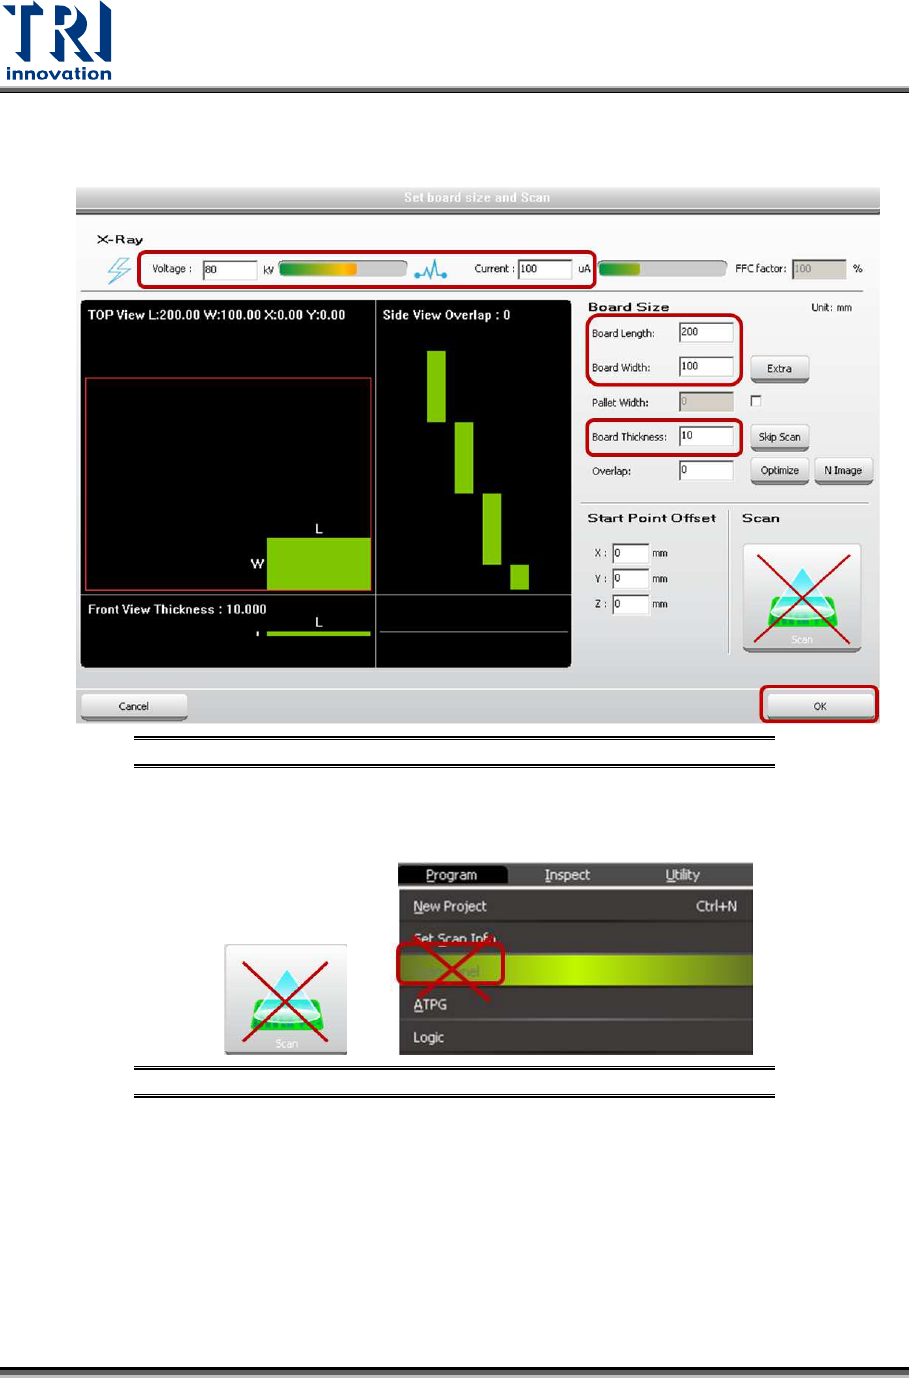
4) Under Camera Dynamic Offset section, click on [Set Scan Info]. Input the scan
parameters and click on [OK].
Figure 77: Set Scan Information
5) Please don’t use the buttons below to scan the board.
Figure 78: Don’t Use These Buttons to Scan the Board
6) Click on [Scan(XRay)] to scan the board.
7) Click on [Scan(2D)] to scan the board.
Test Research, Inc.
TR7600 SIII Series User Guide – Camera Calibration 47
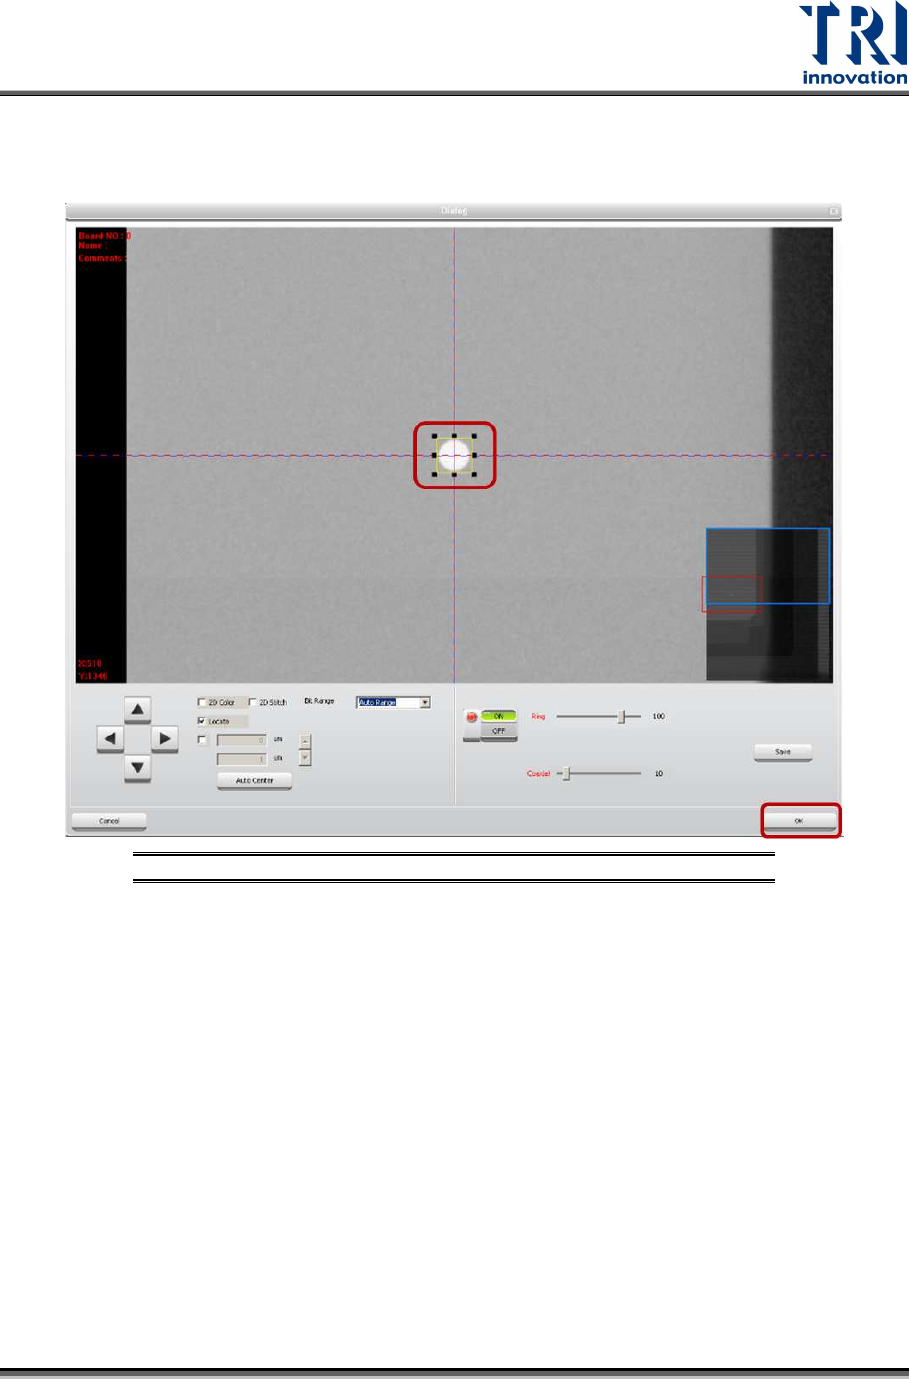
8) Click on [P1(XRay)].
9) Find a single circle. Put this circle at the center of the cross line and enlarge the
box to confine it.
Figure 79: Find a Single Circle and Drag the Frame
10) Click on [OK] to exit.
Test Research, Inc.
48 TR7600 SIII Series User Guide – Camera Calibration
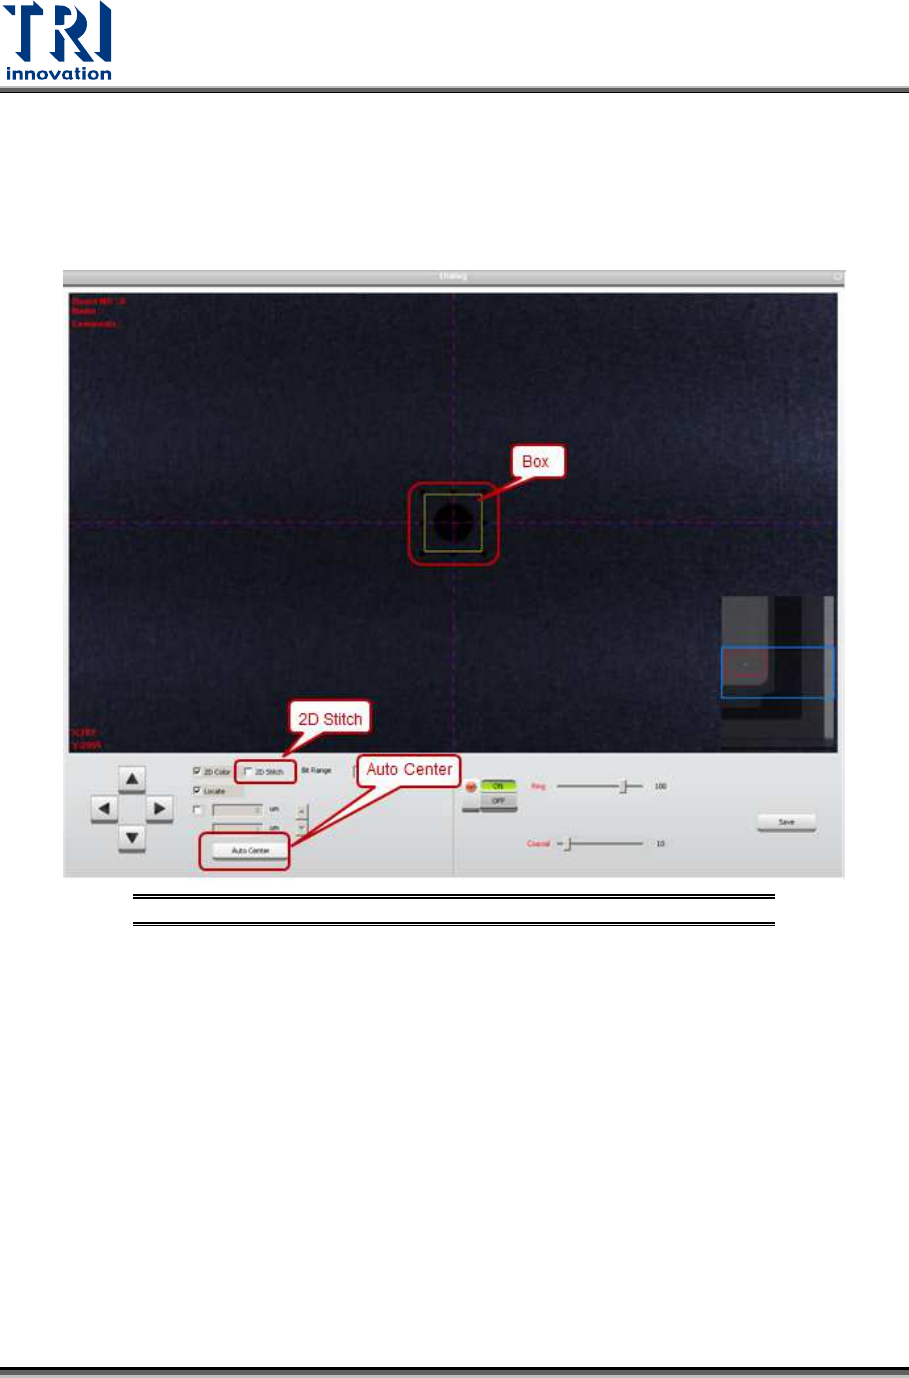
11) Click on [P2(2D Stitch)].
12) Click on [2D Stitch] and the screen will become darker.
13) Put a single circle at the center of the cross line. Enlarge the box to confine the
single circle. The box should be larger than the circle.
14) Click on [Auto Center] once or several times. The main program will calculate the
required data.
Figure 80: Find a Single Circle and Drag the Frame
15) Click on [OK] to exit.
16) Click on [Set] to save the data.