X-Series-Maintenance-Manual(1).pdf - 第101页
Major Maintenance Performing Maintenance Tasks Maintenance Tasks for CPP Head Maintenance Manual SIPLACE X Series 101 Checkin g/Replaci ng the Vacuum-Con ducting Parts 5.6.4.6 Checking/Replacing the Vacuum-Conducting Par…
Major Maintenance
Maintenance Tasks for CPP Head Performing Maintenance Tasks
100 Maintenance Manual SIPLACE X Series
Oiling the DP Segment Guide
5.6.4.4 Oiling the DP Segment Guide
► For this maintenance task, use the blue combitip with Thermoplex ALN 1001/00.
► Set the multipette to 2 µl.Set the multipette to 2 µl.
► Mark the first segment by removing a nozzle.
Oiling th e Star Bearing
5.6.4.5 Oiling the Star Bearing
► For this maintenance task, use the green combitip with CPP Isoflex Topas NCA 5051.
► Set the multipette to 2 µl.Set the multipette to 2 µl.
► Loosen the grub screw on the left side of the star bearing.
► Mark the first segment by removing a nozzle.
► Pull the segment out as far as the stop.
► Apply 2 µl of lubricant to the center of each guide
track (left (2) and right side (1)) and then move the
segment manually approx. 5 times in and out.
► Apply another 2 µl of lubricant to the center of each
guide track (left (2) and right side (1)) and then move
the segment again manually approx. 5 times in and
out.
A total of 2 x 2 µl must be applied to each guide track.
► Move the segment back in again.
► Turn the star on to the next segment.
► Repeat these steps on all segments.
► Fit the removed nozzle back into place.
► Position the combitip in the opening (1) and apply 2 µl
of lubricant. Remove the multipette from the service
opening and turn the star by 30° (= one segment)
onwards. Repeat this step 24 times so that the star
moves two full rotations. A total of 24 x 2 μl lubricant
must be applied.
WARNING! If the star is turned on while the
multipette tip is still in the bearing, the multipette could
break off and damage the bearing.
► Screw the lubricant distributor (2) into the opening in
the star bearing. This tool is used to evenly distribute
the lubricant.
► Rotate the star 3x by 360 degrees.
► Remove the lubricant distributor.
► Screw the grub screw back in.
► Fit the removed nozzle back into place.
Major Maintenance
Performing Maintenance Tasks Maintenance Tasks for CPP Head
Maintenance Manual SIPLACE X Series 101
Checkin g/Replaci ng the Vacuum-Con ducting Parts
5.6.4.6 Checking/Replacing the Vacuum-Conducting Parts
Checking and replacing the filter disks
Checking the vacuum hoses
NOTICE
Vacuum test
► When checking, pay particular attention to the segments which were noticeable during the
vacuum test.
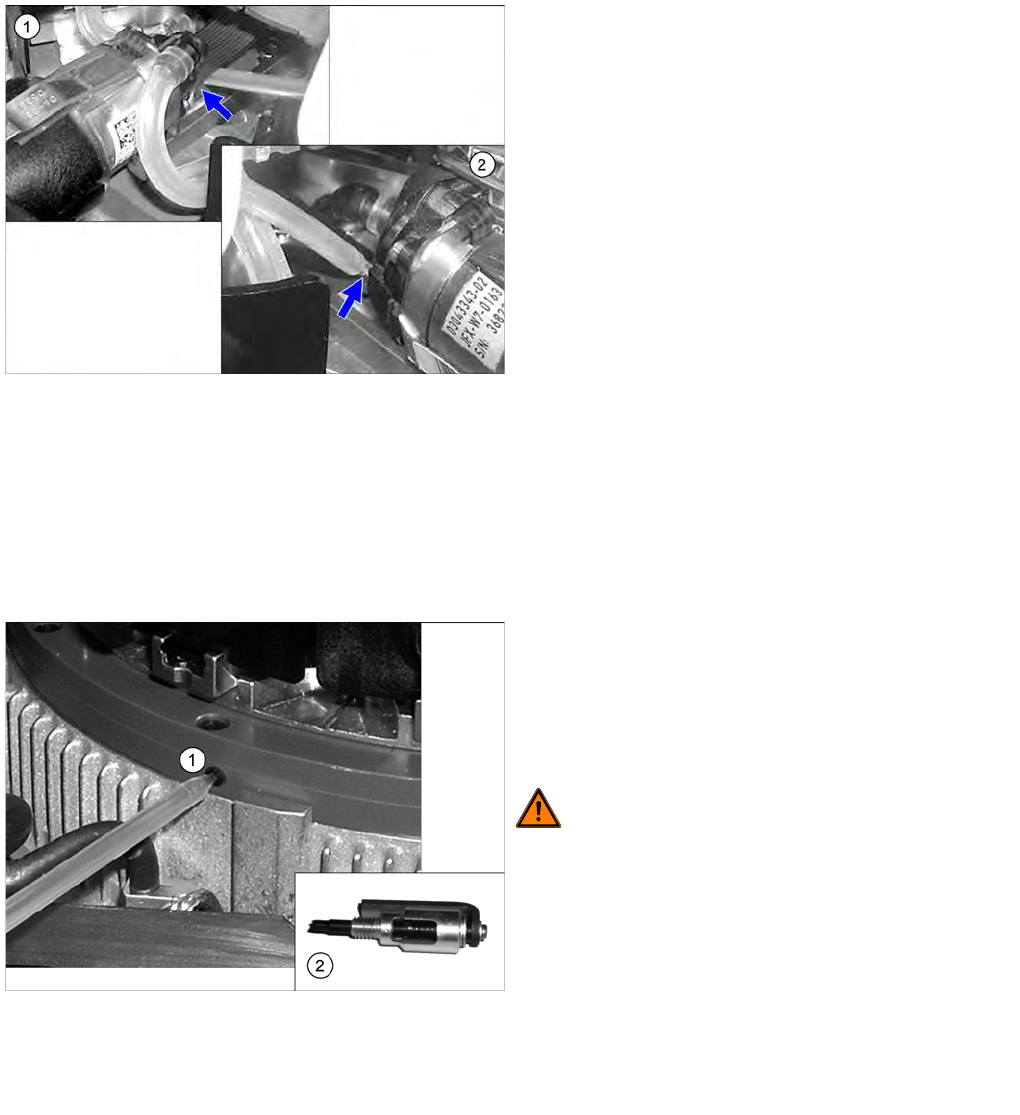
► Check the filter disks (1) for dirt and damage. If a filter
disk is dirty or damaged, replace it.
To remove and install filter disks, proceed as follows:
► Pull the nozzle off the DP drive.
► Remove the outer rubber lip of the filter disk. The
inner plastic section of the filter disk remains in the
DP drive. Now carefully pull this part of the filter disk
out of the DP drive with your finger nail.
► Fit the new filter disk straight onto the DP drive. The
filter disk must engage audibly.
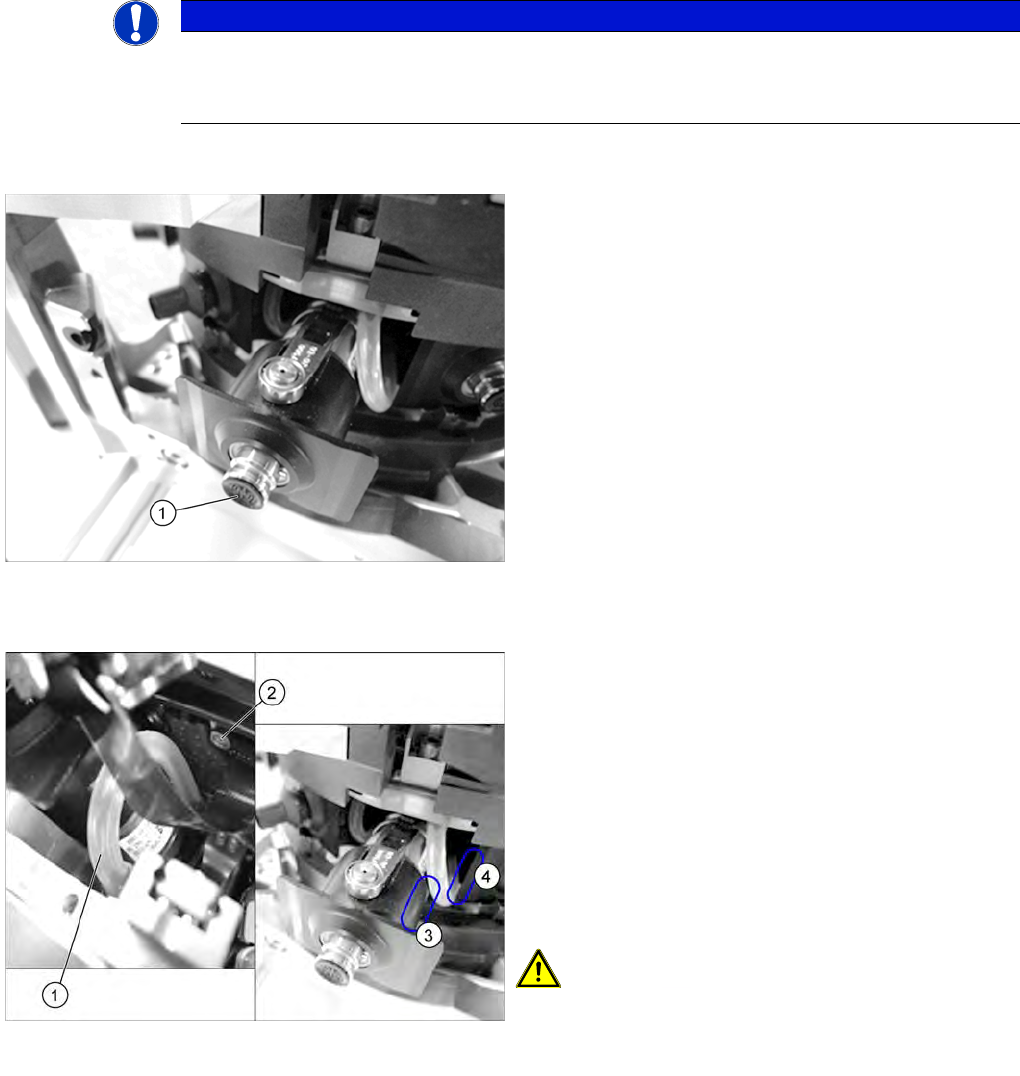
► Check the vacuum hoses.
If a vacuum hose (1) is damaged or no longer airtight,
replace it.
Pay close attention to the following parts of the hose:
⇨ (2) Level with the screw on the Single Core
Solution (SCS)
⇨ (3) The area around the own segment
⇨ (4) The area around the neighboring segment
► For removal and installation details, read the service
manual for the respective machine.
CAUTION! When fitting the hose, make sure
that this does not rub against the cap of the own or
neighboring segment. Check the above mentioned areas
when moving the segment in and out.
Major Maintenance
Maintenance Tasks for CPP Head Performing Maintenance Tasks
102 Maintenance Manual SIPLACE X Series
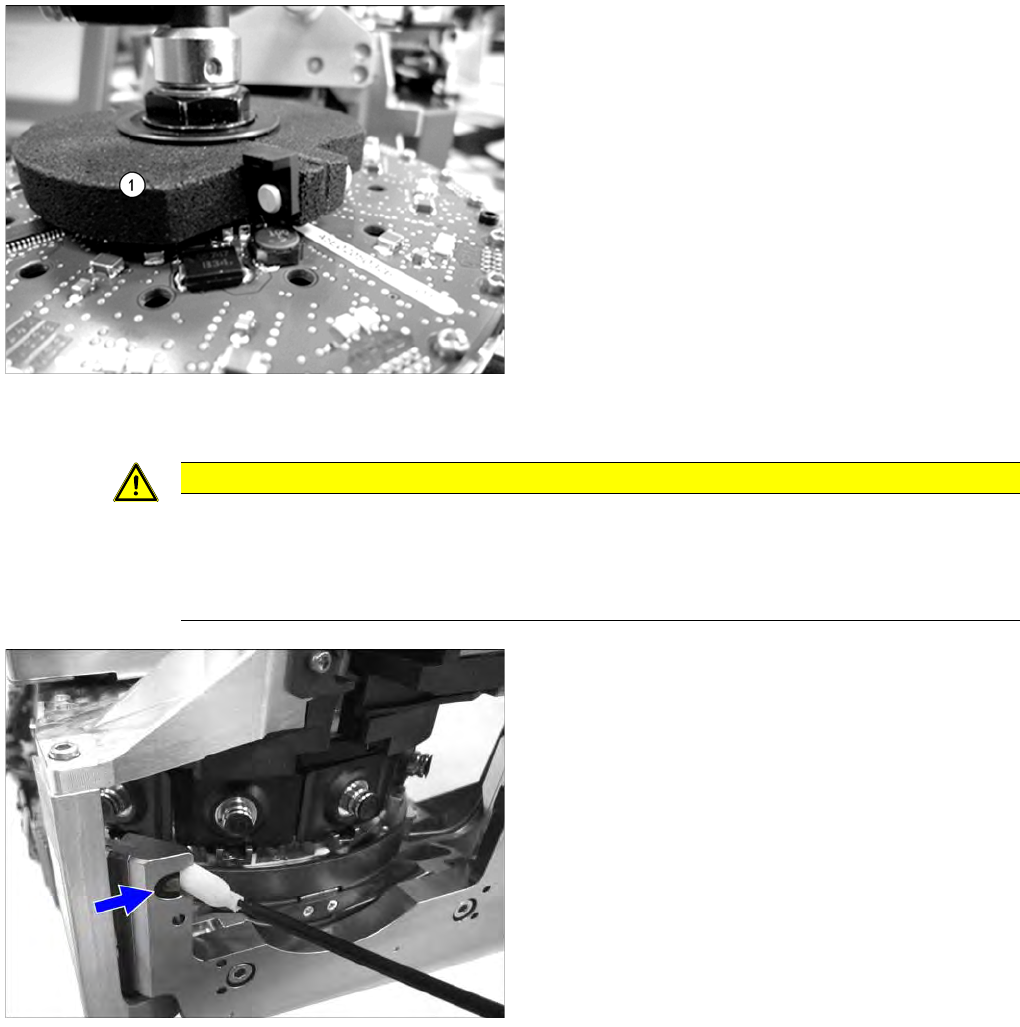
Checking the silencer
Cleaning the Com ponent Se nsor
5.6.4.7 Cleaning the Component Sensor
► Check the silencer for dirt and replace, if necessary.
► For removal and installation details, read the service
manual for the respective machine.
CAUTION
Prism, cottonwool buds
► Take care not to damage the component sensor prisms.
► Make sure that you do not use the cottonwool buds soaked in oil from cleaning the sleeves.
Always use a new cottonwool bud!
► Remove the protective cap from the component
sensor.
► Clean the prisms of the component sensor with a
cottonwool bud soaked in ethanol.
► Fit the protective cap onto the component sensor.