X-Series-Maintenance-Manual(1).pdf - 第53页
Minor Maintenance Consumables, Spare and Wear Parts , Tools Maintenance Tasks for C &P6/12 Head Maintenance Manual SIPLACE X Series 53 Maintenance Tasks for C&P6/12 H ead 4.8 Maintenance Tasks for C&P6/12 Hea…
Minor Maintenance
Maintenance Tasks for Nozzles Performing Maintenance Tasks
52 Maintenance Manual SIPLACE X Series
Replacin g Nozzle s
4.7.4.2 Replacing Nozzles
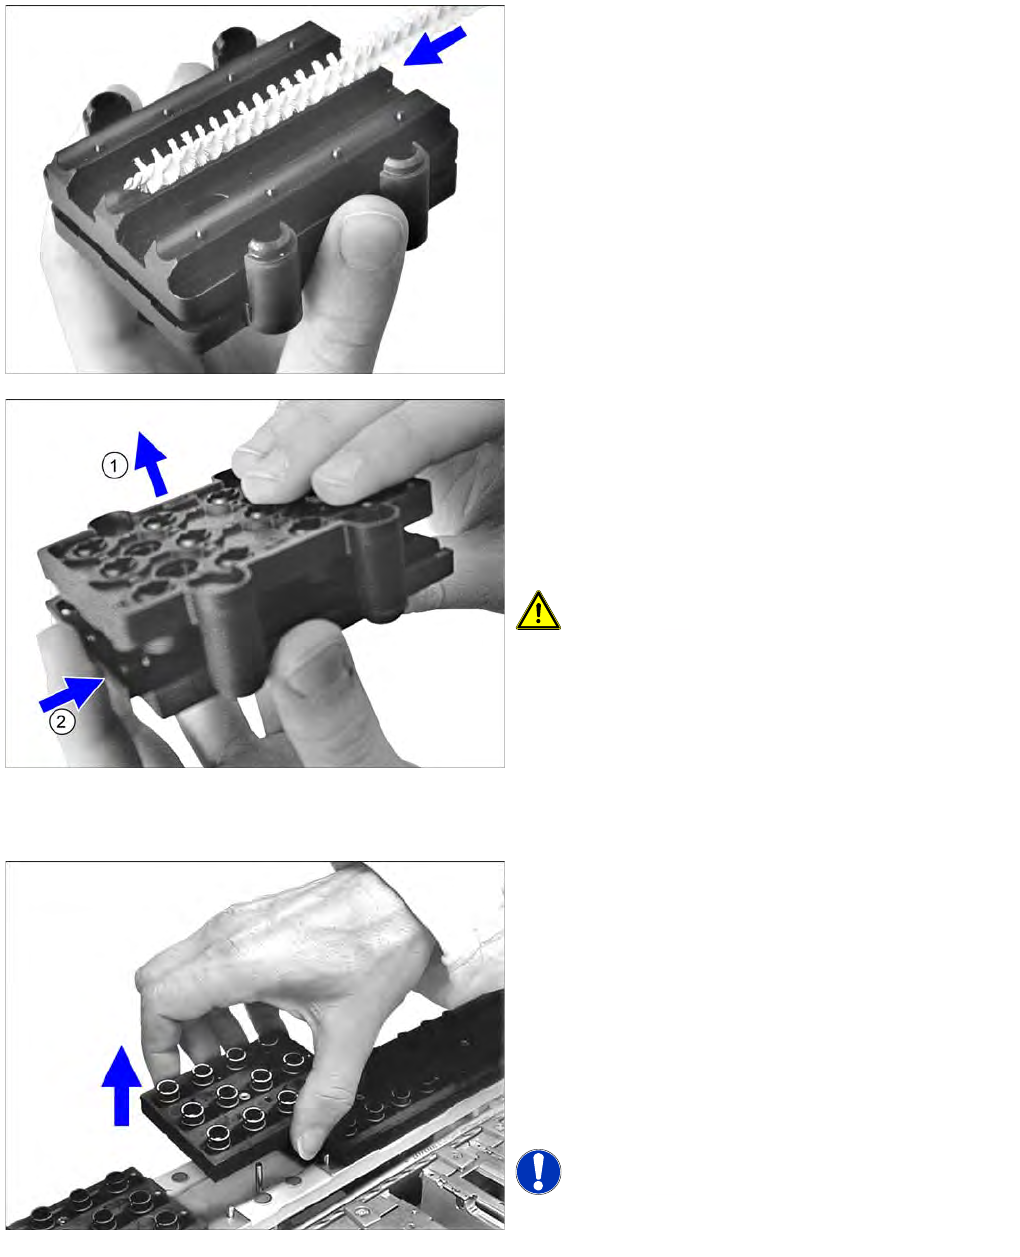
► Apply slight pressure and move the brush back and
forth to remove the partially dissolved dirt and
residues.
► Blow through the nozzles with compressed air.
► (1) Remove the brush guidance.
► Place the nozzles in the nozzle magazine and close
the slide (2).
► Dry the nozzles with compressed air.
► Place the nozzle magazine back in the nozzle
changer.
CAUTION! Reinsert the nozzle magazine into
the nozzle changer with the same orientation as before
(when it was removed before cleaning).
► Remove a full nozzle magazine from the nozzle
changer. When handling a nozzle magazine which is
not full, make a note of the orientation in the nozzle
changer, to ensure correct reinsertion later on.
► Check the nozzles and replace any dirty or damaged
ones.
► Place the nozzle magazine back in the nozzle
changer. When handling a nozzle magazine which is
not full, pay attention to correct orientation in the
nozzle changer.
NOTICE! Prepare additional nozzle magazines
according to the current nozzle configuration and replace
the complete magazine.
Minor Maintenance
Consumables, Spare and Wear Parts, Tools Maintenance Tasks for C&P6/12 Head
Maintenance Manual SIPLACE X Series 53
Maintenance Tasks for C&P6/12 Head
4.8 Maintenance Tasks for C&P6/12 Head
Consumables, Spare and Wear Parts, Tools
4.8.1 Consumables, Spare and Wear Parts, Tools
Consumable materials
▪ Interflon Fin Super (Teflon oil) [03017760-xx]
▪ Protective latex gloves [00372972-xx]
▪ Cotton gloves virgin, size 8 [00359087-xx]
▪ Microfiber cloth for cleaning optical assemblies
▪ Ethanol
▪ Distilled water
▪ Compressed air
▪ Microtips medium precision applicators (cottonwool buds) [03020860Sxx]
▪ ISOFLEX TOPAS, NCA 52 tin 1 kg/tube 50 g [00330850-xx]
▪ UNISILKON L250L grease [00310259Sxx]
▪ Lint-free cloths [03082092-xx]
▪ Cotton wool buds [00352931-xx]
Wear parts
▪ Valve plunger C&P6 (6 in each pack) [00351500-xx] or valve plunger C&P12 (6 in each pack)
[00351498-xx]
▪ O-ring for valve plunger [00359382-xx]
▪ Suction plate assembly DLM/R- light beige [03037984Sxx]
Recommended spare parts
▪ Set of sleeves 12 segment head [00116113Sxx] or
Set of sleeves 6 segment head [00116114Sxx]
▪ Individual sleeves 12 segement head [00350588Sxx] or
individual sleeves 6 segment head [00352957Sxx]
▪ Nozzle magazine 7/9xx [00323044-xx]
Tools
▪ ESD wriststrap TYP.OK/WRS [00320279-xx]
▪ Antistatic tweezers, type Bernstein 5
-
192 [00377393
-
xx]
▪ Antistatic tweezers, type Bernstein 5
-
195 [00377394
-
xx]
▪ Brush [00378523-xx]
▪ Angled tweezers [00096487-xx]
▪ SPIRAL drill cylinder R.1,4 D DIN 338 [00092026-xx]
▪ SPIRAL drill cylinder R.1,1 D DIN 338 [00092020-xx]
▪ Plunger maintenance tool [03049689Sxx]
▪ Cleaning tools for encoder disk [03049704-xx]
▪ Sleeve cleaning device [00377260-xx]
▪ Cleaning box 9xx [03003183Sxx]
▪ Guiding plate short [03029178-xx]
▪ Plastic brush Dm 8 [00325866-xx]
▪ For DLM4 at DX Series: Nozzle magazine 30xx [03081446-xx]
Minor Maintenance
Maintenance Tasks for C&P6/12 Head Preparatory Steps
54 Maintenance Manual SIPLACE X Series
Preparatory Steps
4.8.2 Preparatory Steps
► Switch off the machine, disconnect it from the power supply and secure it to prevent unauthorized
reactivation. Observe the instructions in section "1.2 Preparatory Work..." [ ➙ 11].
Performing Maintenance Tasks
4.8.3 Performing Maintenance Tasks
Replacin g the Valv e Plungers
4.8.3.1 Replacing the Valve Plungers
Cleaning the Valve Casing on the Star
4.8.3.2 Cleaning the Valve Casing on the Star
NOTICE
Do not touch the white cap
Avoid touching the white caps on the valve plungers. These are highly sensitive.
► If the cap is damaged or is detaching itself from the valve plunger, replace the valve plunger
with a new one.
NOTICE
Segment leaky
The "Segment leaking" error message generally indicates a valve plunger that is too loose.
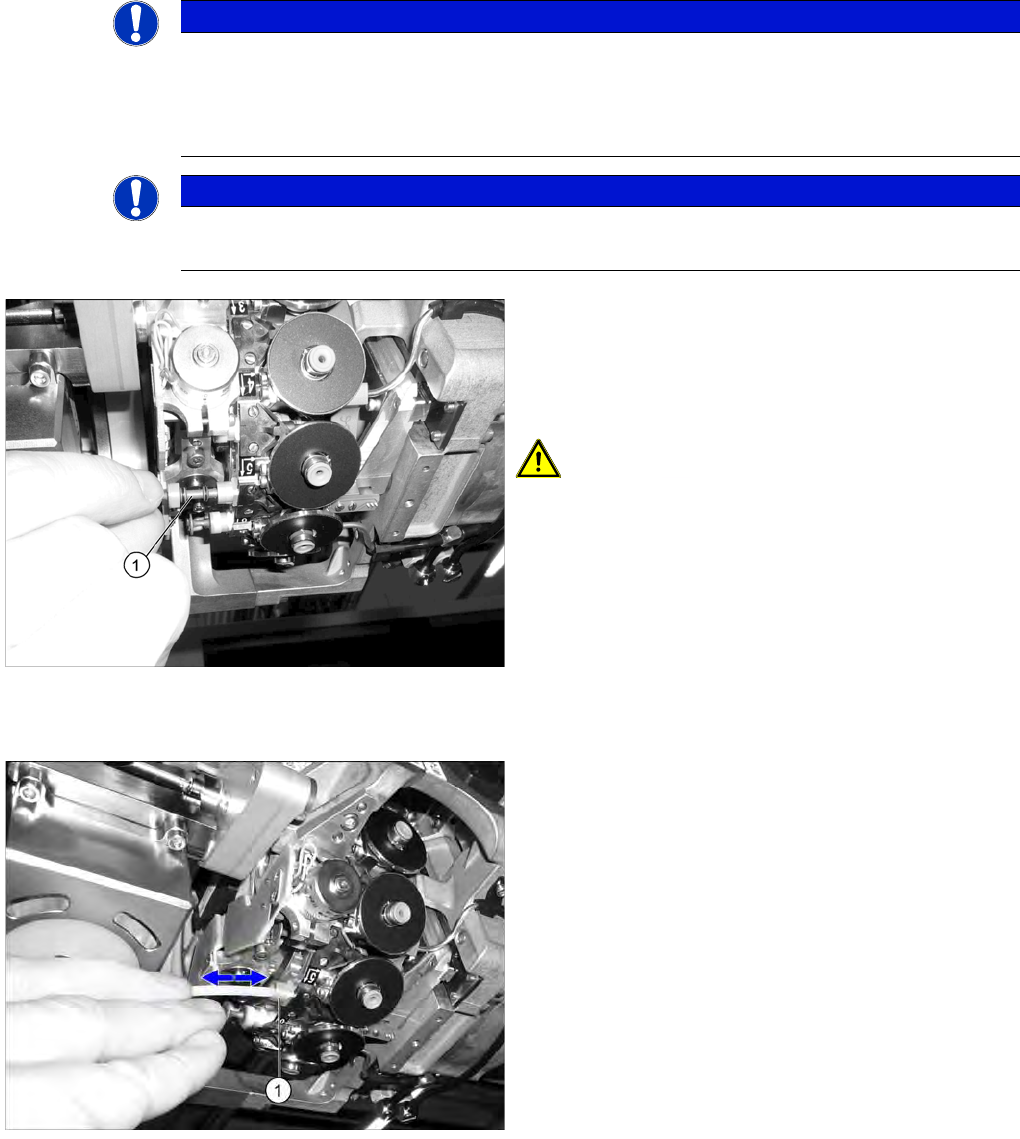
► Remove the valve plunger (1) and insert the cleaned
or new valve plunger.
Move the valve plunger back and forth several times.
If it moves too easily or is stiff to move, replace the
valve plunger.
CAUTION! Make sure that the valve plungers
are inserted as far as the stop.
► Remove the valve plungers.
► Clean the valve casing (1) using a cottonwool bud
moistened with ethanol.
► Then clean all around the valve casings.
► Fit the valve plunger back into place.