X-Series-Maintenance-Manual(1).pdf - 第54页
Minor Maintenance Maintenance Tasks for C&P6 /12 Head Preparatory Steps 54 Maintenance Manual SIPLACE X Series Preparator y Steps 4.8.2 Preparatory Steps ► Switch off the machine, disconnec t it from the po wer suppl…
Minor Maintenance
Consumables, Spare and Wear Parts, Tools Maintenance Tasks for C&P6/12 Head
Maintenance Manual SIPLACE X Series 53
Maintenance Tasks for C&P6/12 Head
4.8 Maintenance Tasks for C&P6/12 Head
Consumables, Spare and Wear Parts, Tools
4.8.1 Consumables, Spare and Wear Parts, Tools
Consumable materials
▪ Interflon Fin Super (Teflon oil) [03017760-xx]
▪ Protective latex gloves [00372972-xx]
▪ Cotton gloves virgin, size 8 [00359087-xx]
▪ Microfiber cloth for cleaning optical assemblies
▪ Ethanol
▪ Distilled water
▪ Compressed air
▪ Microtips medium precision applicators (cottonwool buds) [03020860Sxx]
▪ ISOFLEX TOPAS, NCA 52 tin 1 kg/tube 50 g [00330850-xx]
▪ UNISILKON L250L grease [00310259Sxx]
▪ Lint-free cloths [03082092-xx]
▪ Cotton wool buds [00352931-xx]
Wear parts
▪ Valve plunger C&P6 (6 in each pack) [00351500-xx] or valve plunger C&P12 (6 in each pack)
[00351498-xx]
▪ O-ring for valve plunger [00359382-xx]
▪ Suction plate assembly DLM/R- light beige [03037984Sxx]
Recommended spare parts
▪ Set of sleeves 12 segment head [00116113Sxx] or
Set of sleeves 6 segment head [00116114Sxx]
▪ Individual sleeves 12 segement head [00350588Sxx] or
individual sleeves 6 segment head [00352957Sxx]
▪ Nozzle magazine 7/9xx [00323044-xx]
Tools
▪ ESD wriststrap TYP.OK/WRS [00320279-xx]
▪ Antistatic tweezers, type Bernstein 5
-
192 [00377393
-
xx]
▪ Antistatic tweezers, type Bernstein 5
-
195 [00377394
-
xx]
▪ Brush [00378523-xx]
▪ Angled tweezers [00096487-xx]
▪ SPIRAL drill cylinder R.1,4 D DIN 338 [00092026-xx]
▪ SPIRAL drill cylinder R.1,1 D DIN 338 [00092020-xx]
▪ Plunger maintenance tool [03049689Sxx]
▪ Cleaning tools for encoder disk [03049704-xx]
▪ Sleeve cleaning device [00377260-xx]
▪ Cleaning box 9xx [03003183Sxx]
▪ Guiding plate short [03029178-xx]
▪ Plastic brush Dm 8 [00325866-xx]
▪ For DLM4 at DX Series: Nozzle magazine 30xx [03081446-xx]
Minor Maintenance
Maintenance Tasks for C&P6/12 Head Preparatory Steps
54 Maintenance Manual SIPLACE X Series
Preparatory Steps
4.8.2 Preparatory Steps
► Switch off the machine, disconnect it from the power supply and secure it to prevent unauthorized
reactivation. Observe the instructions in section "1.2 Preparatory Work..." [ ➙ 11].
Performing Maintenance Tasks
4.8.3 Performing Maintenance Tasks
Replacin g the Valv e Plungers
4.8.3.1 Replacing the Valve Plungers
Cleaning the Valve Casing on the Star
4.8.3.2 Cleaning the Valve Casing on the Star
NOTICE
Do not touch the white cap
Avoid touching the white caps on the valve plungers. These are highly sensitive.
► If the cap is damaged or is detaching itself from the valve plunger, replace the valve plunger
with a new one.
NOTICE
Segment leaky
The "Segment leaking" error message generally indicates a valve plunger that is too loose.
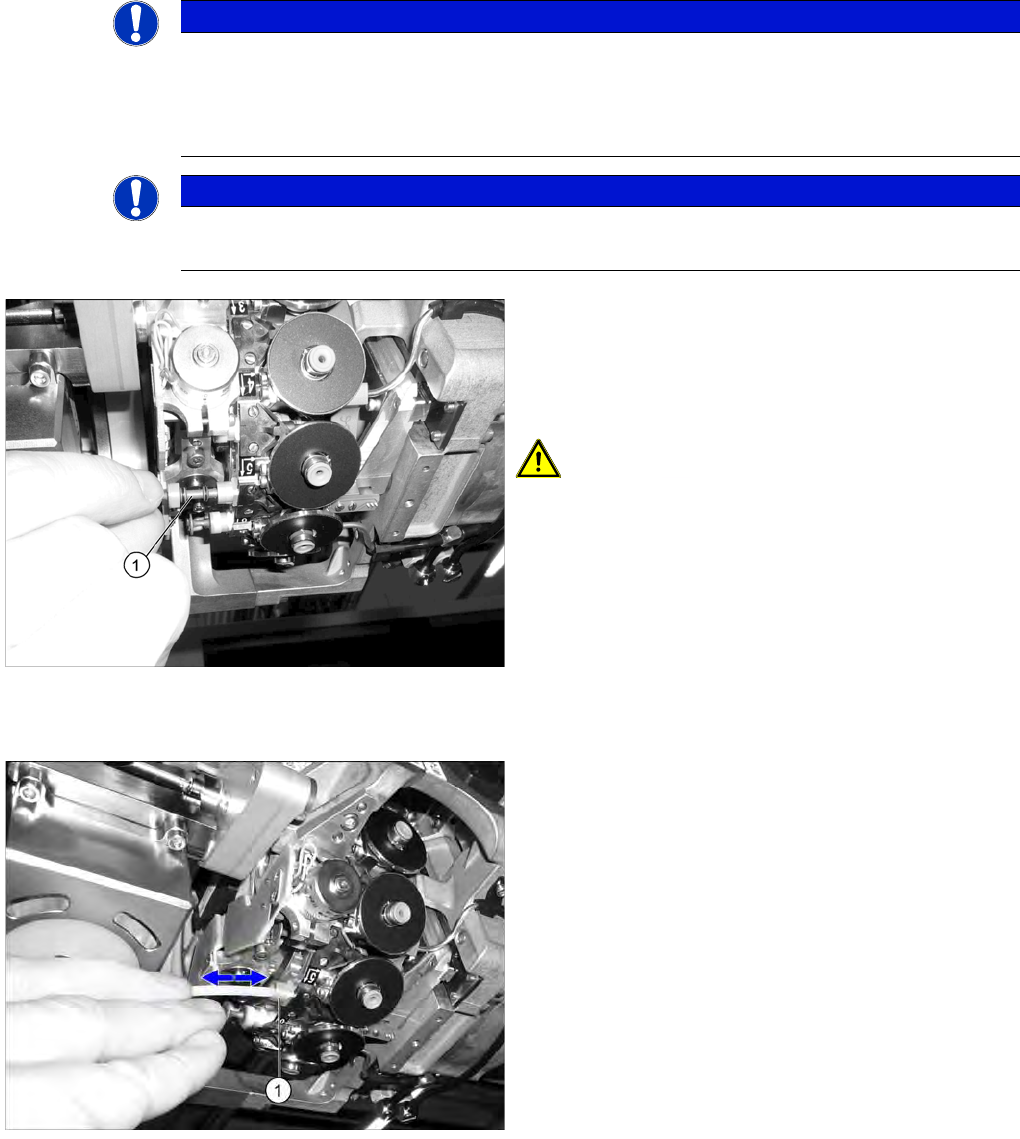
► Remove the valve plunger (1) and insert the cleaned
or new valve plunger.
Move the valve plunger back and forth several times.
If it moves too easily or is stiff to move, replace the
valve plunger.
CAUTION! Make sure that the valve plungers
are inserted as far as the stop.
► Remove the valve plungers.
► Clean the valve casing (1) using a cottonwool bud
moistened with ethanol.
► Then clean all around the valve casings.
► Fit the valve plunger back into place.
Minor Maintenance
Performing Maintenance Tasks Maintenance Tasks for C&P6/12 Head
Maintenance Manual SIPLACE X Series 55
Cleaning the Val ve Plunge r
4.8.3.3 Cleaning the Valve Plunger
► Make sure that the valve plungers are inserted as far as the stop.
► Insert the cleaned sleeves into the segments. Use a very gentle pressure to engage the sleeves to
avoid damaging the retaining springs.
Greasing the Valve Plunge r with the Tool
NOTICE
Mark cleaned valve plunger
► Distinguish between the dirty and the clean valve plungers by identifying the packages
accordingly, for example.
► Please also observe section "4.8.3.3.1 Greasing the Valve Plunger with the Tool" [ ➙ 56].
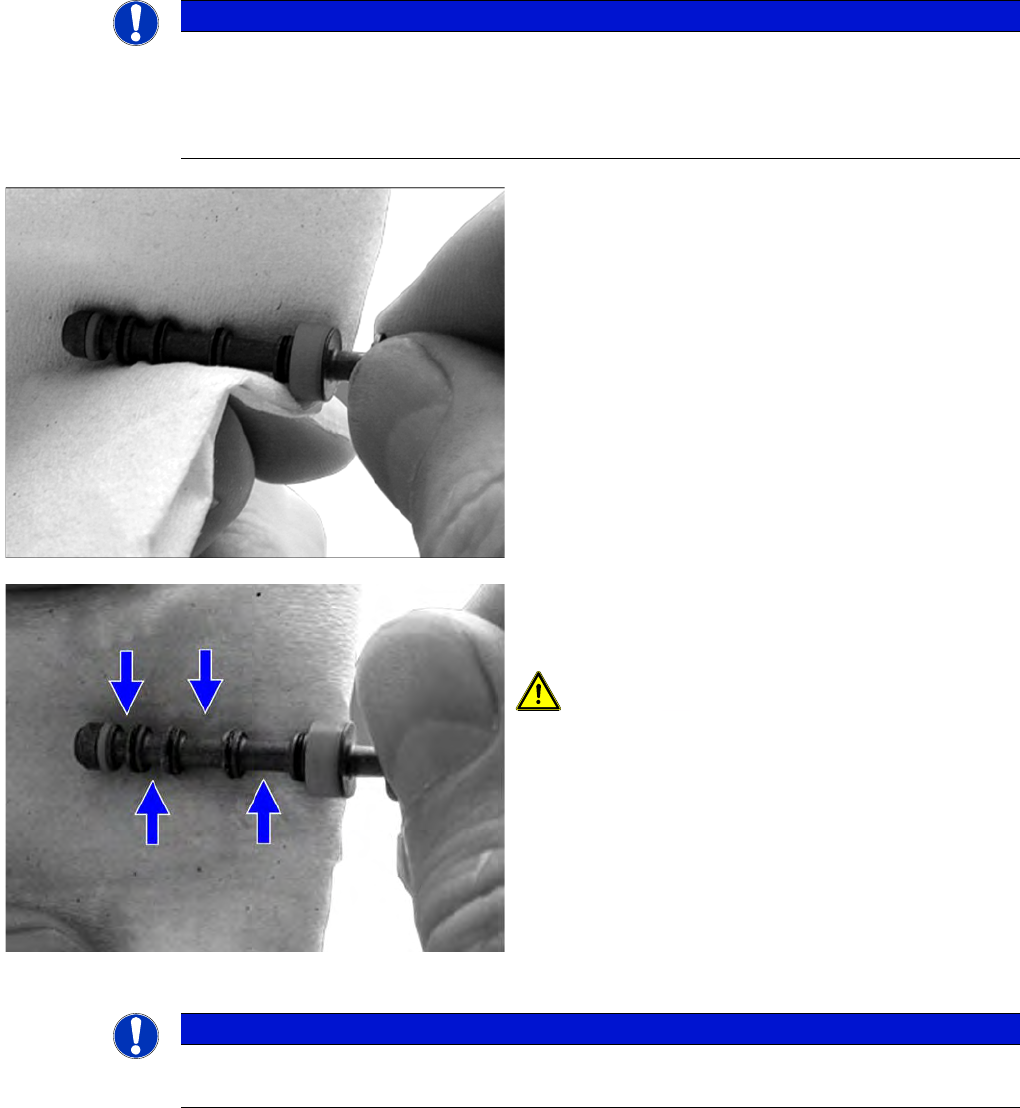
► Remove the valve plungers.
► Wipe the valve plunger using a dry, lint-free cloth.
► Check the sealing lips, the spring O-ring and the
sleeve for damage. If they are damaged, replace the
valve plunger. A loose sleeve can be refitted if it is still
intact.
► Grease the sealing lips extremely sparingly using a
lint-free cloth dipped in ISOFLEX TOPAS NCA 52.
No grease residue may visible.
CAUTION! The grooves shown in the diagram
must be left grease-free. New valve plungers must also
be greased before they are used for the first time.
► Fit the valve plunger back into place.
► Move the valve plungers back and forth several
times. If they move too easily or are stiff to move,
replace the valve plungers concerned.
NOTICE
Error message "Segment leaky"
The "Segment leaking" error message generally indicates a valve plunger that is too loose.