X-Series-Maintenance-Manual(1).pdf - 第88页
Major Maintenance Maintenance Tasks for C&P2 0A Head Performing Maintenance Tasks 88 Maintenance Manual SIPLACE X Series Replacing the filter disks NOTICE Replacing the filter disks ► Read the "User manual, inse…
Major Maintenance
Performing Maintenance Tasks Maintenance Tasks for C&P20A Head
Maintenance Manual SIPLACE X Series 87
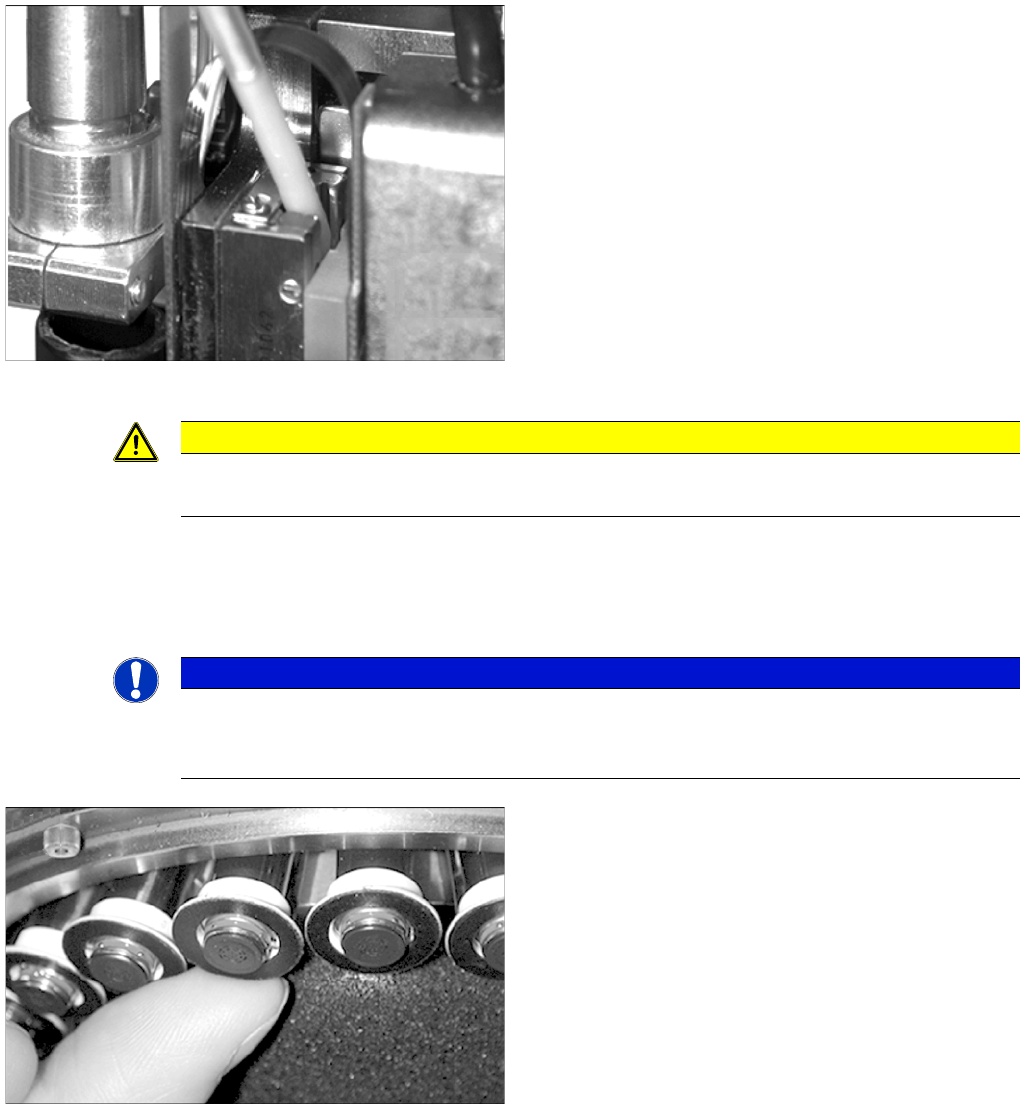
► Remove the black rubber hose between the Z axis and the driver.
Checkin g/Replaci ng the Filter Disk s
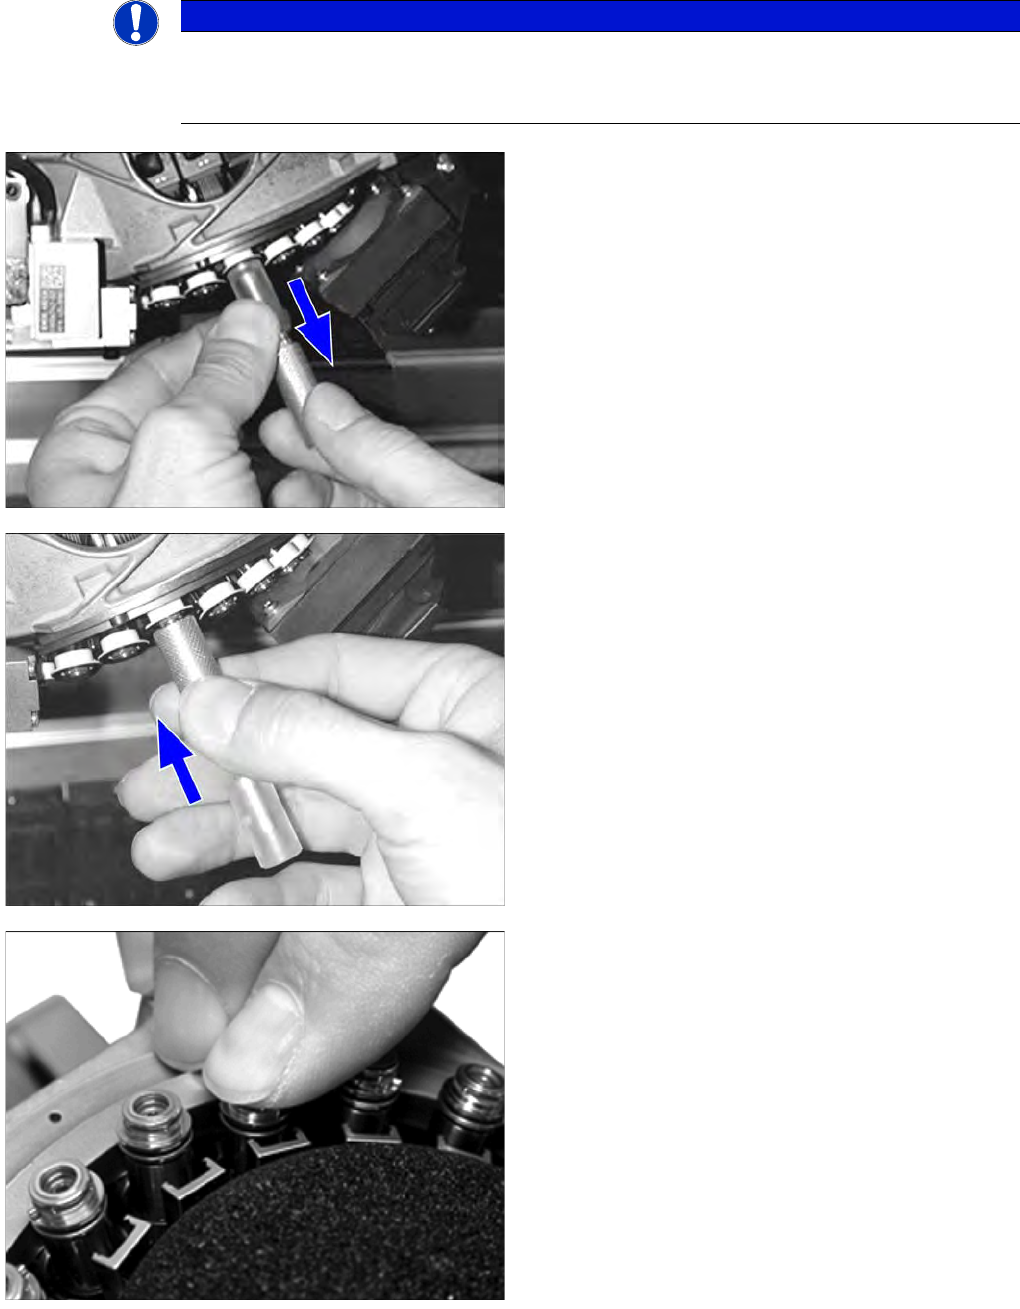
5.5.5.4 Checking/Replacing the Filter Disks
Check
► Move the Z axis into its bottom position.
► Apply 4 µl of lubricant to the inner and outer guideway
of the rail and move the Z axis approx. 5 times
manually in and out.
► Apply another 4 µl of lubricant to the inner and outer
guideway of the rail and move the Z axis again
approx. 5 times manually in and out.
CAUTION
Remove rubber hose
If the rubber hose is not removed, the head will crash!
NOTICE
Check correct function
Check that the filter disks and vacuum distributors are working correctly by checking the
vacuum values in the software.
► Check the filter disks for contamination or damage.
► Replace any damaged filter disks.
Major Maintenance
Maintenance Tasks for C&P20A Head Performing Maintenance Tasks
88 Maintenance Manual SIPLACE X Series
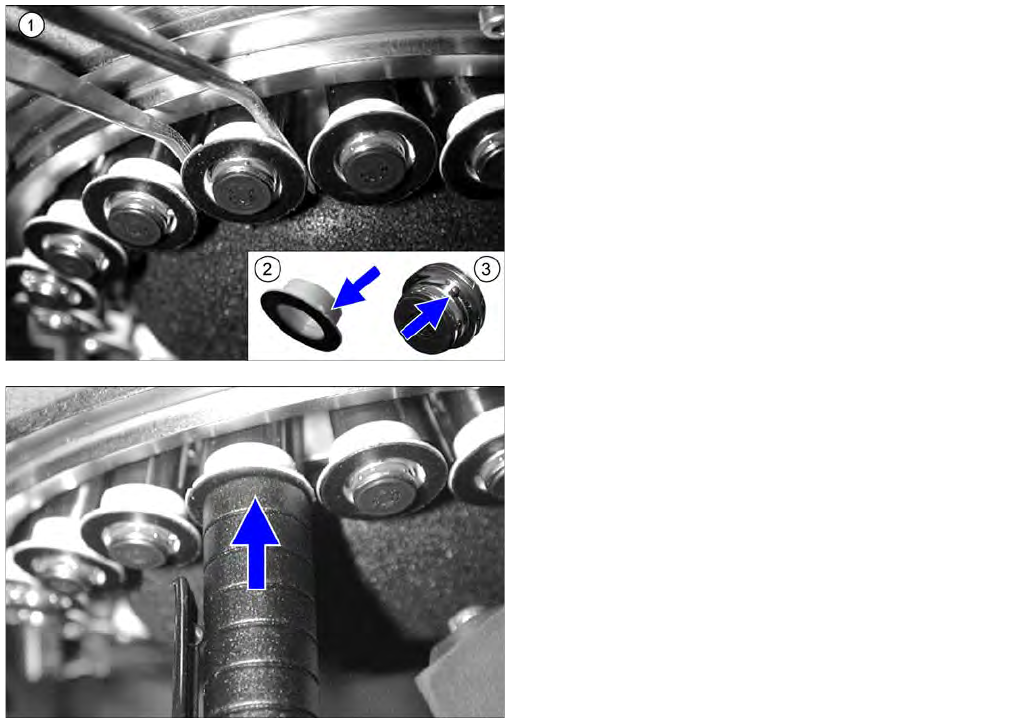
Replacing the filter disks
NOTICE
Replacing the filter disks
► Read the "User manual, insertion and extraction tool for filter disks, C&PA 20" (item no.:
00195378-xx). before replacing the filter disks.
► Use the "insertion and extraction tool for filter disks"
to remove the filter disks from the 20 segments of the
placement head.
► Use the insertion and extraction tool to place a new
filter disk on each segment. The filter disks must
engage audibly.
► Check whether the filter disk is fitted correctly. The
filter disk must be fitted straight on the DP drive.
Major Maintenance
Performing Maintenance Tasks Maintenance Tasks for C&P20A Head
Maintenance Manual SIPLACE X Series 89
Checkin g/Replaci ng the Switching D isk
5.5.5.5 Checking/Replacing the Switching Disk
► Check whether the switching disks are damaged or
broken (e.g. scratches or discoloration of the black
surface). Also check whether neighboring switching
disk have the same height. Differences in height are
an indication of damage.
► If a switching disk is damaged, carefully remove it (1).
► Use your thumb to press from below against the
segment so that the segment is not damaged when
you remove it.
► Fit the new switching disk onto the segment so that
the pin (3) and groove (2) engage with one another.
► Use a suitable sleeve (in this case a pen cap) to press
the switching disk onto the segment.
► Also check whether the new and neighboring
switching disks have the same height.