X-Series-Maintenance-Manual(1).pdf - 第90页
Major Maintenance Maintenance Tasks for C&P2 0A Head Performing Maintenance Tasks 90 Maintenance Manual SIPLACE X Series Checkin g/Replaci ng the Vacuum-Con ducting Parts 5.5.5.6 Checking/Replacing the Vacuum-Conduct…
Major Maintenance
Performing Maintenance Tasks Maintenance Tasks for C&P20A Head
Maintenance Manual SIPLACE X Series 89
Checkin g/Replaci ng the Switching D isk
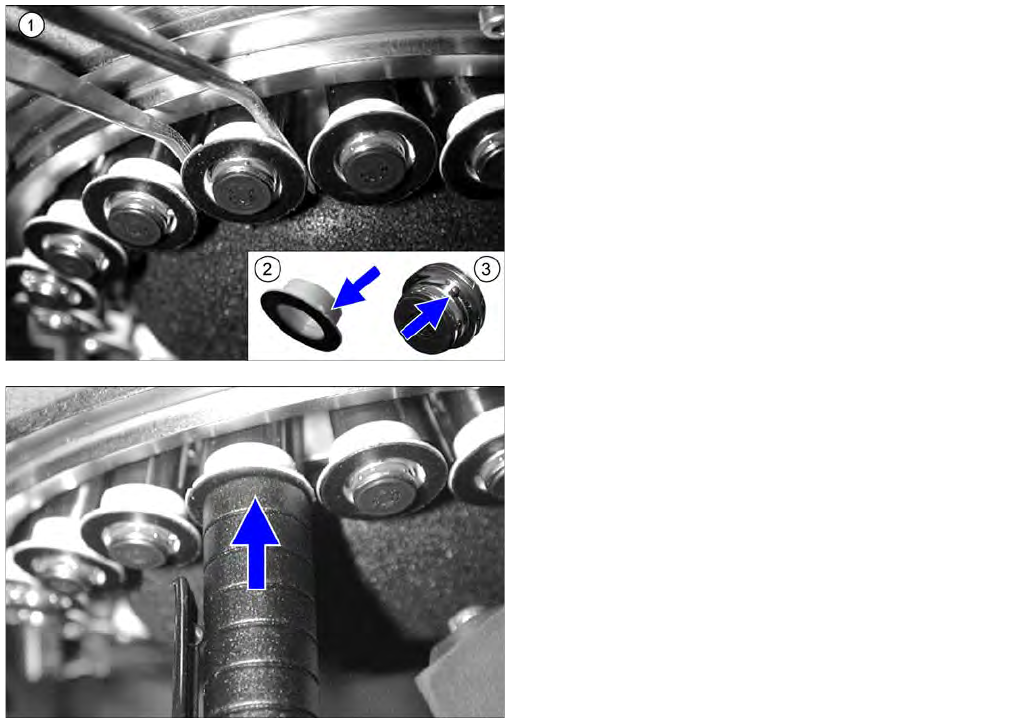
5.5.5.5 Checking/Replacing the Switching Disk
► Check whether the switching disks are damaged or
broken (e.g. scratches or discoloration of the black
surface). Also check whether neighboring switching
disk have the same height. Differences in height are
an indication of damage.
► If a switching disk is damaged, carefully remove it (1).
► Use your thumb to press from below against the
segment so that the segment is not damaged when
you remove it.
► Fit the new switching disk onto the segment so that
the pin (3) and groove (2) engage with one another.
► Use a suitable sleeve (in this case a pen cap) to press
the switching disk onto the segment.
► Also check whether the new and neighboring
switching disks have the same height.
Major Maintenance
Maintenance Tasks for C&P20A Head Performing Maintenance Tasks
90 Maintenance Manual SIPLACE X Series
Checkin g/Replaci ng the Vacuum-Con ducting Parts
5.5.5.6 Checking/Replacing the Vacuum-Conducting Parts
Checking the silencer
Checking the hold circuit
► Fit the hold circuit and silencer again by following the above instructions in reverse order. Also
observe the following instructions:
NOTICE
Check segments , camera optic
► When checking, pay particular attention to the segments which were noticeable during the
vacuum test.
► Make sure that you do not damage or contaminate the camera lens system.
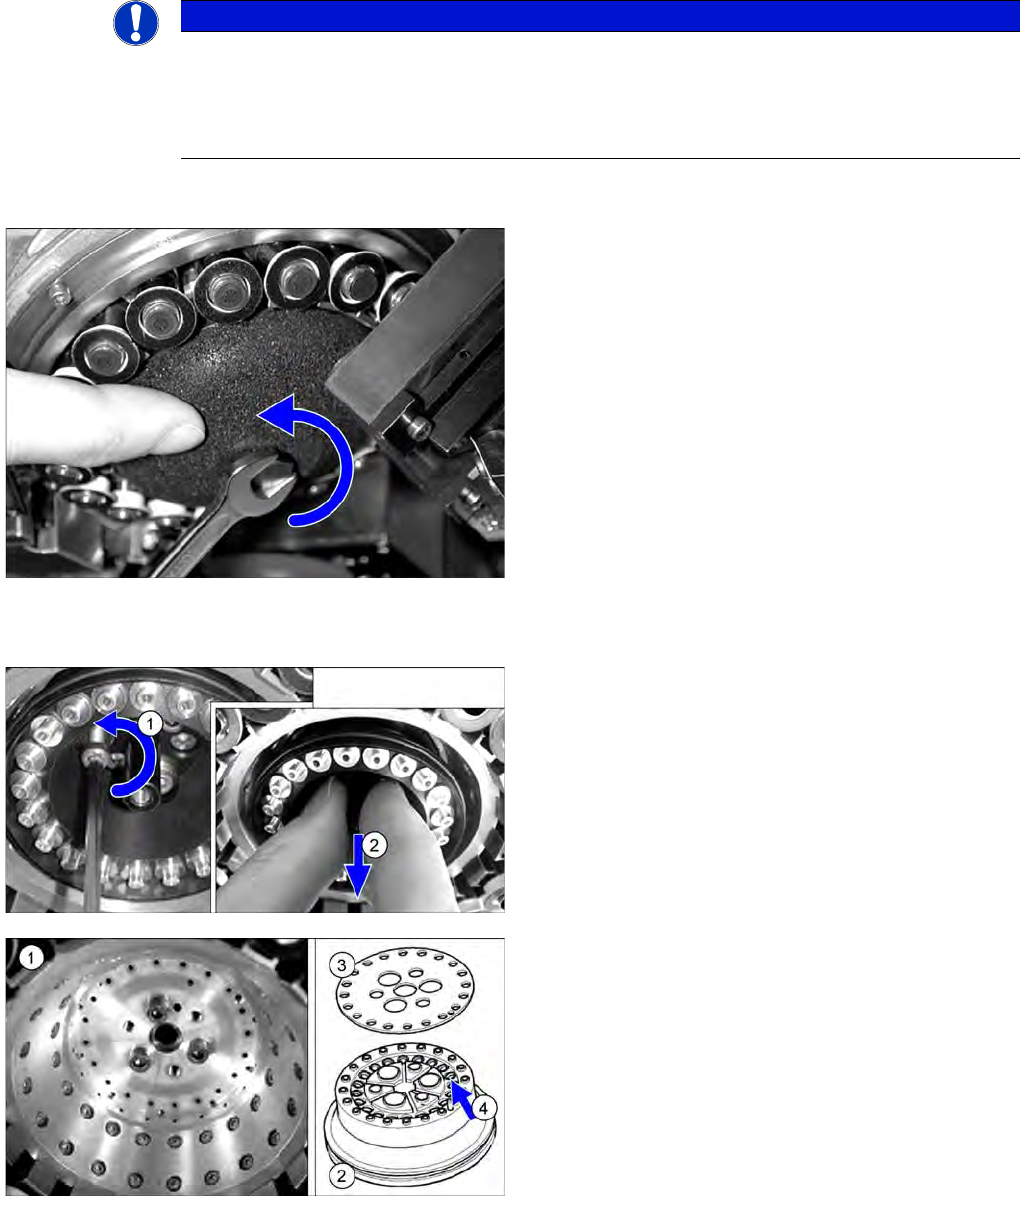
► Dismantle the silencer. To do this, loosen the screw
fastening the silencer and carefully lever the silencer
out.
► Check the silencer for dirt.
► Replace the filter if it is dirty.
► Dismantle the vacuum distributor hold circuit.
► Only loosen the three protruding fastening screws on
the hold circuit and remove the hold circuit.
► Check the seat of the hold circuit (1) for dirt.
► Clean the seat with a lint-free cloth, if required.
► Check the hold circuit (2) and the seal (3) for dirt and
damage. If heavily soiled or damaged, replace the
hold circuit with a new one.
► Clean the hold circuit with compressed air. Make sure
that no dirt gets into the Venturi nozzles (4).
Major Maintenance
Performing Maintenance Tasks Maintenance Tasks for C&P20A Head
Maintenance Manual SIPLACE X Series 91
Cleaning the Com ponent Se nsor
5.5.5.7 Cleaning the Component Sensor
CAUTION
The hold circuit has a centering pin.
► During fitting, make sure that the centering pin is inserted into the opposite hole in the seat
of the hold circuit, otherwise the hold circuit could be fitted at an incorrect angle (twisted by
120 degrees).
CAUTION
Installation instructions
► Make sure that the seal is inserted correctly!
► Insert the silencer once more and screw it in place. The screw may only be tightened "hand-
tight".
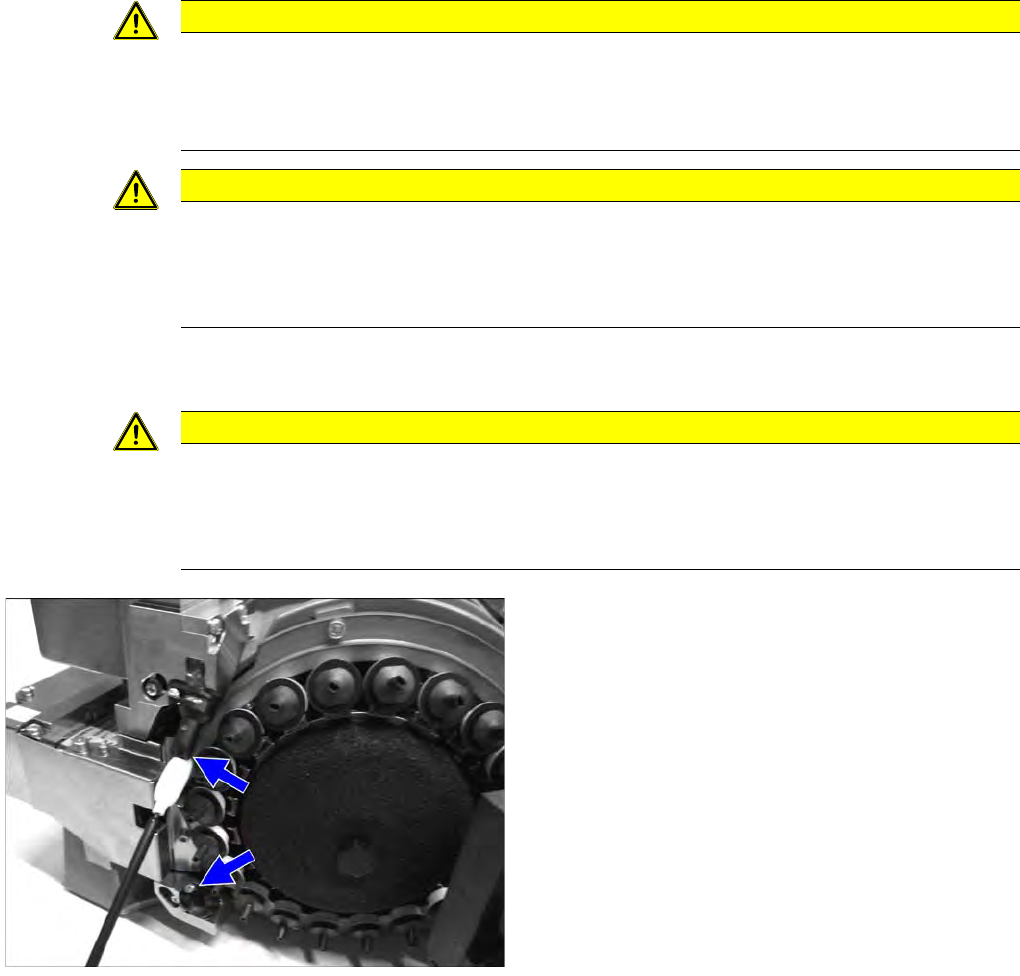
CAUTION
BE-Sensor, cottonwool buds
► Take care not to damage the component sensor prisms.
► Make sure that you do not use the cottonwool buds soaked in oil from cleaning the sleeves.
Always use a new cottonwool bud!
► Remove the protective hose for the component
sensor.
► Clean the prisms of the component sensor with a
cottonwool bud soaked in ethanol.
► Fit the protective hose back onto the component
sensor.