OM-1273-004_w.pdf - 第146页
4-17 AJK-ML T-ID 3.3 Inspection, Cleaning, and Lubrication Spots 0706-002 3.3.5 Magazine Rack Shutter Fulcrum Section (6 places) Every 3 Months Lubrication (MOL YNOC GREASE AP1) Required T ime: 30 minutes W ipe off old g…
4-16
AJK-MLT-ID
3.3 Inspection, Cleaning, and Lubrication Spots
0706-002
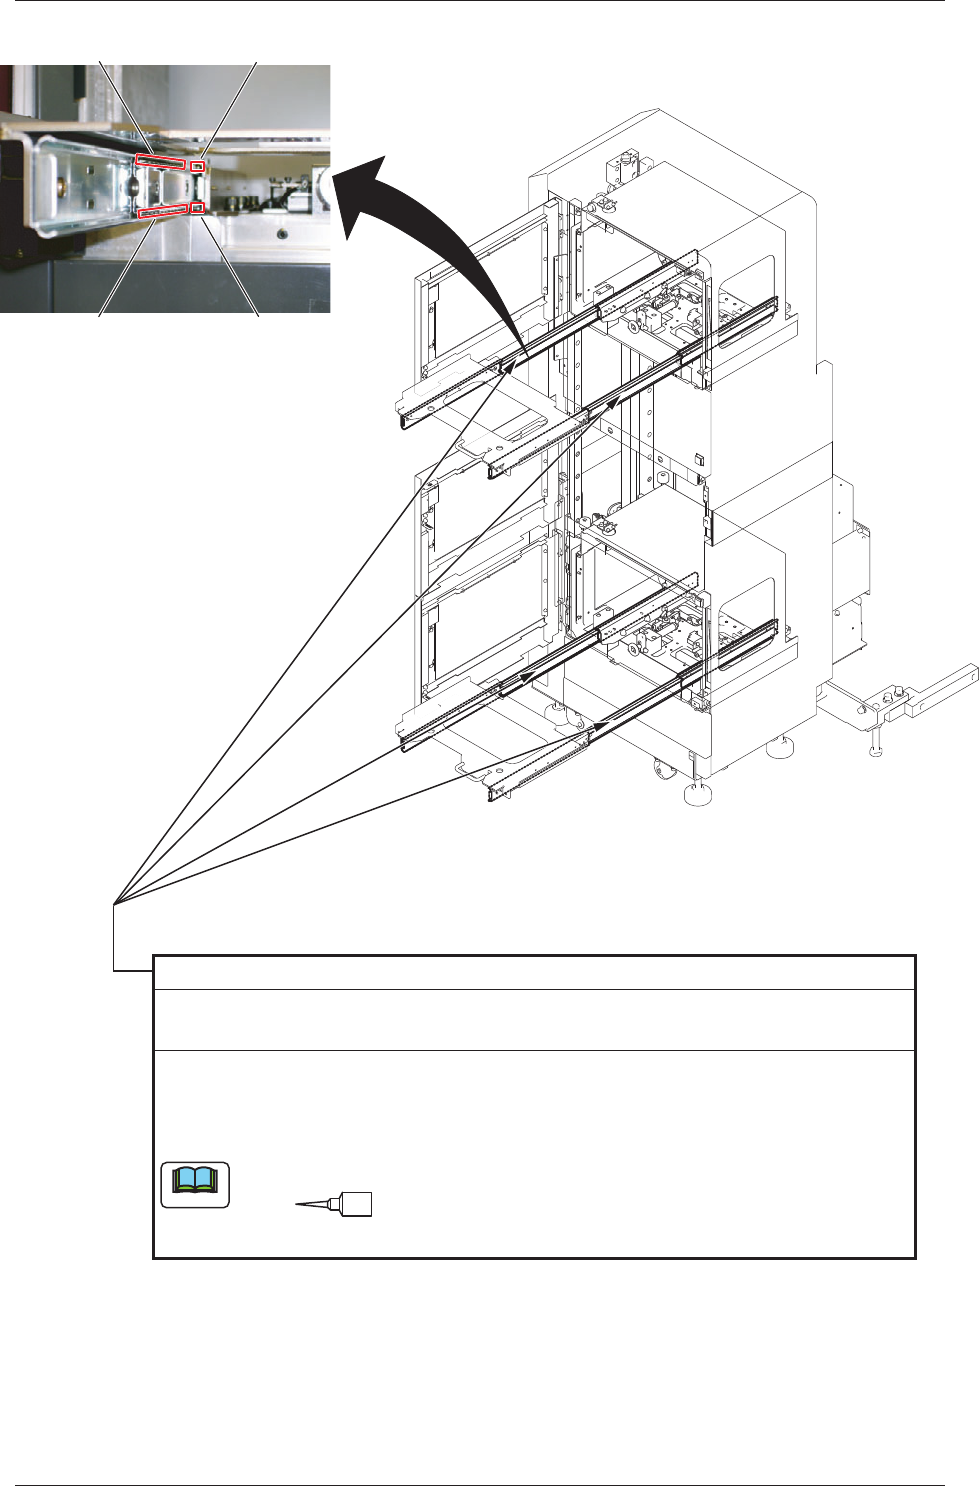
Upper Front Bearing
Lower Front Bearing
Upper Rear Bearing
Lower Rear Bearing
No. 18
Magazine Rail
Yearly Lubrication (
DAPHNE EPONEX GREASE No. 1
)
Required Time: 5 minutes
Draw out the magazine base.
Apply new grease to the bearings (8 pcs. on each rail) on the right and left magazine
rails (the front upper and lower rails and the rear upper and lower rails) with a
syringe.
Note
Use No. 18 (green) nozzle.
Fig. D10
4-17
AJK-MLT-ID
3.3 Inspection, Cleaning, and Lubrication Spots
0706-002
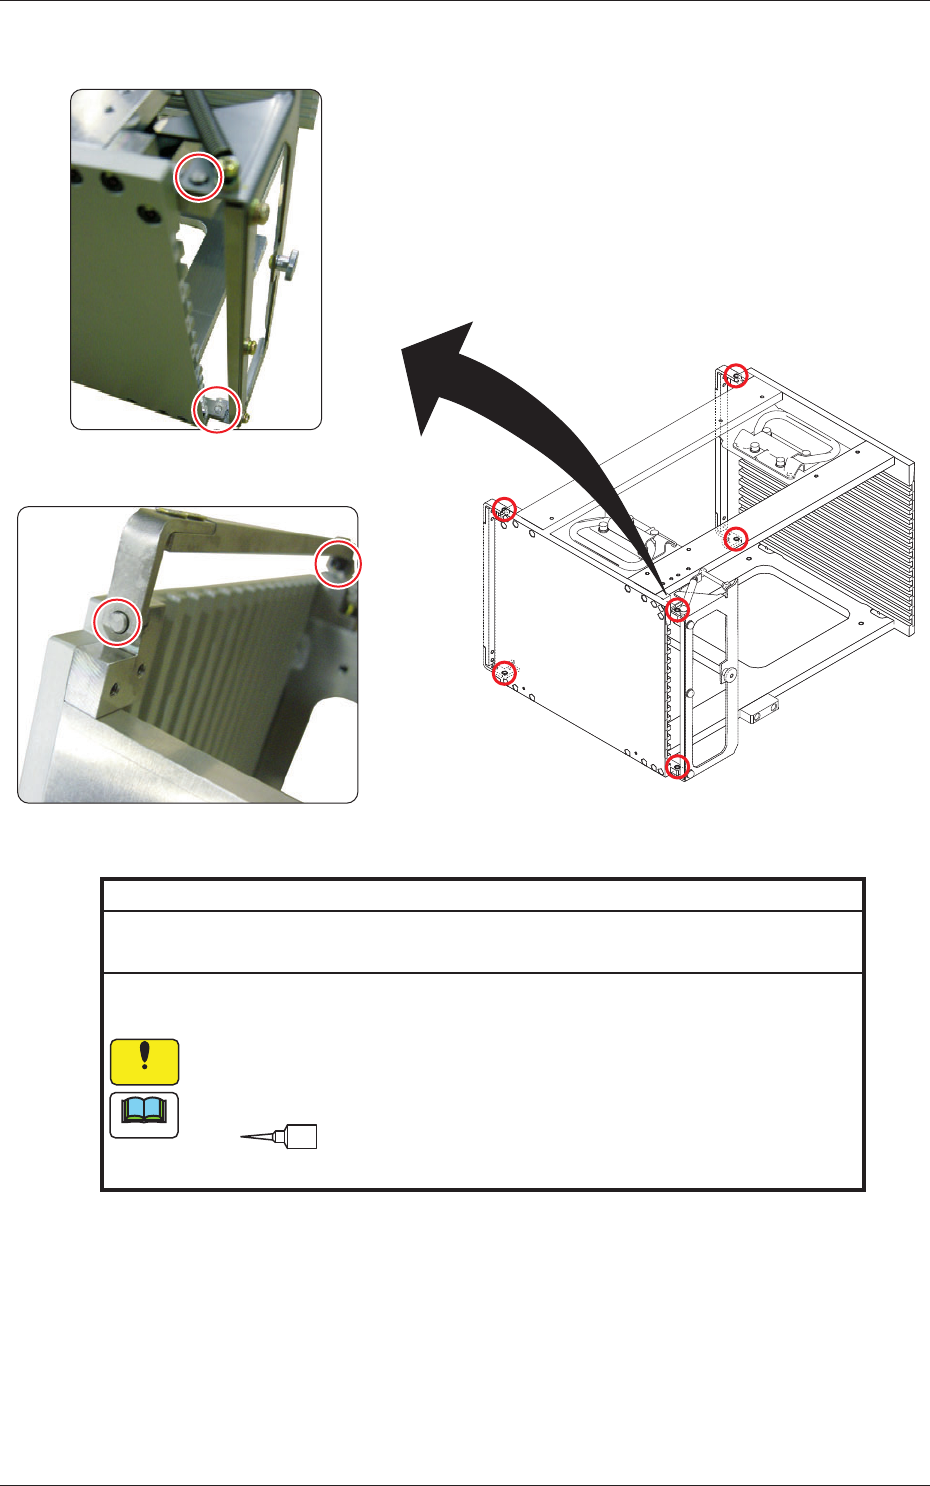
3.3.5 Magazine
Rack Shutter Fulcrum Section (6 places)
Every 3 Months Lubrication (MOLYNOC GREASE AP1)
Required Time: 30 minutes
Wipe off old grease from the upper and lower fulcrum sections of the rack shutter
with an oiled rag and apply new one to them with a syringe.
Take ample care not to leave any waste threads after cleaning.
Magnified View of Rack Shutter
Magnified View of Magazine Door
Note
No. 18
Use No. 18 (green) nozzle.
Notice
Fig. D11
4-18
AJK-MLT-ID
4. Maintenance
0706-002
4. Maintenance
4.1 Detachment and Attachment of Maintenance Cover
4.1.1 Detachment of Maintenance Cover
(1) Zero the multi-layer tray feeder.
(2) Open the "TRAY UNIT" window and move the elevator to the place
where the grease can easily be supplied. (Operation Sequence: [MAINT]
Button on Main Menu Bar
→
[UNIT ADJ] Button on "MAINT"
Submenu Bar
→
[TRAY UNIT] Button on "UNIT ADJ" Submenu Bar
→
"TRAY UNIT" Window)
(3) Turn off the power.
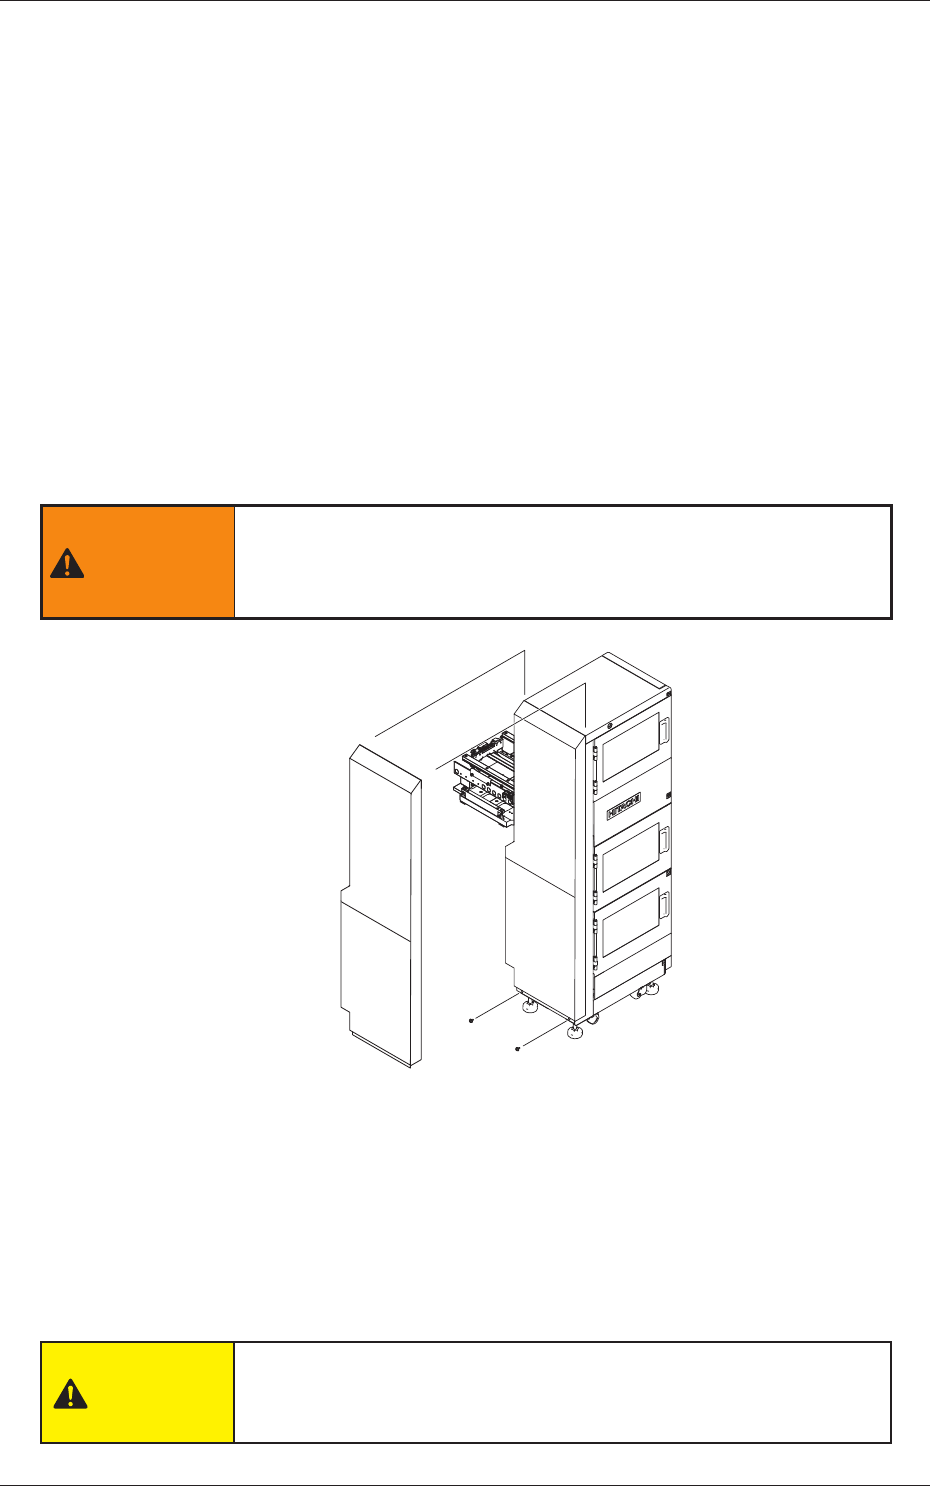
(4) Remove two setscrews with a cross-head screwdriver.
WARNING
Before detaching the maintenance cover, be sure to turn off the
power breaker and lock it with a padlock.
Detach the maintenance cover.
Remove two setscrews.
Fig. D12
(5) Slide the maintenance cover upward to detach.
4.1.2 Attachment of Maintenance Cover
To attach the maintenance cover, follow the reverse procedure of the
detachment.
CAUTION
After the maintenance work, be sure to attach the cover back in
place.