00196376-0102_UM S-Feeder_EN.pdf - 第44页
Tape Feeder Modules Details for 12/16 mm S Converting the Tape Width 44 User Manual SIPLACE S-Feeder 2.3 Details for 12/16 mm S 2.3.1 Converting the Tape Width To convert the feeder from a width of 12 mm to 16 mm (or vic…
Tape Feeder Modules
Inserting the Tape Reel Holder Details for 3x8 mm S Feeders
User Manual SIPLACE S-Feeder 43
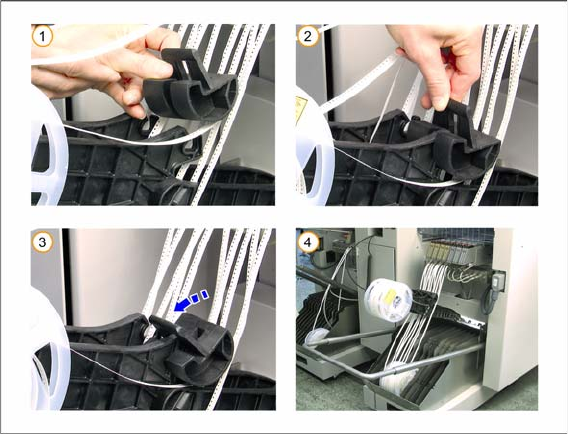
2.2.4.2 Inserting the Deflection Pulleys
The deflection pulleys keep the tapes tensioned in the tape reel holders.
►(1) Position the deflection pulley above the tape reel holder.
►(2) Insert the deflection pulley into the recess in the tape reel holder.
►(3) Take the deflection pulley by the handle and turn it in the direction of the arrow.
►(4) The diagram shows an example of an optimum setup.
Tape Feeder Modules
Details for 12/16 mm S Converting the Tape Width
44 User Manual SIPLACE S-Feeder
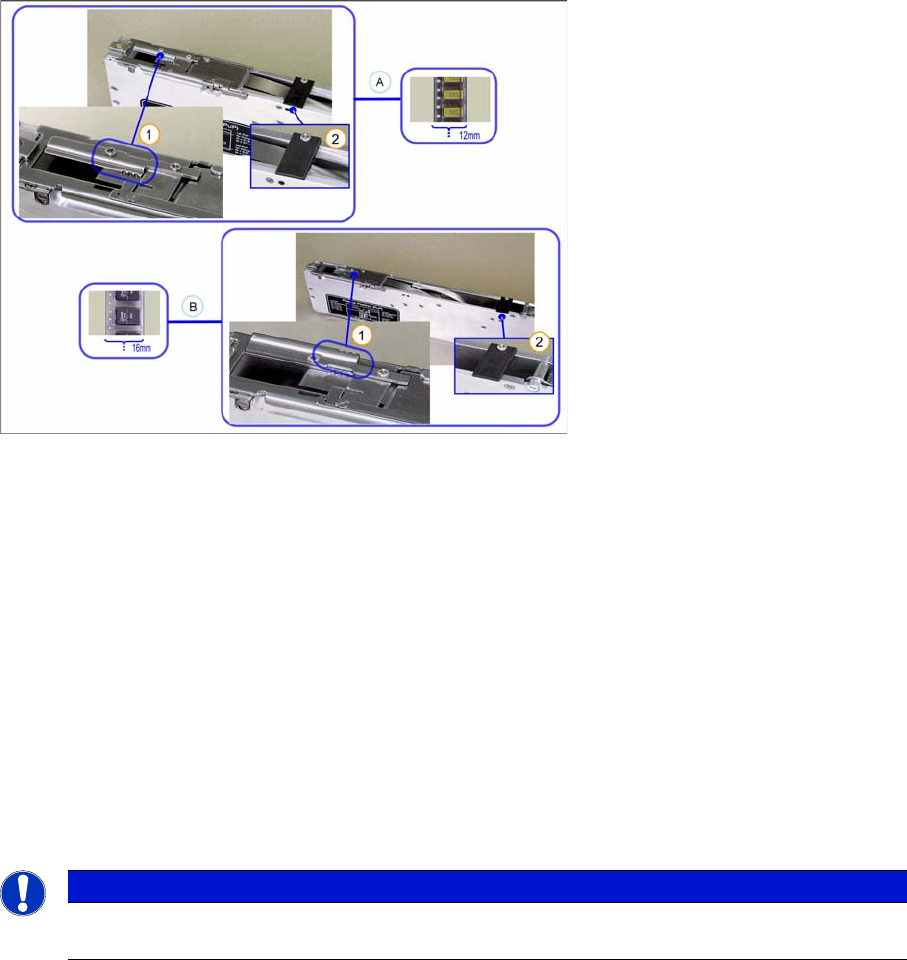
2.3 Details for 12/16 mm S
2.3.1 Converting the Tape Width
To convert the feeder from a width of 12 mm to 16 mm (or vice versa), turn the filler piece at the pickup
window to the respective position.
To process 12 mm tapes you need to have a tape clip as guidance. You do not need this tape clip to
process 16 mm tapes. In this case it can be stored at the park position.
►Loosen the two screws fastening the filler piece to the feeder.
►Turn the filler piece by 180 degrees.
►Fix the filler piece into place with the two screws.
►Loosen the screw on the tape clip.
► Fasten the tape clip in the required position with the same screw.
Legend:
A Structure for 12 mm tapes 1 Filler piece
B Structure for 16 mm tapes 2 Tape clip
NOTICE
The filler piece must always be fitted at both tape setups, as the protruding "nose" of the clip
keeps the removal edge pressed down.
Tape Feeder Modules
Inserting the Tape Details for 12/16 mm S
User Manual SIPLACE S-Feeder 45
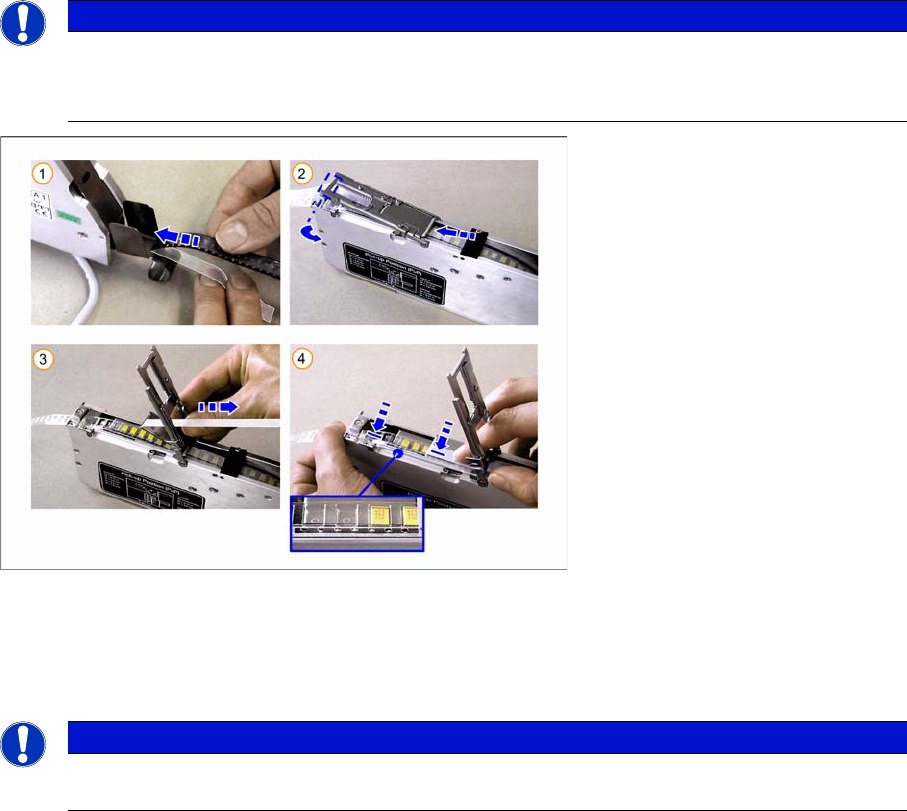
2.3.2 Inserting the Tape
►
Only for tapes with foil overhang at the beginning of the tape:
Wrap the foil overhang (for threading in) around the beginning of the tape material, tension the foil
along the underside of the tape and hold in place.
►(1) Thread the tape from behind into the feeder track.
►(2) Open the pickup window:
To do this, press the pickup window down slightly and the turn the latch by 90°, until this engages
audibly.
Now push the tape under the pickup window.
Only for tapes with no overhang at the beginning of the tape:
Free up approx. 2-3 cm of the foil and fold the foil back.
►(3) Lift the pickup window and pull the cover tape backwards, over the removal edge.
Now press the removal edge down.
►(4) Make sure that the tape perforations are in the transport wheel before you close the removal edge.
NOTICE
Before inserting a new tape, check that the step size is set correctly.
Before you insert the tape, remove any loose components from the feeder. Pay particular
attention to the areas below the removal edge and the pickup window.
NOTICE
When processing tapes with a width of 12 mm:
Make sure that the tape is threaded through the tape clip when you feed it in.