CM88Maintenace2x.PDF - 第102页
Page 1-10 Mounting Position Calibration 6 . Press UNLOCK + Unload . • The board is transported to the rear conveyor . 7 . Press UNLOCK + Carry out . • The board is ejected. 8 . T urn OFF the servo switch. ∗ Open the safe…
Page 1-9
CALIBRATION
To the next page
3Y3C-E-MMZ0A-A01-00
Mounting Position Calibration
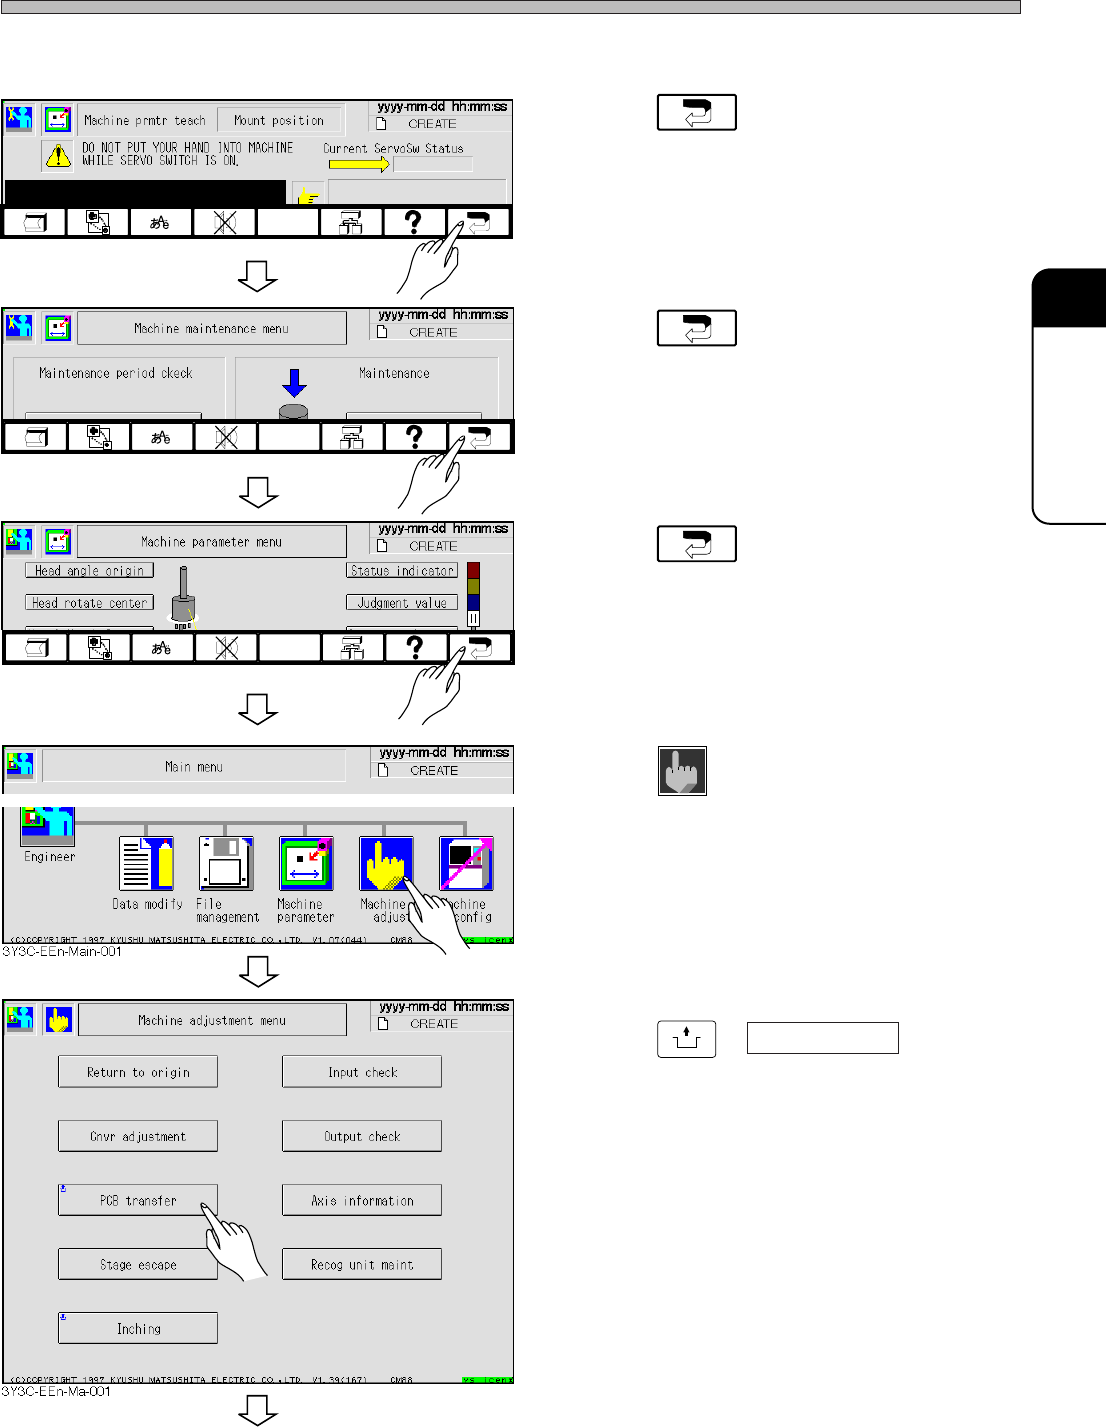
5. Ejecting the Exclusively Reserved Board and Removing the Jigs
1. Press .
• The “Machine maintenance menu” screen is
displayed.
2. Press .
• The “Machine parameter menu” screen is
displayed.
3. Press .
• The “Main menu” screen is displayed.
4. Press
Machine
adjust
.
• The “Machine adjustment menu” screen is
displayed.
5. Press
UNLOCK
+ PCB transfer .
• The “PCB transfer” screen is displayed.
3Y3C-EEn-MpMm-002
3Y3C-EEn-MpMmMp-001
3Y3C-EEn-Mp-003
Page 1-10
Mounting Position Calibration
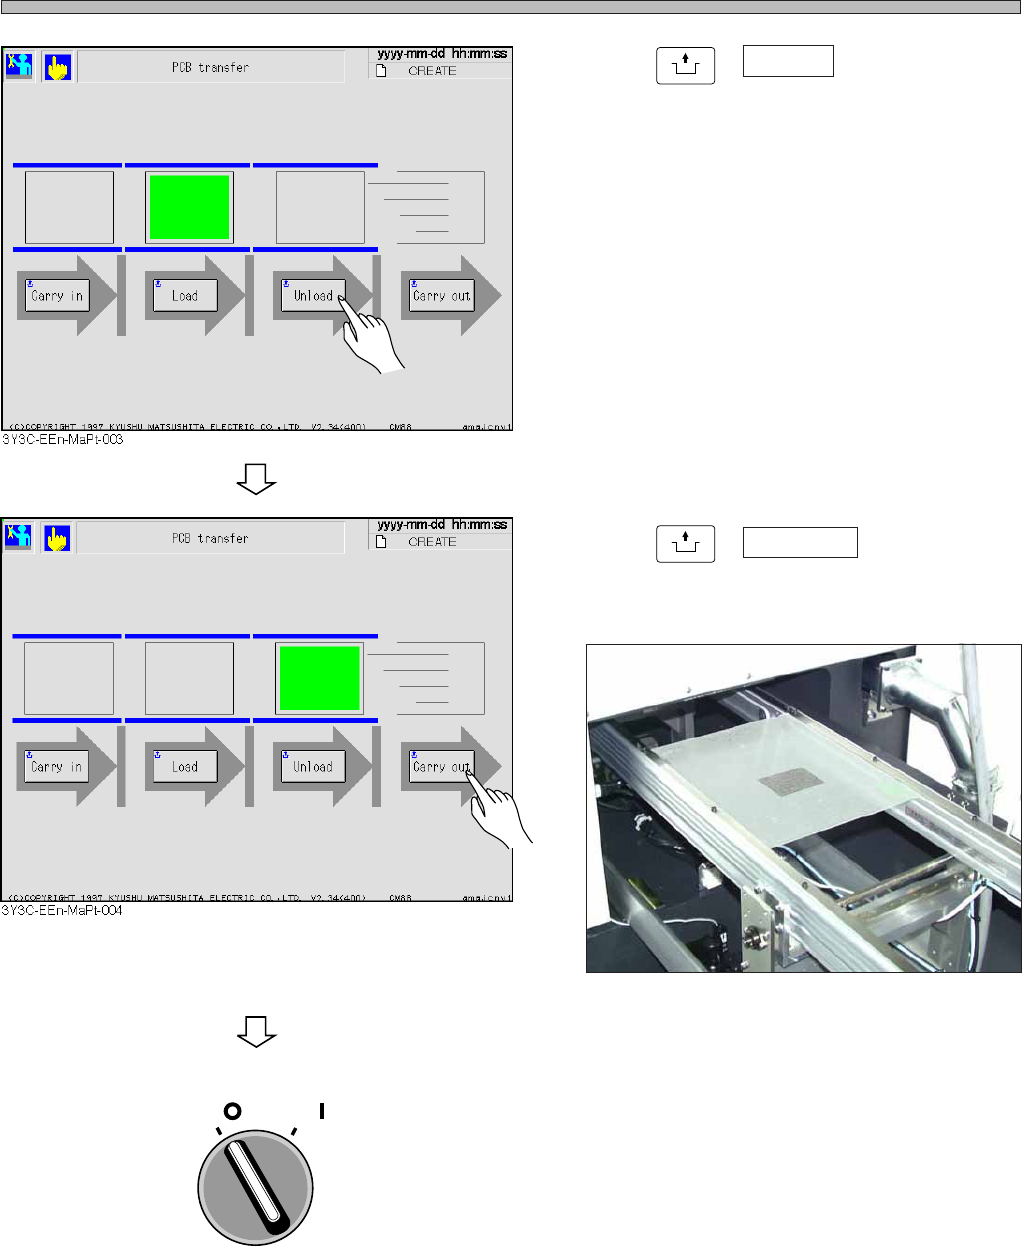
6. Press
UNLOCK
+ Unload .
• The board is transported to the rear conveyor.
7. Press
UNLOCK
+ Carry out .
• The board is ejected.
8. Turn OFF the servo switch.
∗ Open the safety cover, then remove the jigs and tape feeder.
3Y3C-E-MMZ0A-A01-00
OFF ( )
ON ( )
SERVO
3Y3C-140P
Page 1-11
CALIBRATION
3Y3C-E-MMZ0A-A01-00
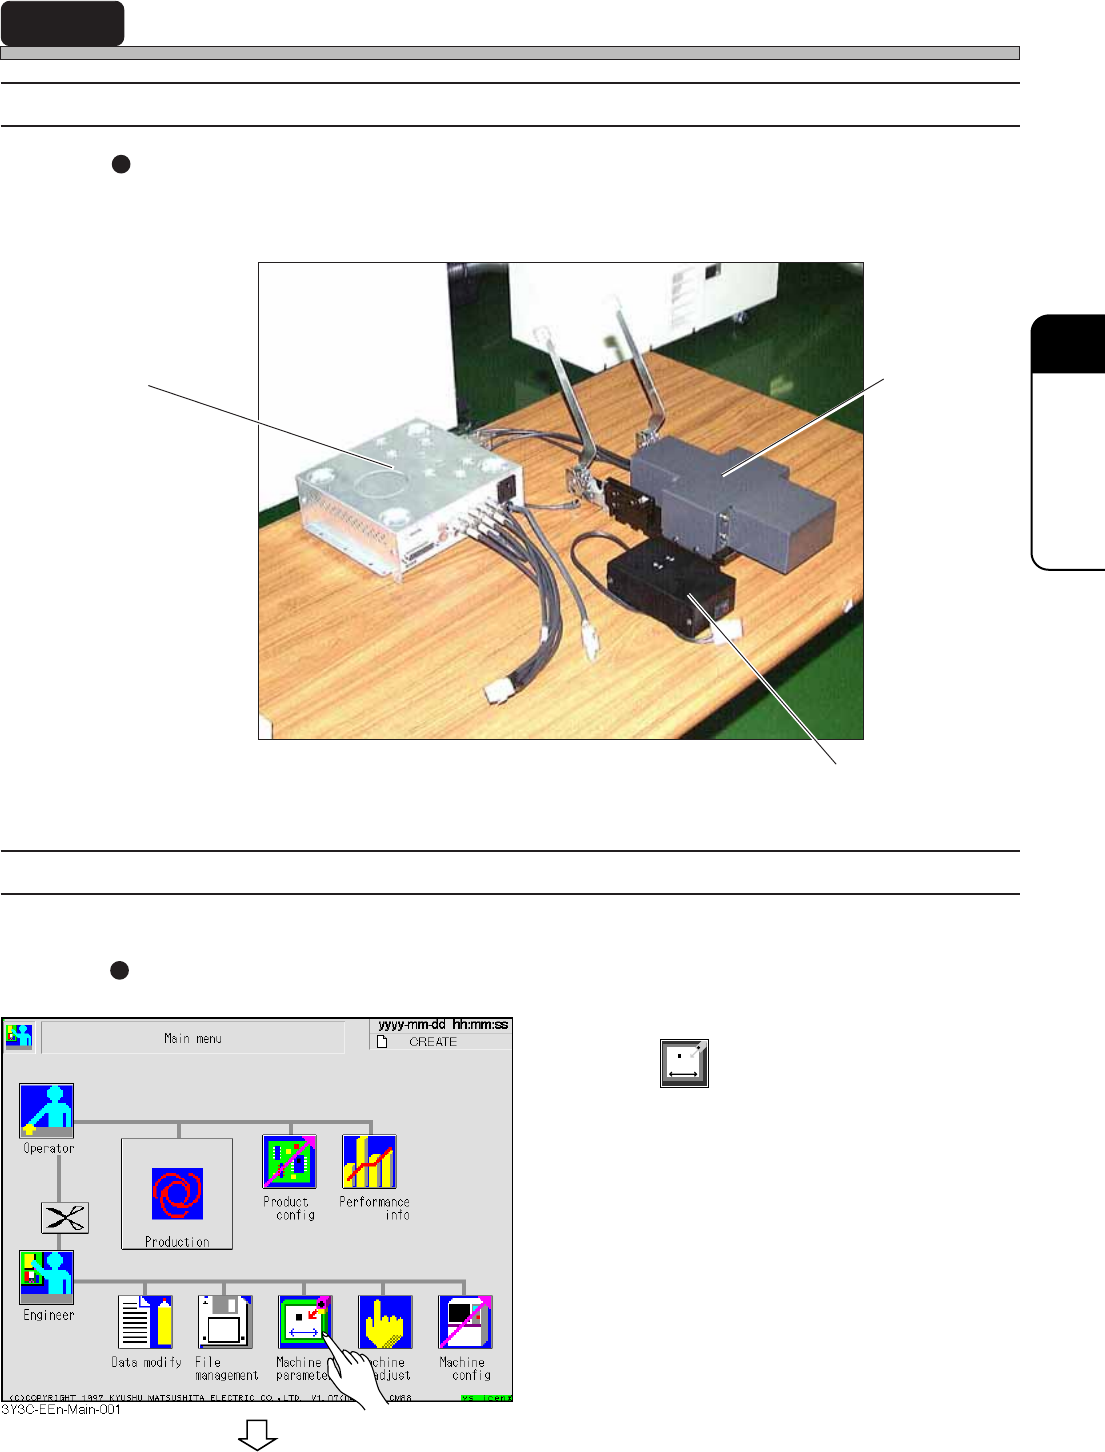
1-2 Pickup Position Calibration
1-2-1 Preparation
Pickup Position Calibration Jigs
Before setting these jigs, make sure that the power supplies of the CCU and the power supply box
are OFF.
1-2-2 Pickup Position Calibration Procedure
1. Setting the Jigs and Wiring
Setting the Jigs
1. Press
Machine
parameter
.
Camera Jig
Power Supply Box
Camera Control Unit (CCU)
To the next page
3Y3C-141P