CM88Maintenace2x.PDF - 第110页
Page 1-18 Pickup Position Calibration 5 . T urn ON the power supply . 1. Turn ON the power supply of the CCU. ∗ However , the power is not supplied from the machine. When T each start is pressed, the power is supplied fr…
Page 1-17
CALIBRATION
3Y3C-E-MMZ0A-A01-00
Pickup Position Calibration
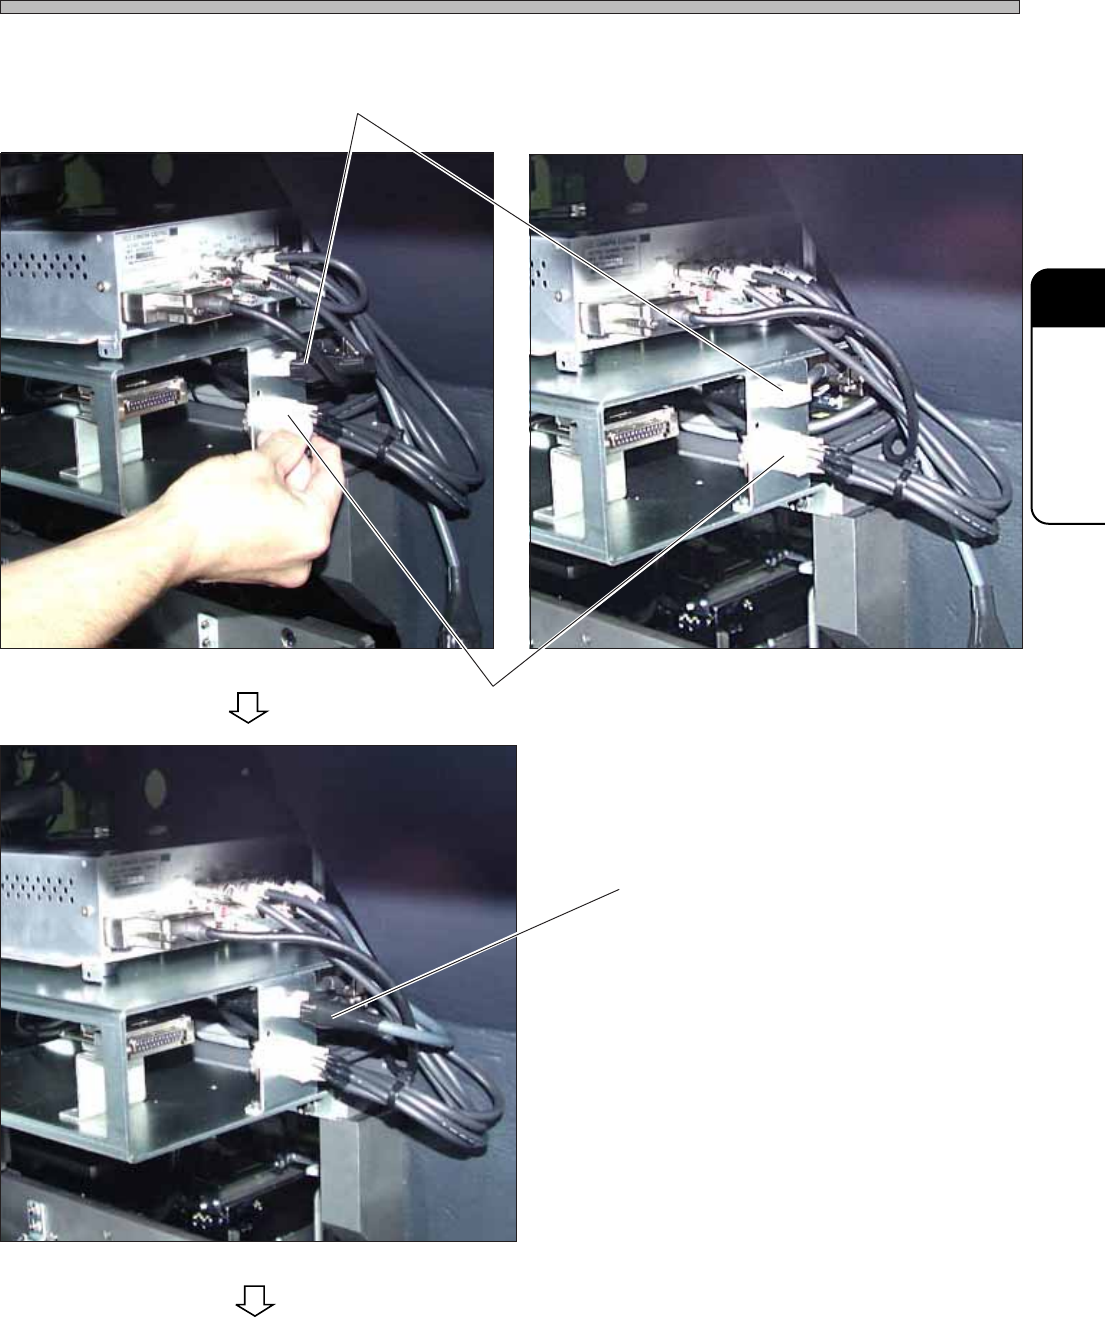
2. Connect the connector A.
3. Remove the terminator B.
4. Connect the CCU connector to B.
A
3Y3C-155P
3Y3C-156P
B
3Y3C-157P
B
To the next page
Page 1-18
Pickup Position Calibration
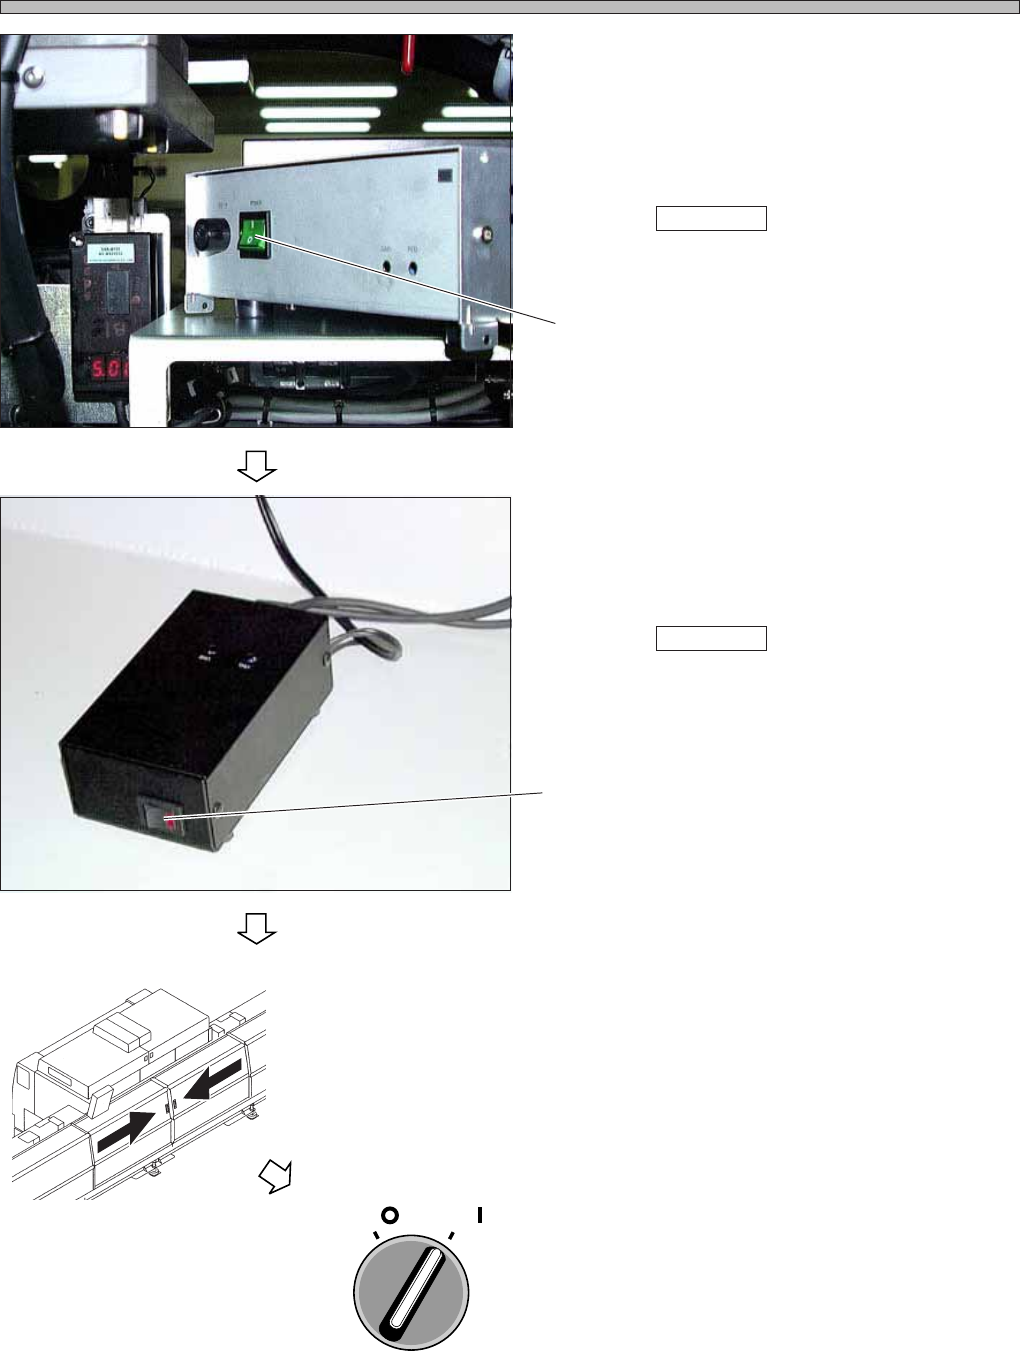
5. Turn ON the power supply.
1. Turn ON the power supply of the CCU.
∗ However, the power is not supplied from the
machine.
When Teach start is pressed, the power is
supplied from the machine.
2. Turn ON the power supply of the power supply
box.
∗ However, the power is not supplied from the
machine.
When Teach start is pressed, the power is
supplied from the machine.
6. Close the rear center safety cover.
7. Turn ON the servo switch.
3Y3C-E-MMZ0A-A01-00
Switch
3Y3C-158P
3Y3C-159P
OFF ( )
ON ( )
SERVO
Switch
3Y3C-AG01
Page 1-19
CALIBRATION
3Y3C-E-MMZ0A-A01-00
Pickup Position Calibration
2. Calibration
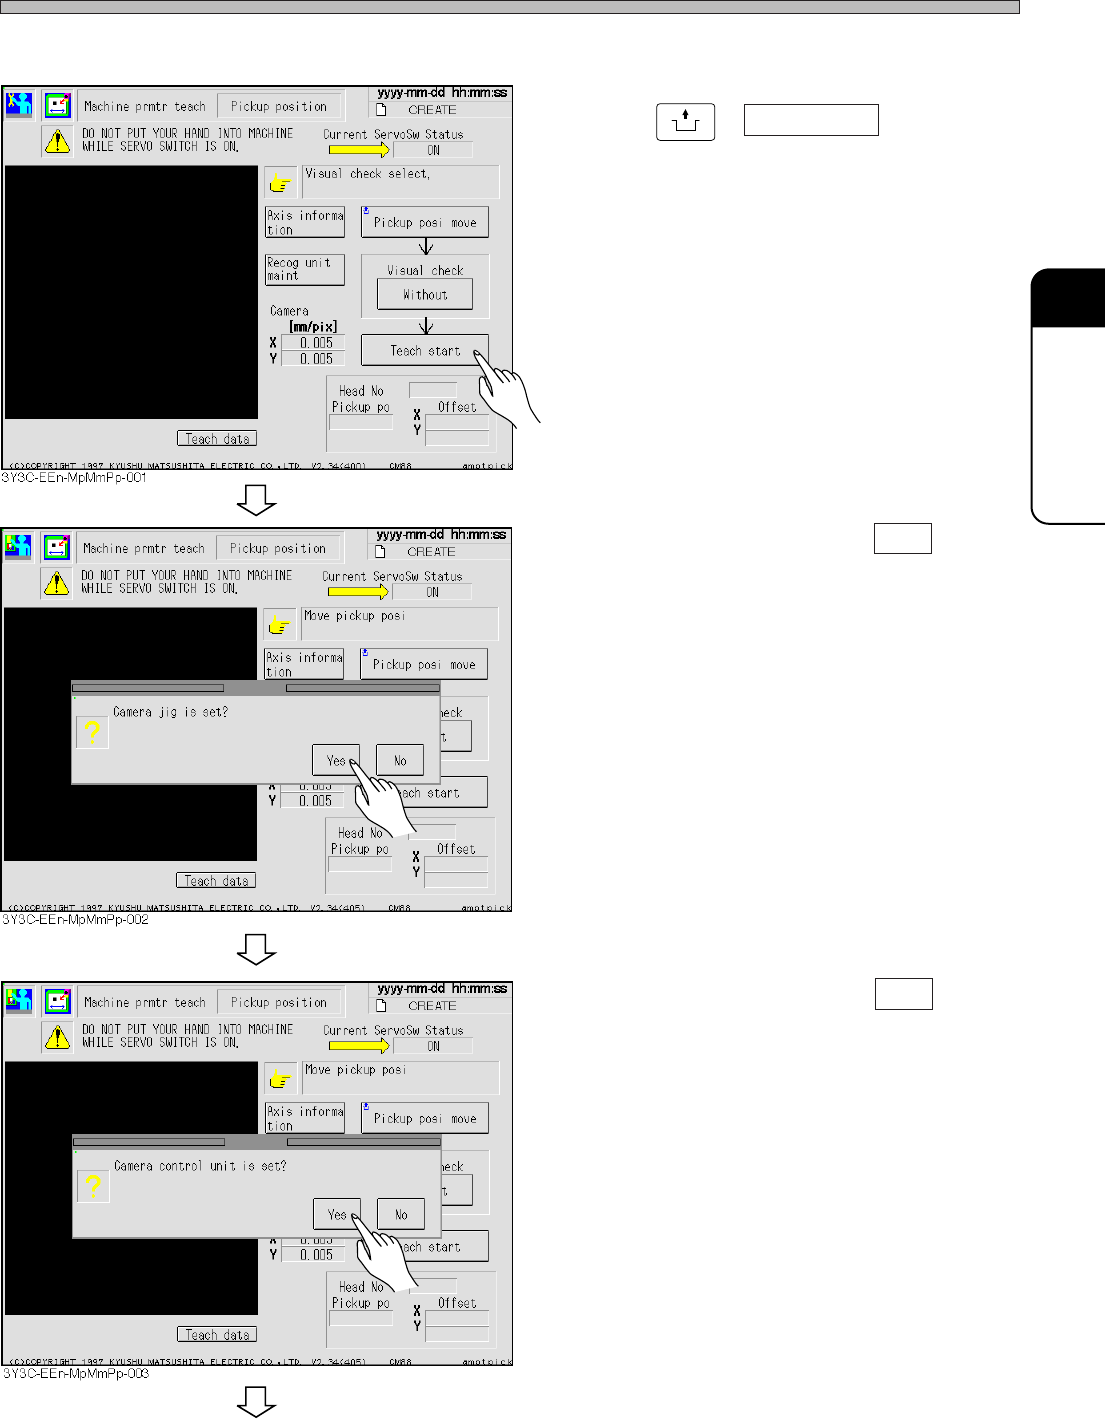
1. Press
UNLOCK
+ Teach start .
• The confirmation message appears.
2. After confirmation, press Yes .
• The confirmation message appears.
3. After confirmation, press Yes .
To the next page