KE-750_MS.pdf - 第84页
2. ATC ON/OFF Verification Cable Replacement (1) Replace either ATC OPN sensor assy (CN616) (Prod. No. E93547250A0) or ATC OPN sensor assy (CN617) (Prod. No. E93537250A0). (2) Refer to 7 - 1 - (5) and adjust sensor posit…

(6) Connect φ4 air cylinder. Open hand valve bit by bit until air comes out and connect at location (B) in
Fig. 7 - 1 - 1. Connect another at location (A).
(7) Follow (2) in reverse sequence to connect (only tighten screw provisionally).
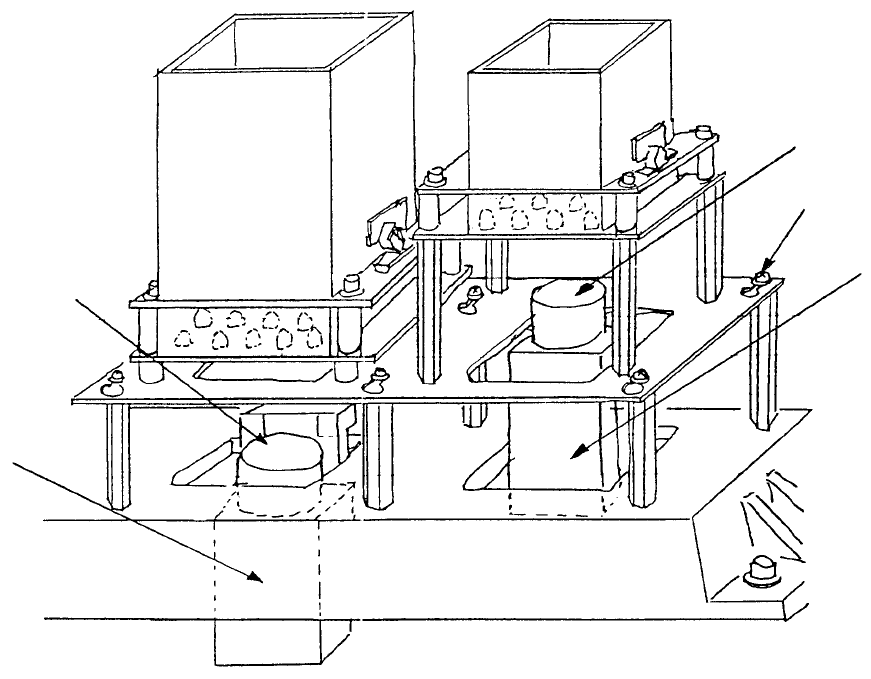
(8) Set ATC offset boss assy (jig) in the 2 holes as shown below.
While looking at the live image of the OCC camera, move head with HOD until one of the ATC is
nearly centered in the CRT.
A
TC
A
TC support angle
A
TC offset boss ass
y
(Head)
Fig. 7-1-4
Next, move HOD along X-axis (Do not move in Y-axis) until the other offset boss can be seen.
Loosen screws (a) & (b) and move ATC with ATC support angle until the boss is nearly centered in
the CRT.
Repeat this procedure with the 2 bosses until Y-axis displacement is to within 0.1mm at both ends
and then tighten screws (a) & (b).
Since camera aperture is 6.3mm and boss diameter is 2.5mm, a visual judgement must be made.
(9) Reenter MS parameters of ATC offset.
1-76
2. ATC ON/OFF Verification Cable Replacement
(1) Replace either ATC OPN sensor assy (CN616) (Prod. No. E93547250A0)
or ATC OPN sensor assy (CN617) (Prod. No. E93537250A0).
(2) Refer to 7 - 1 - (5) and adjust sensor positioning.
(3) Use cable ties to bundle and fasten wires and tubes.
1-77
Chapter 8 VCS 0.3/0.4
1. CCD Camera / Lens Replacement
(1) Loosen the 6 M3 SEMS screws by turning 5 time. Slide light base and remove.
(2) For lens replacement, while looking from above turn lens in a counterclockwise direction and
remove. Loosen the 4 screws used for focus adjustment in the new lens and firmly fasten it to the
camera.
CCD camera
M3 SEMS cap scre
w
CCD camera
Lens
(0.3 VCS) (Optional)(0.4 VCS)
Fig. 8-1-1
1-78