03253524-01 KPO 2 Closed Loop.pdf - 第21页
3 USER INFORMATION 3.4 TROUBLE SHOOTING AND ESCALATION Standalone Manual Interface To Koh Young KPO 2 08/2021 21 3.4 TROUBLE SHOOTING AND ESCALATION When running KPO, if the print process becomes unstable or falls below …
3 USER INFORMATION
3.3 GETTING STARTED
20 Standalone Manual Interface To Koh Young KPO 2 08/2021
2018-07-10 12:01:52.8953: INFO: KPOPlugIn: Parameter change: Front Print Speed - 100(mm/s) -
> 60.0(mm/s)
2018-07-10 12:01:52.8953: INFO: KPOPlugIn: Parameter change: Rear Print Speed - 100(mm/s) -
> 60.0(mm/s)
2018-07-10 12:01:52.8953: INFO: KPOPlugIn: Parameter change: Front Pressure - 0(kg) -> 53.14(N)
2018-07-10 12:01:52.8953: INFO: KPOPlugIn: Parameter change: Rear Pressure - 0(kg) -> 53.14(N)
2018-07-10 12:01:52.8953: INFO: KPOPlugIn: Parameter change: Separation Speed - 20(mm/s) ->
5.0(mm/s)
Printing With Parameter Changes
NOTE
KPO uses Newtons for print pressure. The printer software automatically converts to kg or lbs.
3 USER INFORMATION
3.4 TROUBLE SHOOTING AND ESCALATION
Standalone Manual Interface To Koh Young KPO 2 08/2021 21
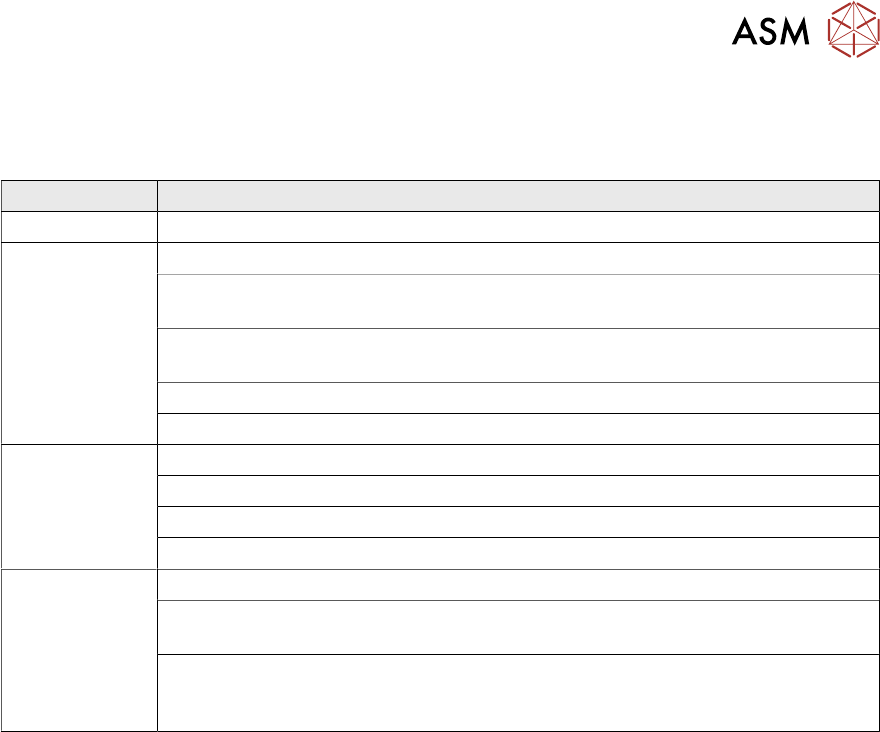
3.4 TROUBLE SHOOTING AND ESCALATION
When running KPO, if the print process becomes unstable or falls below production quality targets,
use the following troubleshooting and escalation process table:
Step Task
1 Follow the troubleshooting guidelines in Koh Young’s supporting documentation
2 Confirm Print Process:
Check that all process hardware is still in good condition; ie no damage or wear
to stencil, tooling, squeegees etc
Check that the quantity of paste on the stencil is controlled and within specified
limits
Check under stencil cleaner functionality
Escalate to a trained process engineer for process troubleshooting
3 Confirm Printer Capability:
Check machine condition and setup
Run printability test using a test board or similar
Escalate to trained maintenance engineer for machine troubleshooting
4 Further Escalation:
If the printer condition and performance is acceptable but there are issues while
running under KPO closed loop control, escalate to a Koh Young representative
If there are issues with the printer performance after eliminating the process
hardware, process recipe and machine maintenance as the root cause, contact
your local ASM service control centre for further advice
3 USER INFORMATION
3.4 TROUBLE SHOOTING AND ESCALATION
22 Standalone Manual Interface To Koh Young KPO 2 08/2021
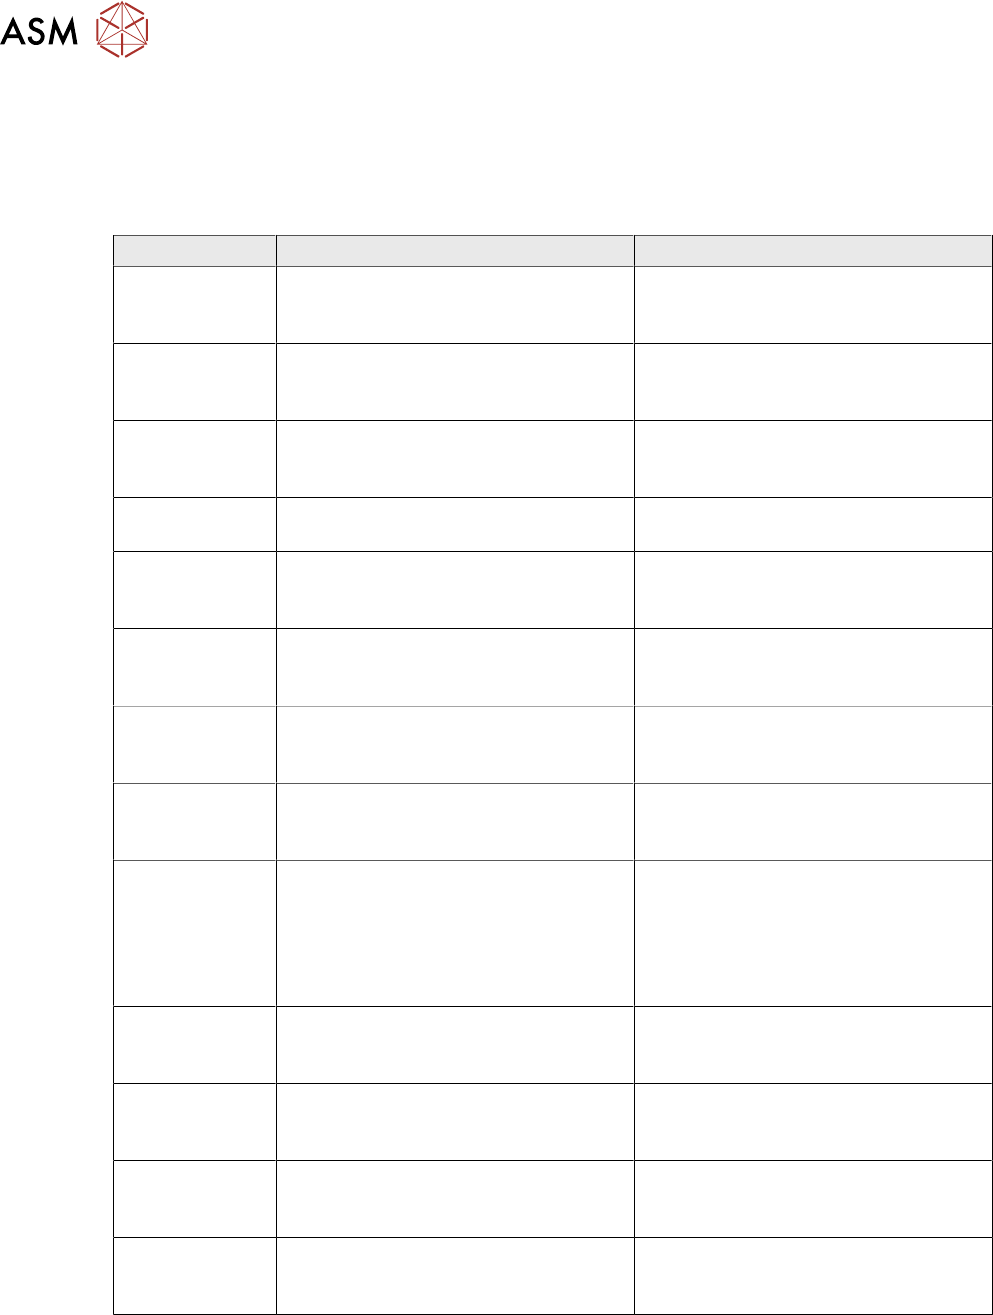
3.4.1 Appendix A - Printer Preparation
ProDEK should be run in advance to ensure print alignment.
NOTE
The pre-requisite to any KPO testing is the printer is maintained, calibrated and passed as ready
for production.
Step Task Comments
1 Check the machine environment (tem-
perature and humidity) is within spe-
cification
2 Confirm printer product file matches
SPI product file and both match the
product setup sheet
3 Ensure all process hardware (stencil,
tooling and squeegees) are correct as
per the product setup sheet
4 Ensure stencil, tooling and squeegees
are clean and free from damage
5 Ensure print area (transport belts,
board clamps and table top) are clean
and free from damage
6 If running a PAM test, ensure there is
sufficient quantity of panels to com-
plete the setup, test and validation
7 If using barcode verification, assemble
the reader and ensure the barcodes
are read repeatedly and reliability
8 If running a PAM test, set the consum-
able warning mode in the printer soft-
ware to ‘Suspend’
9 If running a PAM test, it is recommen-
ded to ensure enough under stencil
cleaner paper and solvent to complete
the required number of cleaning se-
quences (although these can be re-
plenished mid PAM if required)
10 Use Open Cover commands to prime
the paper and solvent. Ensure the
cleaner works correctly
11 Use a transparent stencil or empty
stencil frame to verify Mode 1 cleaning
sequence is functioning correctly
12 Maintain the solder paste bead dia-
meter within specification throughout
the testing
13 Run print verification and ensure that
the solder paste is aligned accurately
to the PCB pads