00198829-01_SM_X-Series-S_Hxxxx_EN.pdf - 第60页
3 Power supply 3.4 Power supply and transformer modules 60 Service Manual SIPLACE X-Series S (from Hxxxx) 01/2021 3.4.8 Replacing the main switch Parts, equipment and tools ● Main switch 3 pin 25A type P1-25/V/SVB [03114…
3 Power supply
3.4 Power supply and transformer modules
Service Manual SIPLACE X-Series S (from Hxxxx) 01/2021 59
3.4.7 Setting the Voltage on the AC/DC Converters
Parts, equipment and tools
●
Voltage measuring device
Overview
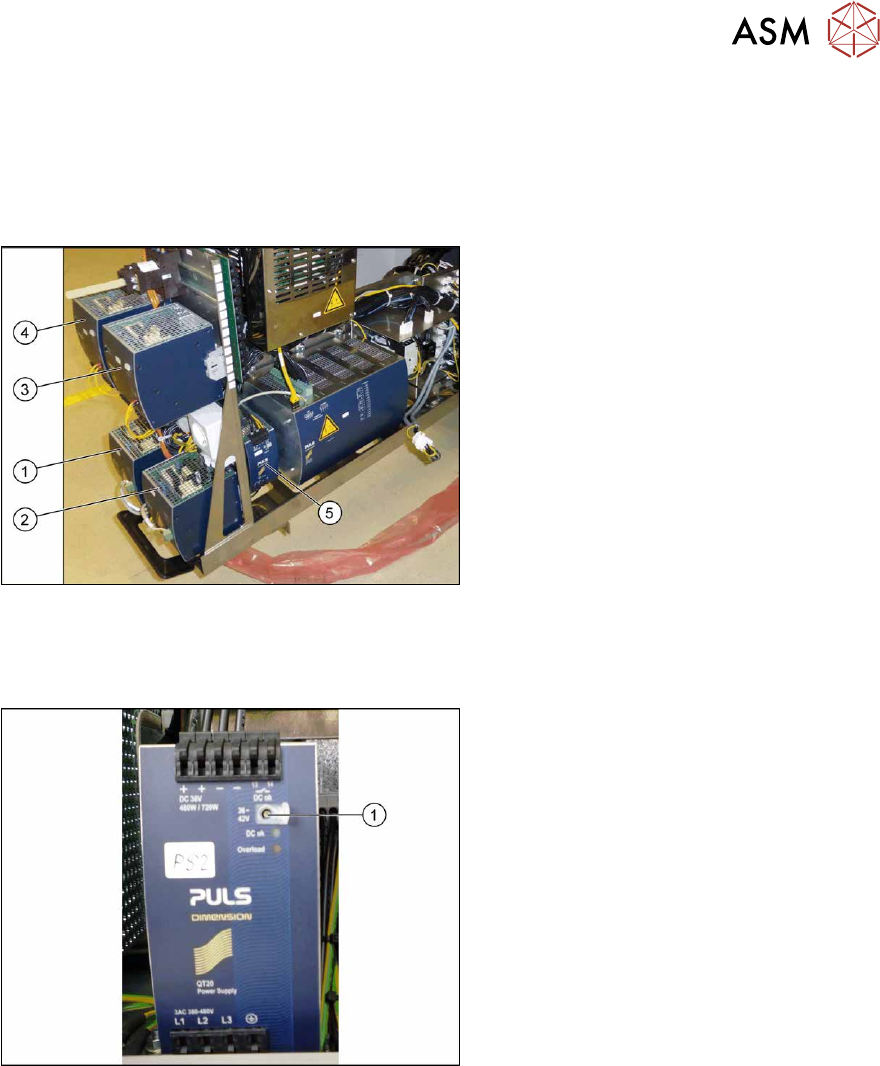
Fig.63: Overview of the AC/DC converter
1. PS1: AC-/DC converter DC300/150V
1.3kW 3 phase [03103087‑xx]
300/160 V for gantry 1/4
2. PS2: AC-/DC converter DC300/150V
1.3kW 3 phase [03103087‑xx]
300/160 V for gantry 2/3
3. PS3: AC/DC converter 36V 26.7A
960W 3 phase [03103331‑xx]
→ 42 V for Vision, head, conveyor mo-
tors
4. PS4: AC/DC converter DC24V/40A 3
phase [03102840‑xx]
→ 27 V for FCU
5. PS5: AC/DC converter DC24V/20A
3 phase [03055232‑xx]
→ 24V
Setting
Fig.64: Setting the AC-DC converter
► Open the protective cap on the setting
screw(1)
.
► Use a flat-bladed screwdriver to set the
correct voltage on the AC/DC con-
verter.
Check the voltage with a suitable
voltage measuring device between the
terminals +
and–.
3 Power supply
3.4 Power supply and transformer modules
60 Service Manual SIPLACE X-Series S (from Hxxxx) 01/2021
3.4.8 Replacing the main switch
Parts, equipment and tools
●
Main switch 3 pin 25A type P1-25/V/SVB [03114066-xx]
Overview
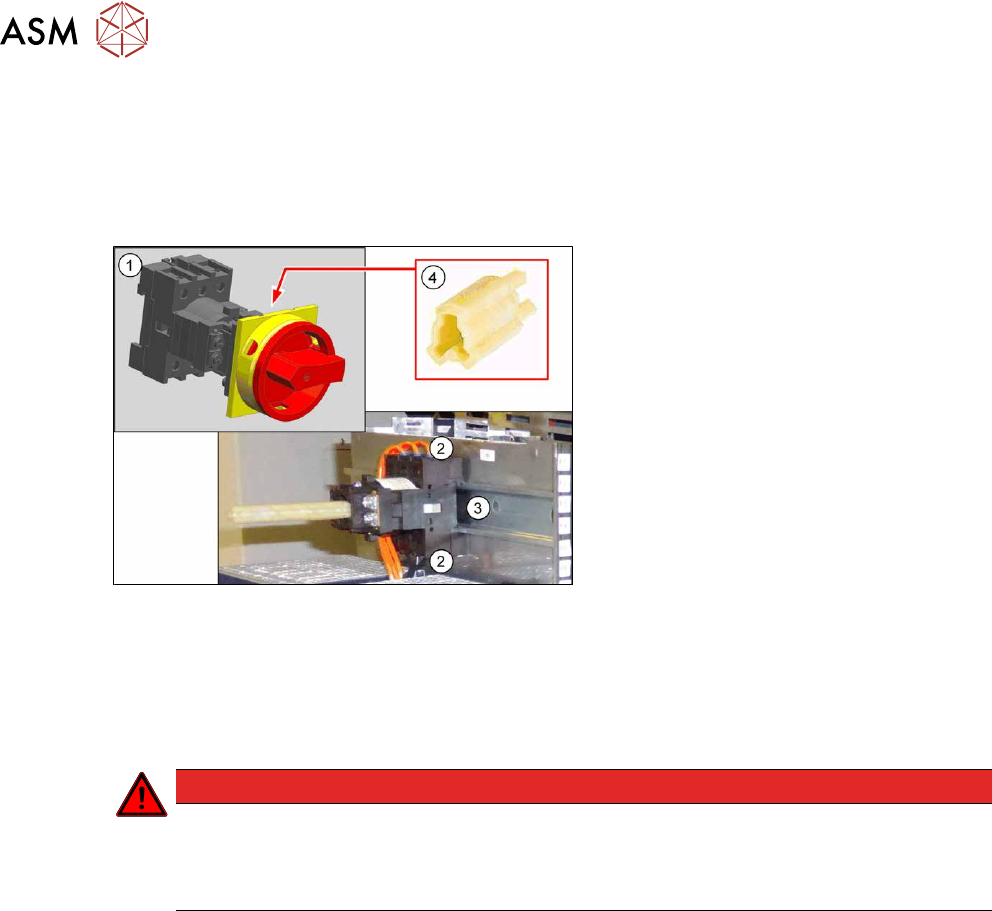
Fig.65: Main switch - overview
1. Main switch 3 pin 25A type P1-25/V/
SVB [03114066-xx]
2. Electrical connections (3 each on top
and bottom)
3. Mounting rail
4. Axis extension ZAV-T0 for T0, T1, P1
[03119456‑xx]
Removal
► Switch off the machine, disconnect it from the power supply and secure it to prevent
unauthorized reactivation.
1.2 "Preparatory work..." [}16]
DANGER
Checking for absence of voltage!
► Before you start working check the power supply for absence of voltage and observe
the waiting times! For more information about this read section 3.4.3
"Checking For
Absence of Voltage" [}49].
► Unplug the electrical connections on top and bottom of the main switch. You might like to
mark their positions to make clear assignment easier later on.
► Pull the main switch off the mounting rail.
Installation
Follow the removal instructions in reverse order for installation.
3 Power supply
3.4 Power supply and transformer modules
Service Manual SIPLACE X-Series S (from Hxxxx) 01/2021 61
3.4.9 Replacing the circuit breaker
Parts
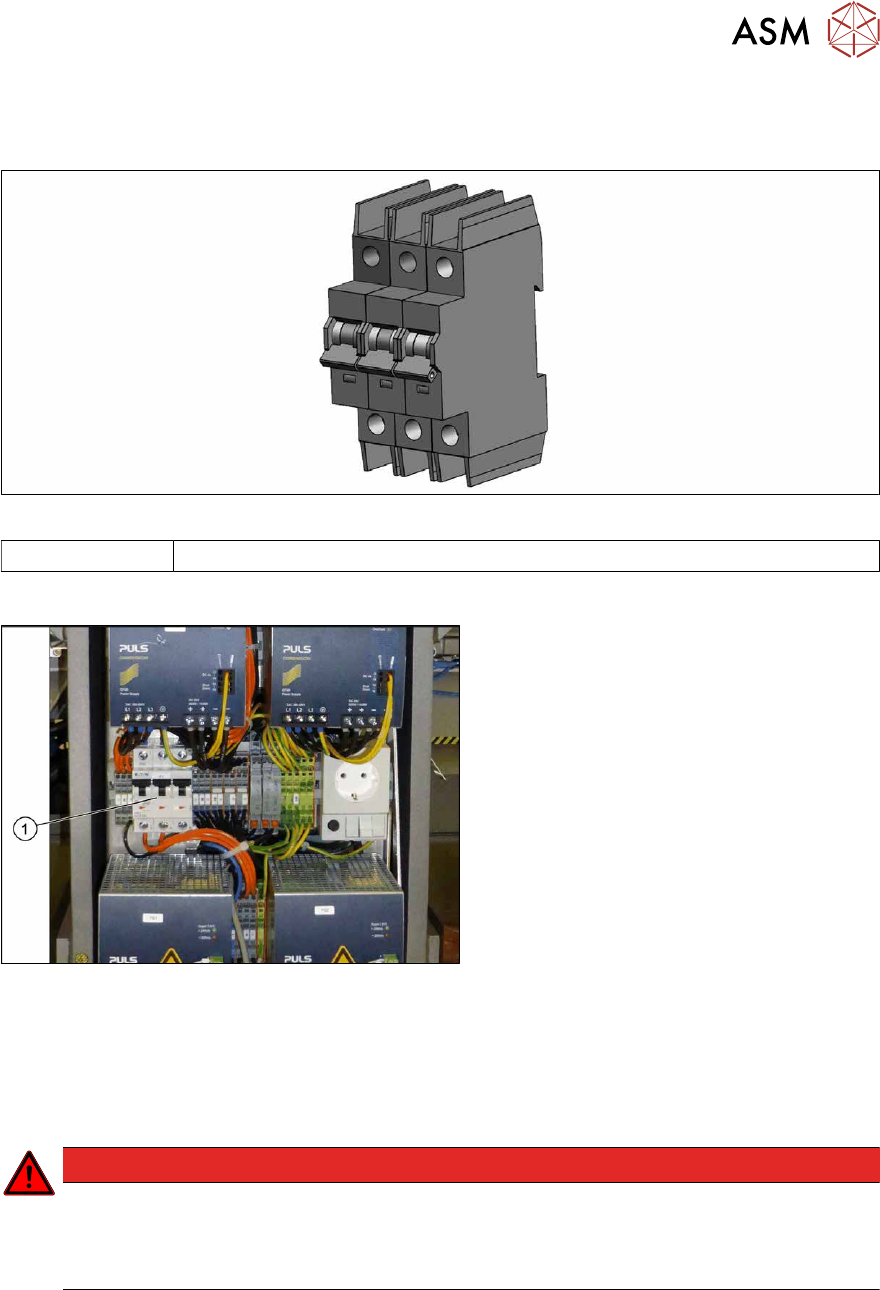
Fig.66: Circuit breaker
03118366‑xx Circuit breaker FAZ-C16/3-NA 16A 3p
Overview
Fig.67: Circuit breaker
1. Circuit breaker on the front of the
power supply
Removal
► Switch off the machine, disconnect it from the power supply and secure it to prevent
unauthorized reactivation.
1.2 "Preparatory work..." [}16]
DANGER
Checking for absence of voltage!
► Before you start working check the power supply for absence of voltage and observe
the waiting times! For more information about this read section 3.4.3
"Checking For
Absence of Voltage" [}49].
► Unplug the electrical connections on top and bottom of the circuit breaker. You might like to
mark their positions to make clear assignment easier later on.
► Lift off the circuit breaker from the assembly rail. To do this, pull downward the two black lugs
that are located on the left and right side at the rear of the circuit breaker.
► Lift off the circuit breaker from the assembly rail.
Installation
Follow the removal instructions in reverse order for installation.