00198829-01_SM_X-Series-S_Hxxxx_EN.pdf - 第74页
4 Electrics and control system 4.5 Indicator lamp 74 Service Manual SIPLACE X-Series S (from Hxxxx) 01/2021 Two/three color indicator lamp Fig.82: Three/two color indicator lamp Fig.83: Setting the three/two color indi…
4 Electrics and control system
4.5 Indicator lamp
Service Manual SIPLACE X-Series S (from Hxxxx) 01/2021 73
4.5 Indicator lamp
4.5.1 Replacing the indicator lamp/module
Parts
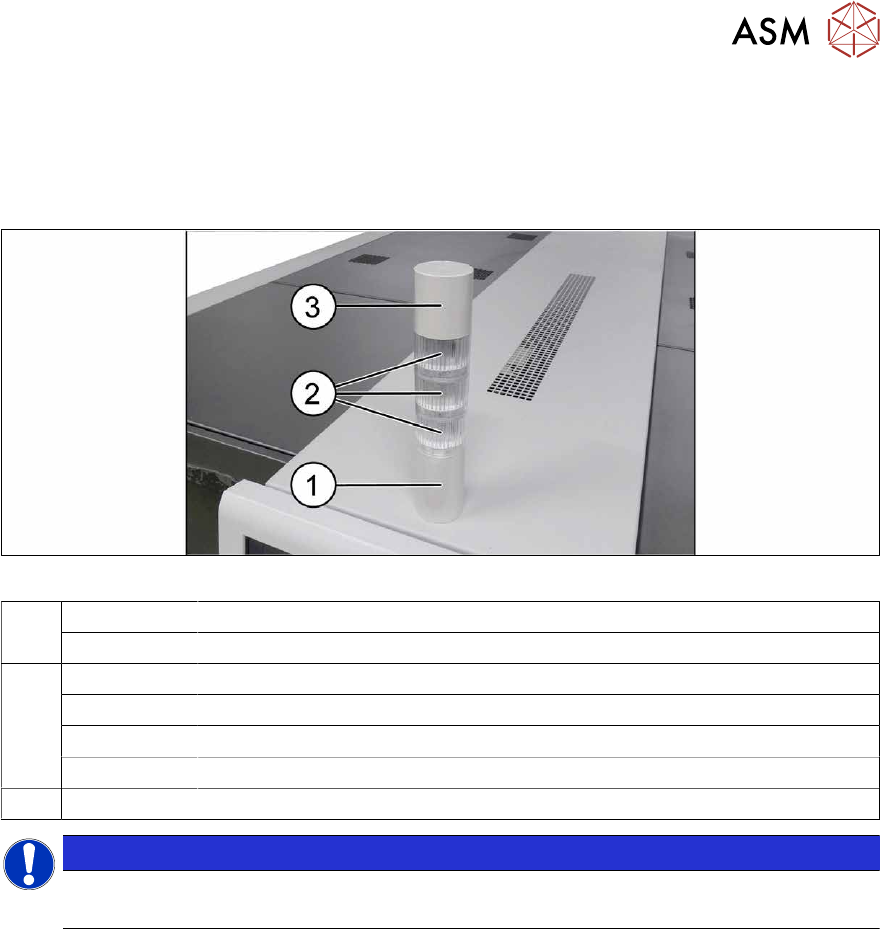
Fig.81: Indicator lamp
1 03162662-xx Basic module
03103211-xx Connecting cable
2 03162664-xx LED module LR5-E-RZ 50mm red, transparent
03162665-xx LED module LR5-E-YZ 50mm yellow, transparent
03162663-xx LED module LR5-E-GZ 50mm green, transparent
03162666-xx LED module LR5-E-CZ 50mm white, transparent
3 03162667‑xx Buzzer module LR5-BW 50mm
NOTICE
Do not separate the LED and its housing
The LED and the transparent housing can not be separated from one another.
4 Electrics and control system
4.5 Indicator lamp
74 Service Manual SIPLACE X-Series S (from Hxxxx) 01/2021
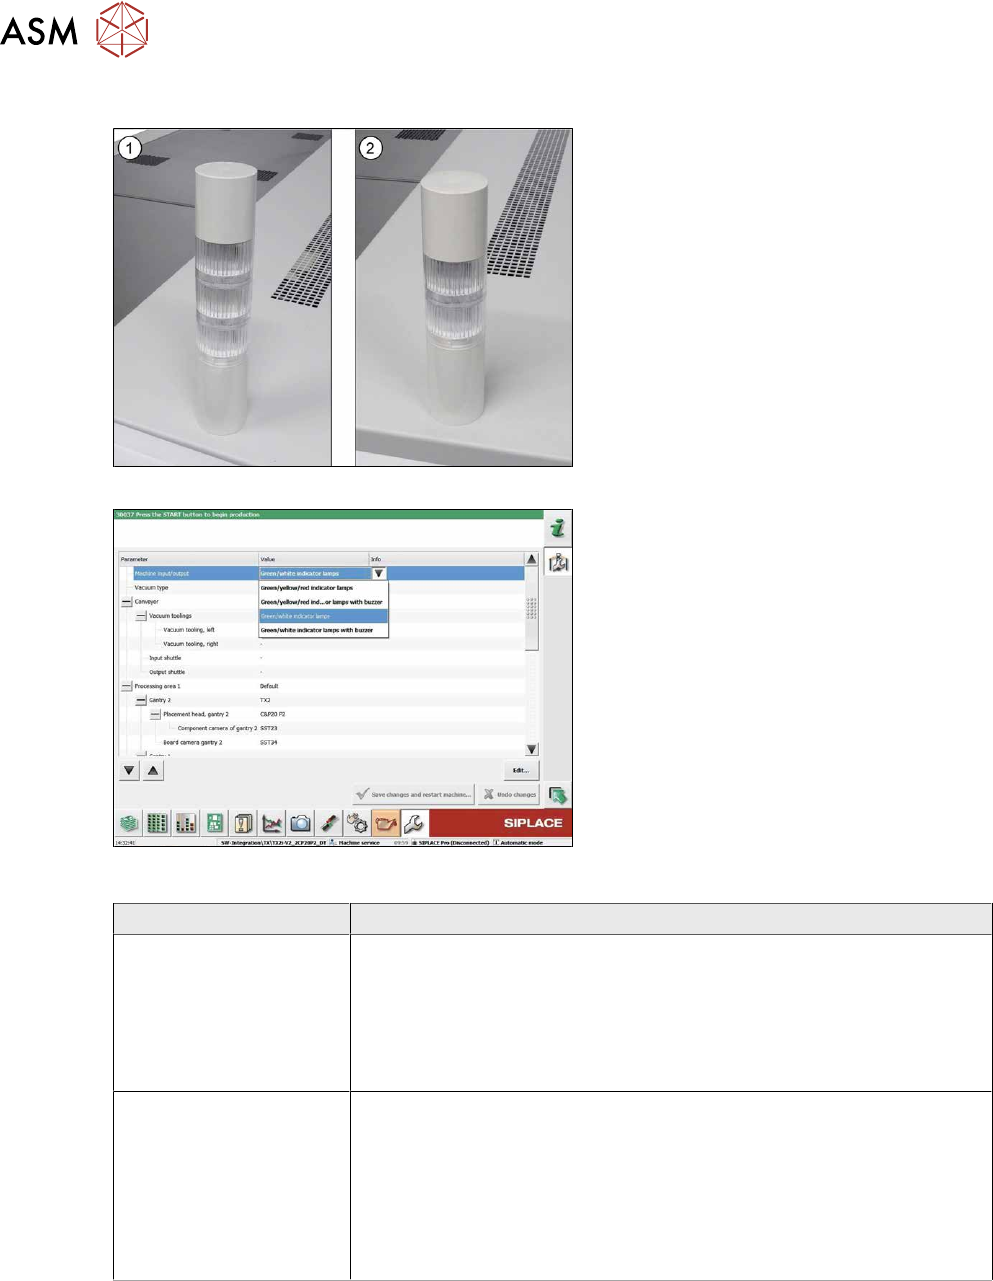
Two/three color indicator lamp
Fig.82: Three/two color indicator lamp
Fig.83: Setting the three/two color indicator lamp
The indicator lamp can either be configured
as a two or three color version:
1. Three color indicator lamp (red/yellow/
green)
2. Two color indicator lamp (white/green)
To convert from two to three color (or vice
versa), fit the relevant LED modules and set
the correct option in the machine configura-
tion.
Variant Parts
Two color variant
(green/white)
●
Basic module [03162662-xx]
●
Connection cable [03103211-xx]
●
Buzzer module LR5-BW 50mm [03162667‑xx]
●
LED module LR5-E-GZ 50mm green, transparent [03162663‑xx]
●
LED module LR5-E-CZ 50mm white, transparent [03162666‑xx]
Three color variant
(green/yellow/red)
●
Basic module [03162662-xx]
●
Connection cable [03103211-xx]
●
Buzzer module LR5-BW 50mm [03162667‑xx]
●
LED module LR5-E-GZ 50mm green, transparent [03162663‑xx]
●
LED module LR5-E-YZ 50mm yellow, transparent [03162665‑xx]
●
LED module LR5-E-RZ 50mm red, transparent [03162664‑xx]
4 Electrics and control system
4.5 Indicator lamp
Service Manual SIPLACE X-Series S (from Hxxxx) 01/2021 75
Removal
► Switch off the machine, disconnect it from the power supply and secure it to prevent
unauthorized reactivation.
1.2 "Preparatory work..." [}16]
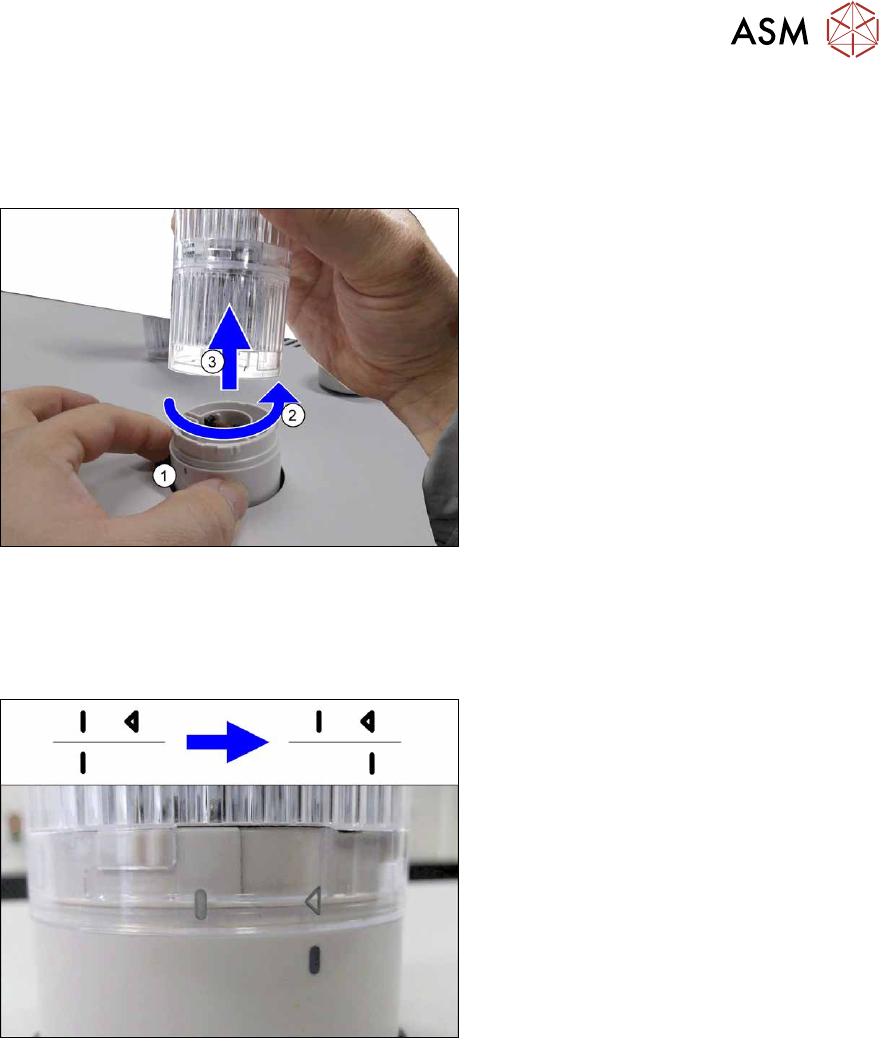
Fig.84: Removing the indicator lamp
► Hold the base(1) of the indicator lamp
tightly, so that it does not rotate.
► Turn the top section of the indicator
lamp approx. 2cm anti-clockwise(2)
and then take the indicator lamp up and
off(3)
.
Installation
Installation is performed by following the above instructions in the reverse order. Also observe the
following instructions:
Fig.85: LED module with housing
Assembling the modules
► When assembling the modules, pay at-
tention to the line and arrow markings.
► First fit the modules together so that
the lines are on one another.
► Now turn the top modules approx. 2cm
clockwise, until the arrow is over the
line.
Hold the base tightly during this, so that
it does not turn.