00198829-01_SM_X-Series-S_Hxxxx_EN.pdf - 第99页
5 Pneumatic System 5.12 Vacuum Pump Service Manual SIPLACE X-Series S (from Hxxxx) 01/2021 99 5.12 Vacuum Pump DANGER Observe User Manual ► Please observe the safety instructions in the user manual for all work! NOTICE D…
5 Pneumatic System
5.11 Replacing the electronic ballast for the ELMO blower
98 Service Manual SIPLACE X-Series S (from Hxxxx) 01/2021
5.11 Replacing the electronic ballast for the ELMO blower
Parts, equipment and tools
●
Electronic ballast for ELMO blower [03006517-xx]
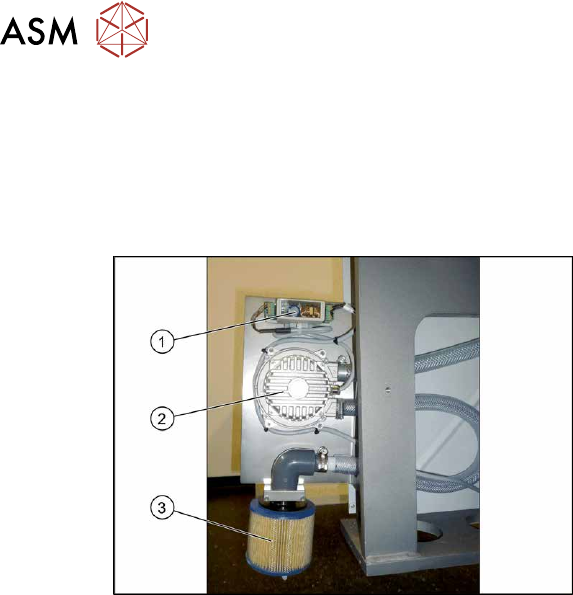
Overview
Fig.121: ELMO blower
1. Elmo blower electronics
2. Elmo blower
3. Cooling air filter
The ELMO blower is located at location 3,
behind the side cover.
Removal/installation
► Removal and installation of the Elmo blower electronics is the same as that for the Elmo
blower itself. For more information, read section 5.10
"Replacing the side channel compressor
Elmo blower (location 3)" [}97].
5 Pneumatic System
5.12 Vacuum Pump
Service Manual SIPLACE X-Series S (from Hxxxx) 01/2021 99
5.12 Vacuum Pump
DANGER
Observe User Manual
► Please observe the safety instructions in the user manual for all work!
NOTICE
Different vacuum pump versions
The following tasks are described using the new version "Vacuum pump Becker VX 4.25
IE3 with cable" [03212135Sxx]. The procedure is the same for the old version
[03069679‑xx]. Any relevant differences will be mentioned explicitly.
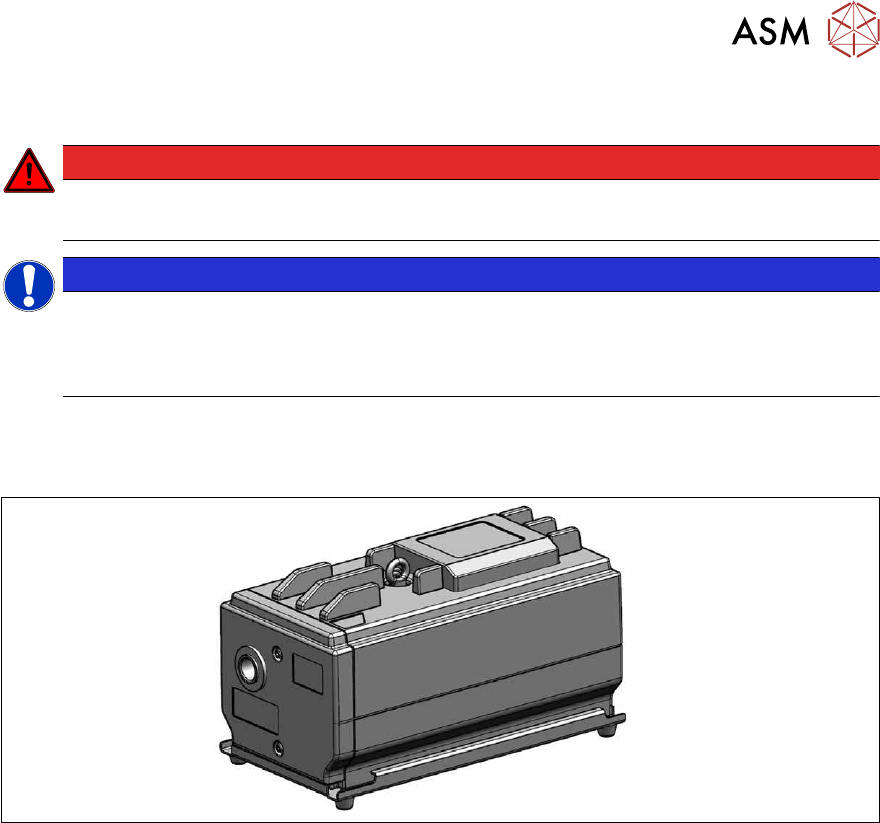
5.12.1 Replacing the pump and spare parts
Parts
Fig.122: Becker VX 4.25 IE3 vacuum pump with cable [03212135-xx]
●
Becker VX 4.25 IE3 vacuum pump with cable [03212135Sxx] (replaces [03069679-xx])
●
Filter insert [03077677‑xx]
See 5.12.2
"Replacing the filter insert" [}100]
●
Slide set [03077679‑xx]
See 5.12.3
"Replacing the slide set" [}101]
For other spare parts, see the catalogue of parts.
Removal/installation
Refer to the assembly instructions for your machine for this:
●
Assembly instructions "Option Vacuum Pump SIPLACE X-Series S from Hxxxx " [DEEN:
00198599‑xx]
5 Pneumatic System
5.12 Vacuum Pump
100 Service Manual SIPLACE X-Series S (from Hxxxx) 01/2021
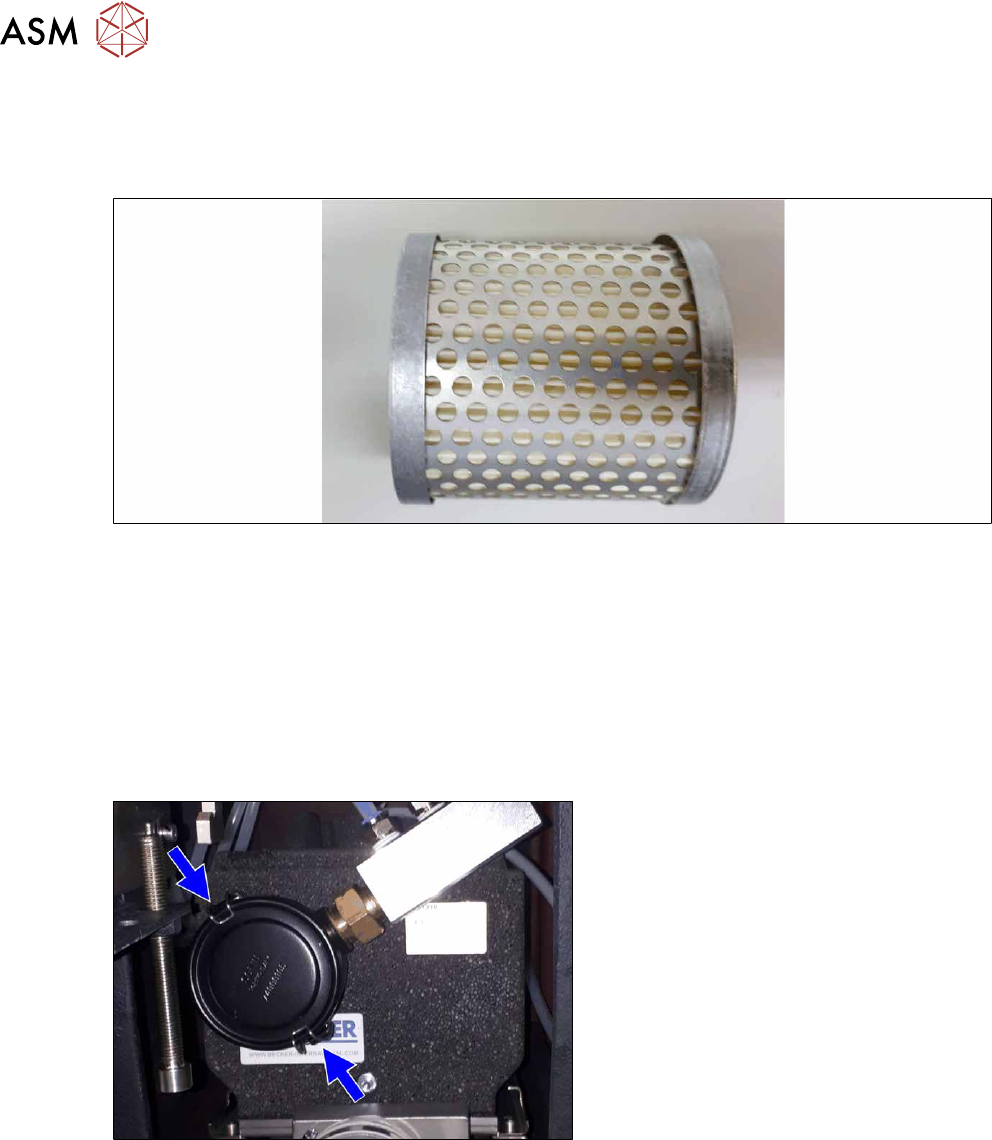
5.12.2 Replacing the filter insert
Read the job cards for your machine.
Parts, equipment and tools
Fig.123: Filter insert
●
Filter insert [03077677‑xx]
Removal/installation
► Switch off the machine, disconnect it from the power supply and secure it to prevent
unauthorized reactivation.
1.2 "Preparatory work..." [}16]
► Switch off the compressed air supply and then disconnect the machine from the compressed
air supply.
5.2 "Disabling the compressed air supply" [}86]
Fig.124: Retaining clips (example of SIPLACE SX2 shown)
► Open the edgewise retaining clamps of
the filter casing and remove the cap.