444CEMM2(CM201).pdf - 第17页
Page 2-17 MACHINE P ARAMETER 2 2 2 Procedures of Machine Parameter T eaching 9. Set the nozzles to all the nozzle holders. • At this time, 3 is displayed in the pos field. 10. Close the safety cover . 11 . T urn ON the s…
Page 2-16
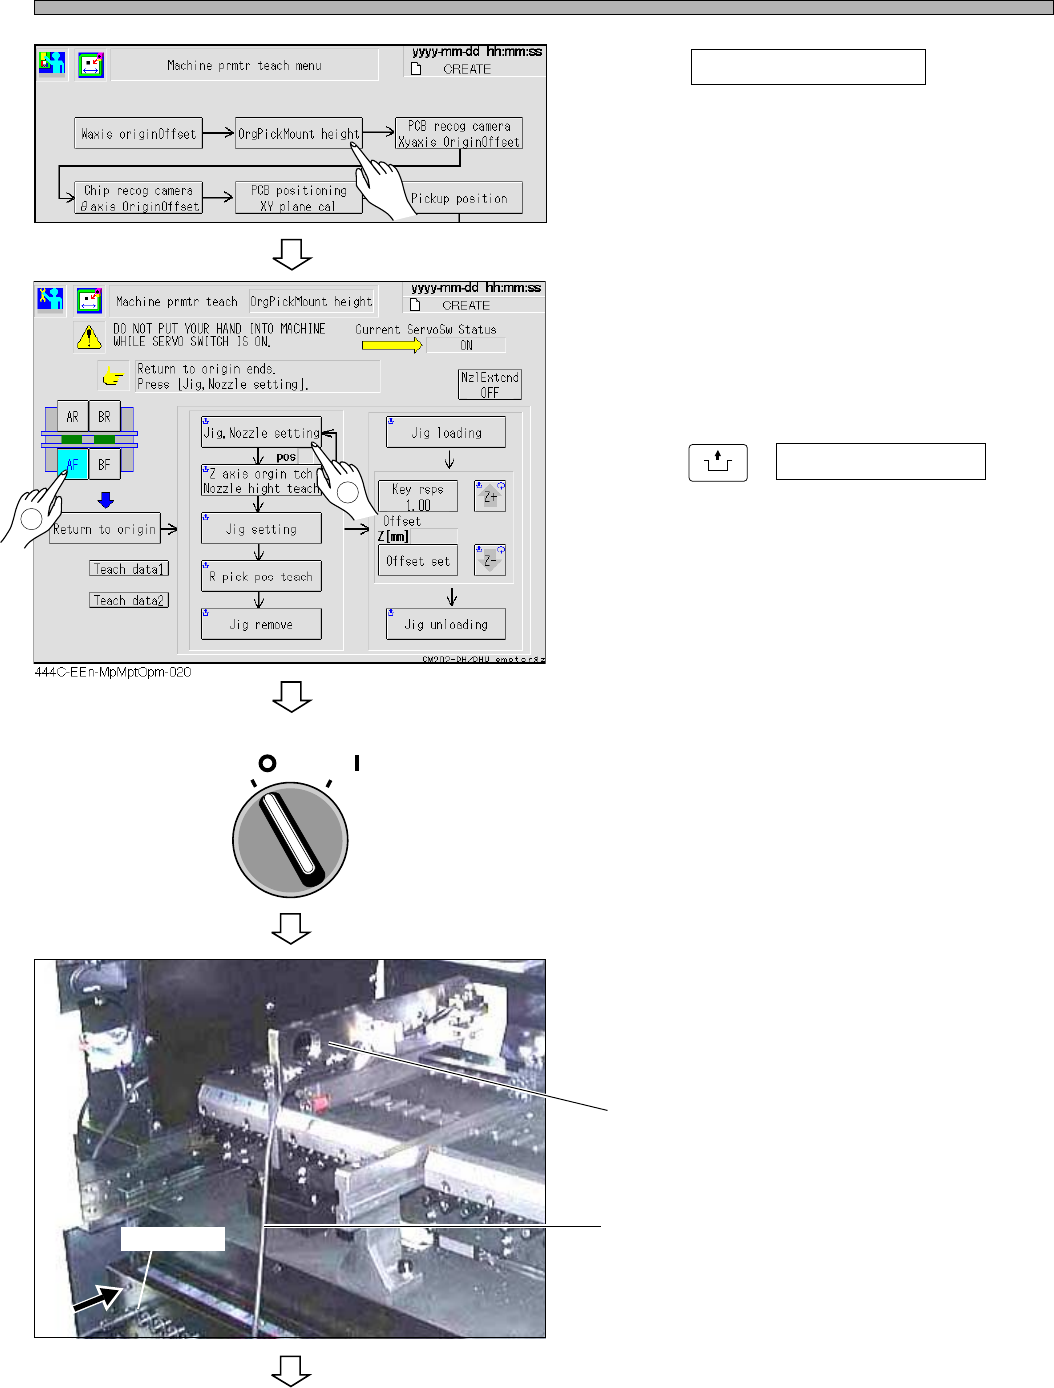
Procedures of Machine Parameter Teaching
3. Press OrgPickMount height .
• The “Origin Pickup Mount Height” screen
appears.
4. Select the stage for teaching.
5. Press
UNLOCK
+ Jig, Nozzle setting .
6. Turn OFF the servo switch.
7. Open the safety cover.
8. Set the height teaching jig to the slot
No. 7 on the feeder base and connect
the cable to the connector at the left
end.
To the next page
444C-EEn-MpMpt-004
444C-E-MMA02-A02-06
1
Height teaching jig
Cable
OFF ( )
ON ( )
SERVO
444C-476P
Connector
2
Page 2-17
MACHINE PARAMETER
2
2
2
Procedures of Machine Parameter Teaching
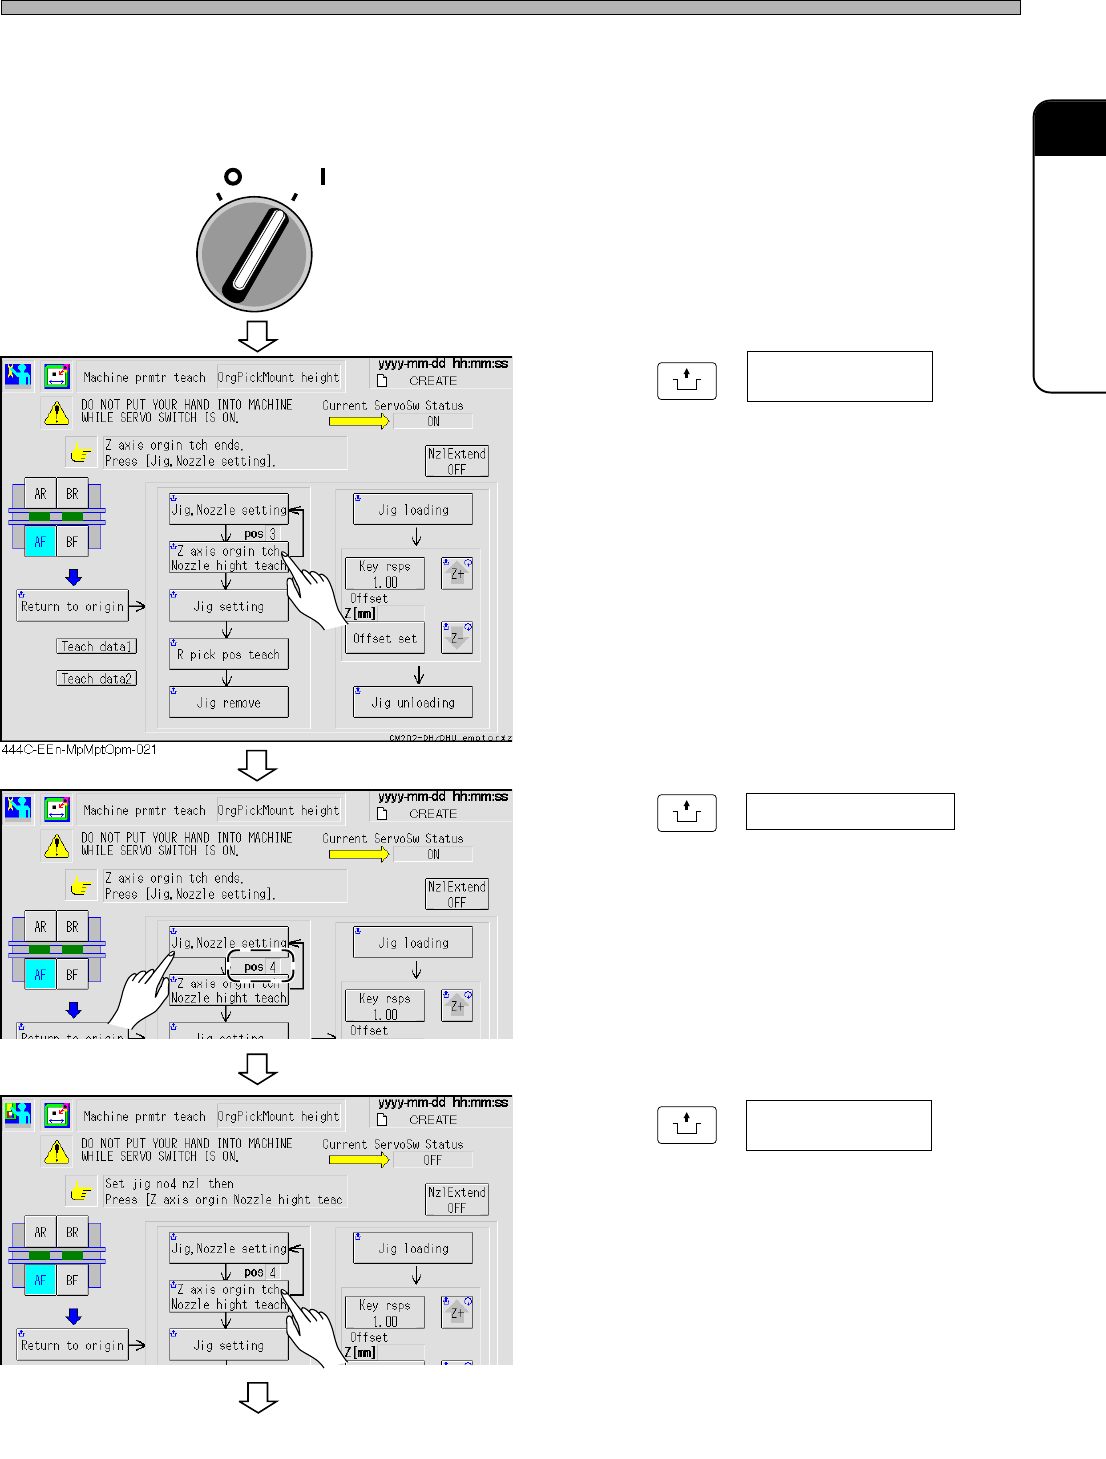
9. Set the nozzles to all the nozzle
holders.
• At this time, 3 is displayed in the pos field.
10. Close the safety cover.
11. Turn ON the servo switch.
12. Press
UNLOCK
+ .
• The nozzle at the pos 3 will be measured.
13. Press
UNLOCK
+ Jig, Nozzle setting .
• At this time, 4 is displayed in the pos field.
14. Press
UNLOCK
+ .
15. Teach all the nozzle holders by
repeating the steps from 13 to 14.
∗ The display in the pos field switches in
sequence from 3→4→5→6→1→2.
To the next page
444C-E-MMA02-A02-05
Z axis orgin tch
Nozzle hight teach
Z axis orgin tch
Nozzle hight teach
444C-EEn-MpMptOpm-022
444C-EEn-MpMptOpm-023
OFF ( )
ON ( )
SERVO
Page 2-18
Procedures of Machine Parameter Teaching
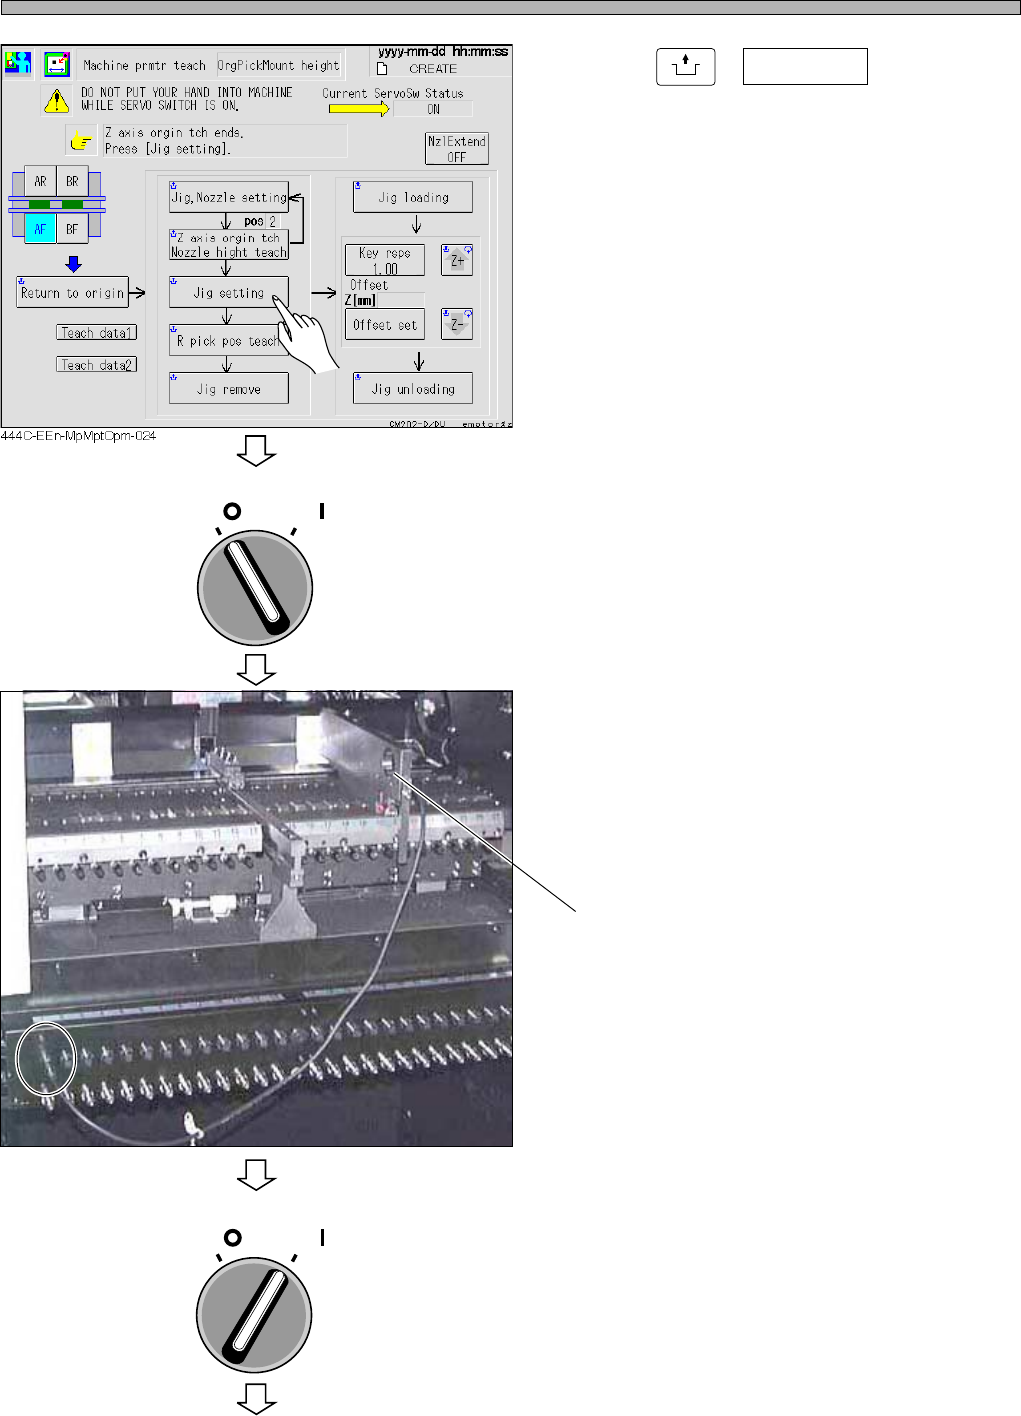
16. Press
UNLOCK
+ Jig setting .
• After the head has traveled to the jig setting
position, the servo switch turns OFF automati-
cally.
17. Turn OFF the servo switch.
18. Open the safety cover.
19. Set the height teaching jig to the slot
No. 21 on the feeder base.
∗ The cable is still connected to the connector at
the left end.
20. Close the safety cover.
21. Turn ON the servo switch.
To the next page
444C-E-MMA02-A02-05
OFF ( )
ON ( )
SERVO
OFF ( )
ON ( )
SERVO
444C-477P
Height teaching jig