444CEMM2(CM201).pdf - 第35页
Page 2-35 MACHINE P ARAMETER 2 2 2 1. Press Mount position . • The indication of the servo switch changes to OFF . 2. Select a stage, and press Configuration to check. ∗ T o carry out Standard and Precision continu- ousl…
Page 2-34
444C-E-MMA02-A04-05
2-2-6 Mount Position
∗ It is required that the pick-up position teaching has been completed.
Preparation
••
••
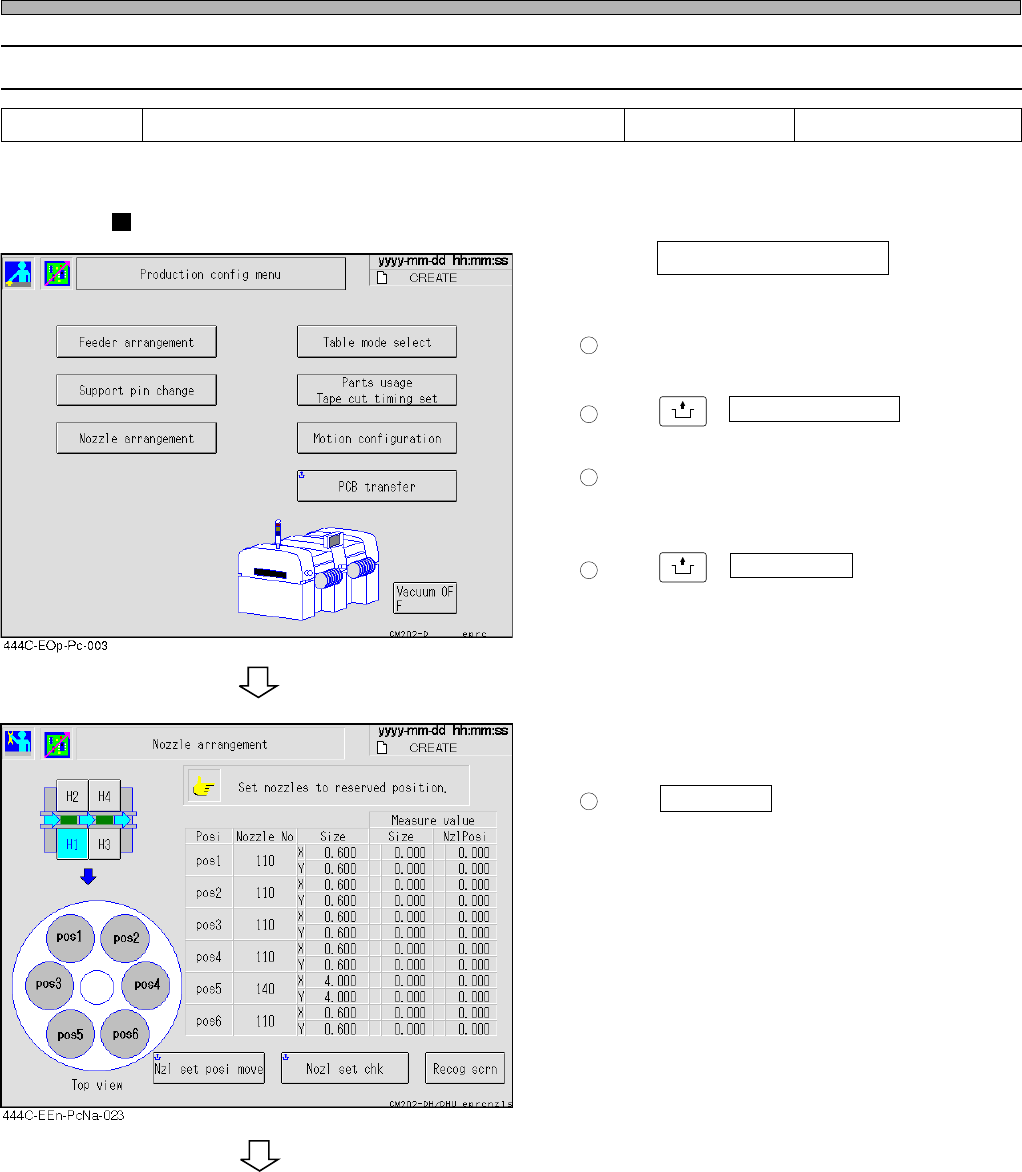
• Press Nozzle arrangement in “Pro-
duction config menu.”
1
Select a stage.
2
Press
UNLOCK
+ Nzl set posi move .
3
Attach six 110 nozzles to the head on the
selected stage.
4
Press
UNLOCK
+ Nozl set chk .
• Make sure that there are no abnormal mea-
surement values.
∗ When the indication on which the production
data is reflected is not 110 nozzle, the warning
message appears; however, ignore it.
5
Press Recog scrn .
• Make sure that the attached six nozzles are
displayed in white orderly.
To the next page
Tools 15 minutes
1005R feeder, 110 nozzle for 1005 × 6
Required time
Procedures of Machine Parameter Teaching
Page 2-35
MACHINE PARAMETER
2
2
2
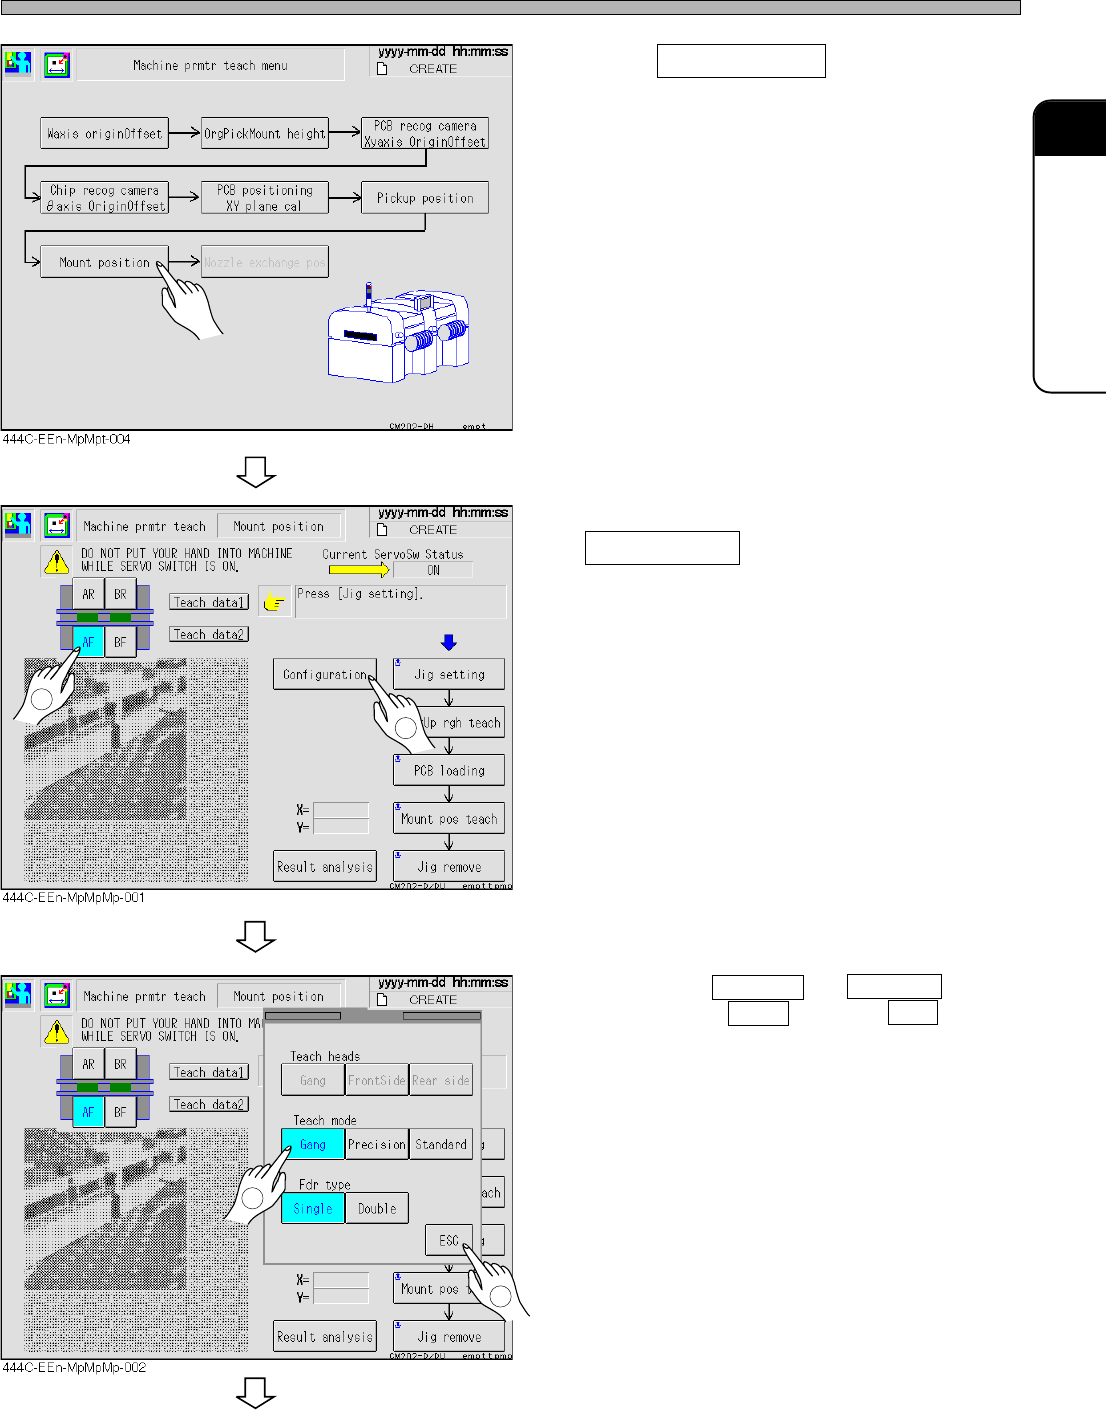
1. Press Mount position .
• The indication of the servo switch changes to
OFF.
2. Select a stage, and press
Configuration to check.
∗ To carry out Standard and Precision continu-
ously, choose Gang and press ESC .
Procedures of Machine Parameter Teaching
To the next page
2
1
2
1
444C-E-MMA02-A04-01
Page 2-36
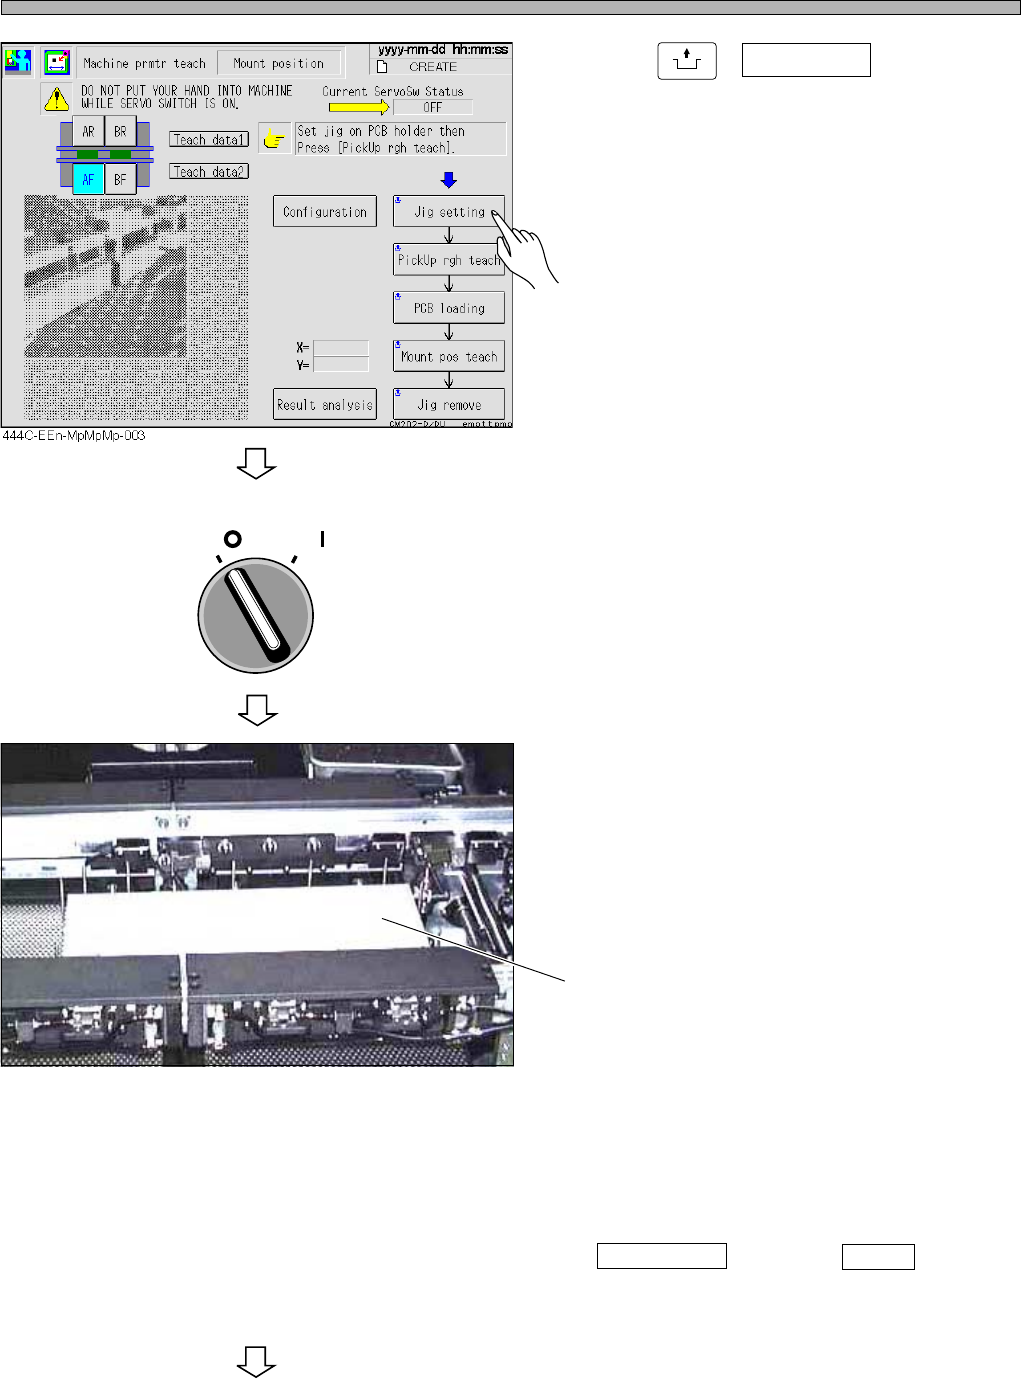
3. Press
UNLOCK
+ Jig setting .
• The head moves to the jig setting position, and
then the indication of the servo switch changes
to OFF automatically.
4. Turn OFF the servo switch.
5. Open the safety cover.
6. Put illumination on the support
blocks.
∗ See to it that it is located directly under the
white acrylic plate, while imagining the trans-
ported one.
7. Attach the feeder with 1005R chips to
the No.7 slot on the feeder base.
∗ If there are not 8-mm single feeders, press
Configuration and choose Double for the
feeder type.
Procedures of Machine Parameter Teaching
444C-E-MMA02-A04-01
To the next page
444C-480P
Illumination
OFF ( )
ON ( )
SERVO