444CEMM2(CM201).pdf - 第62页
Page 3-22 Check and Solutions 444C-E-MMA03-A03-04 T o the next page 4 . Check the nozzles. • Check whether the nozzles that are actually set are the same as the ones to be used. 5 . Press UNLOCK + Nozl set chk . • Rechec…
Page 3-21
3
SOLUTIONS FOR ERROR
3
3
Check and Solutions
444C-E-MMA03-A03-04
To the next page
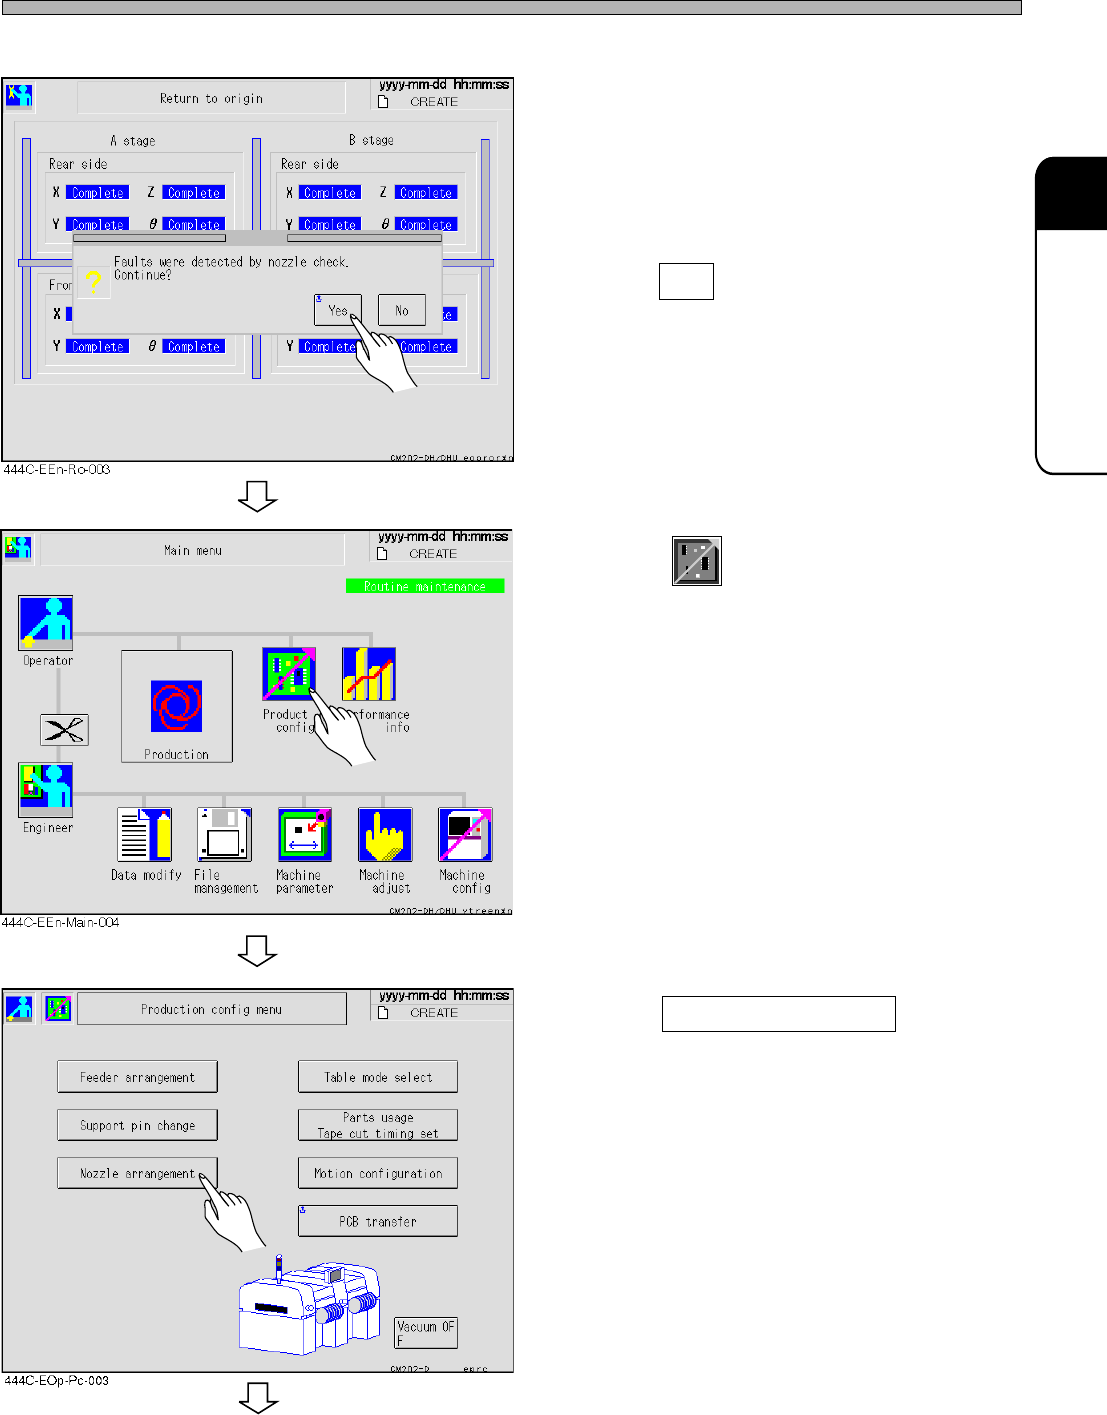
2. Checking the details of nozzle checking operation error (Without the nozzle changer)
• To solve the error occurred in the nozzle
checking operation in starting production, use
the following procedure.
1. Press Yes .
• The screen returns to the main menu.
2. Press
Product
config
.
3. Press Nozzle arrangement .
Page 3-22
Check and Solutions
444C-E-MMA03-A03-04
To the next page
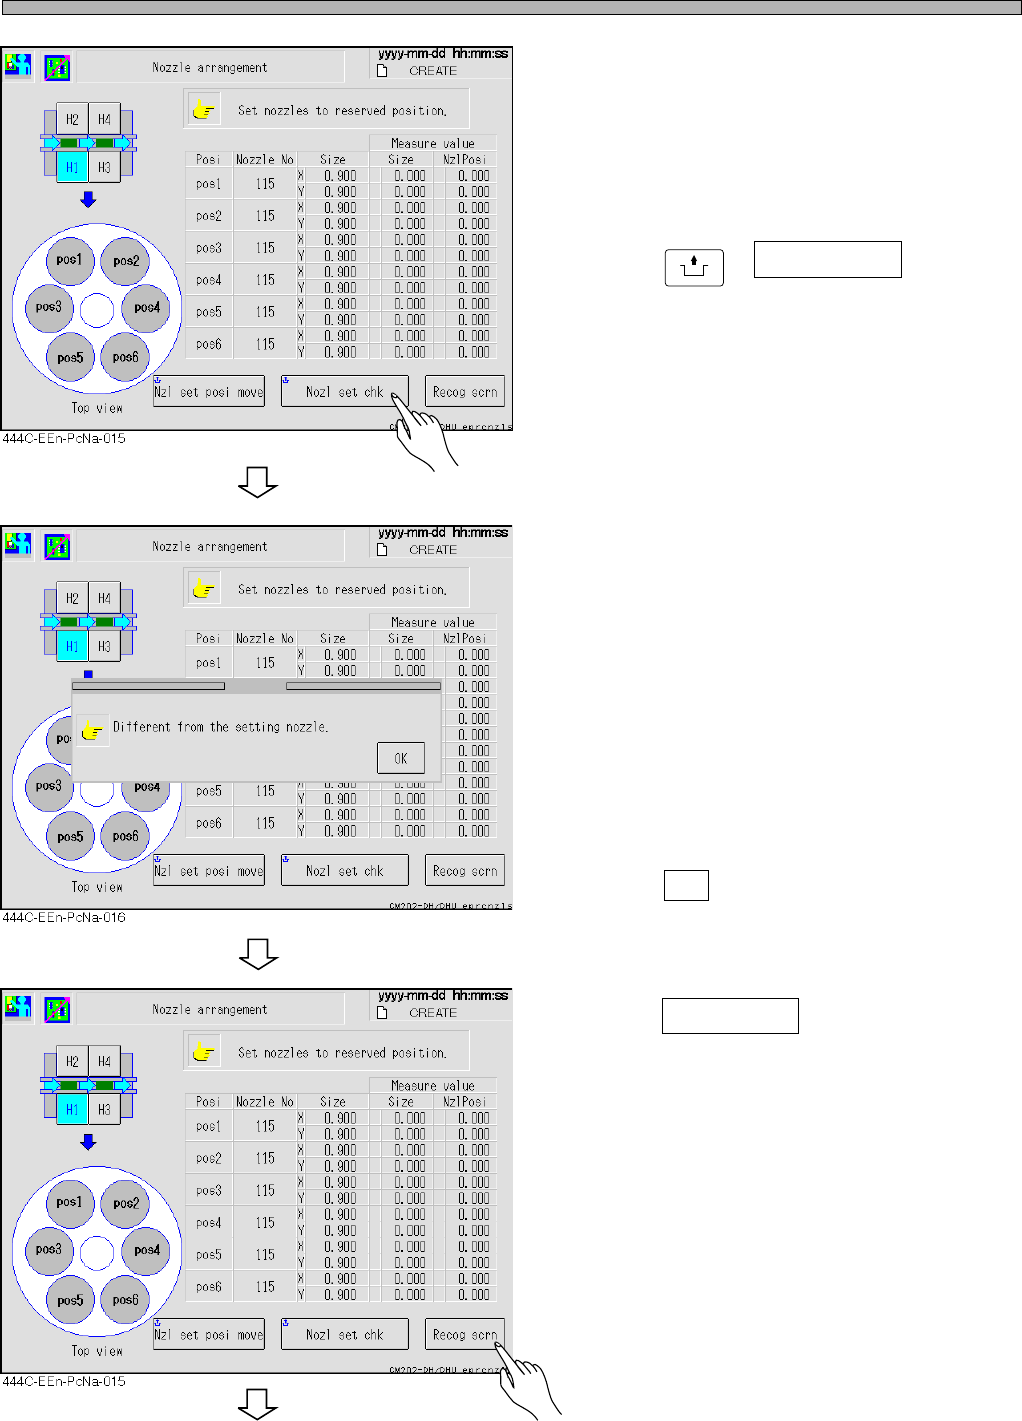
4. Check the nozzles.
• Check whether the nozzles that are actually set
are the same as the ones to be used.
5. Press
UNLOCK
+ Nozl set chk .
• Recheck whether the registered and the set
nozzles are the same.
∗ If there is no error, go to step 10.
If there is an error, perform steps 6 to 9.
6. Check the measurement values.
• Check the sizes of the registered and the
measured nozzles at the screen.
• If some nozzles have not been set or if the
registered nozzle size is different from the
measured one, an error occurs and the mes-
sage appears.
• Press OK .
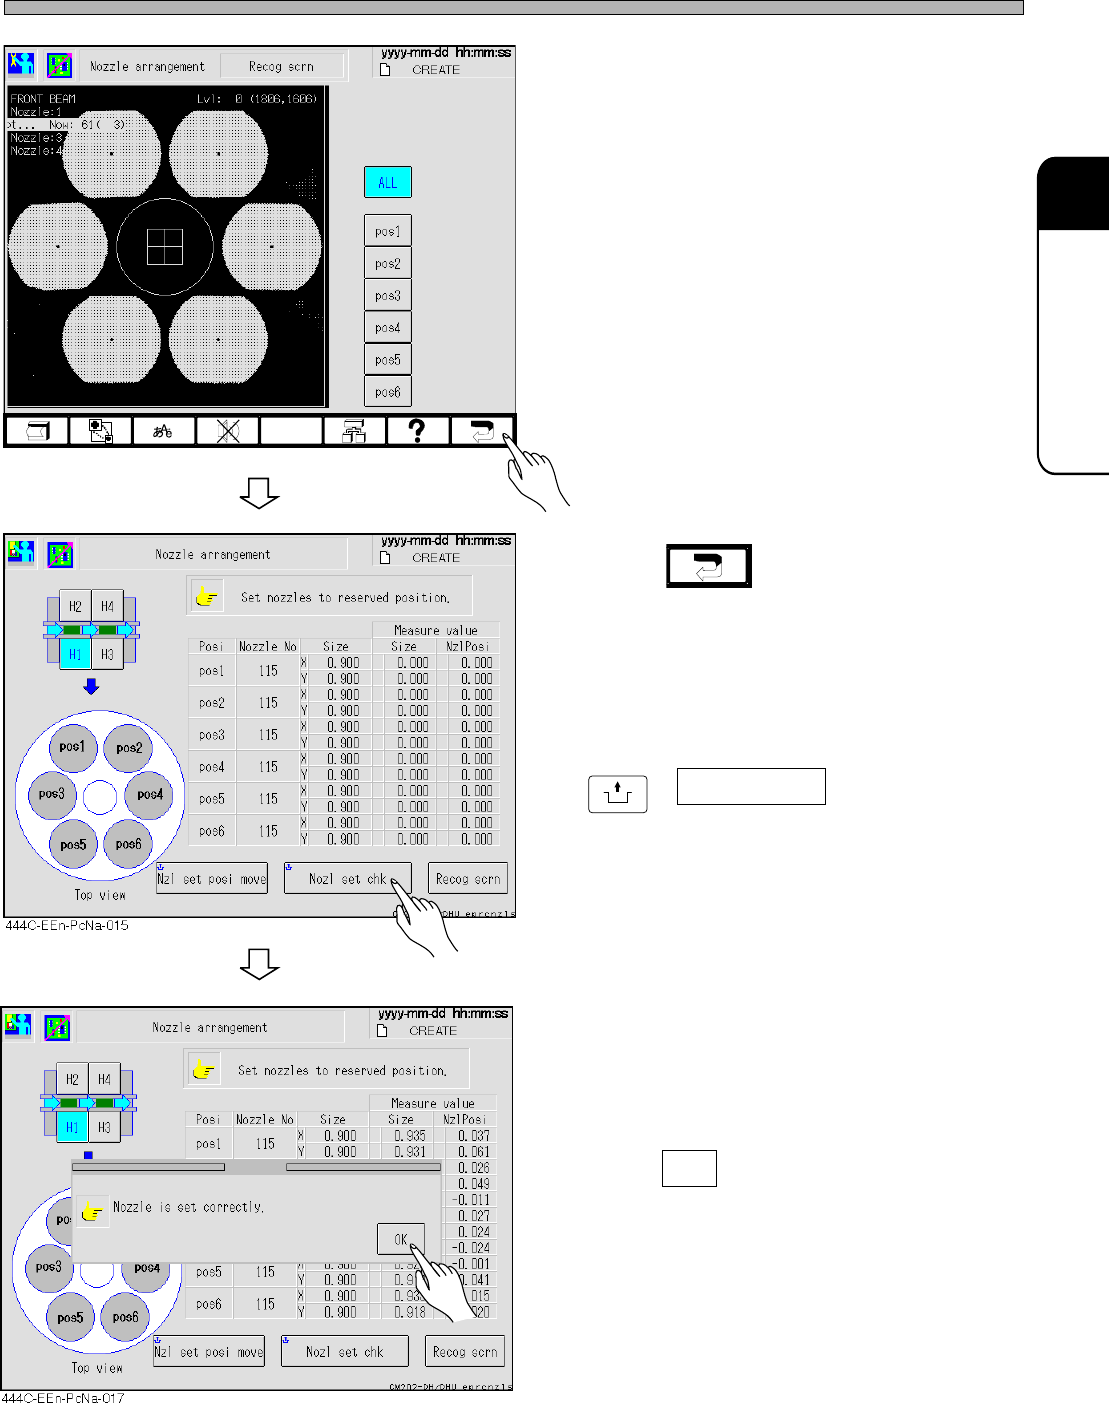
7. Press Recog scrn .
Page 3-23
3
SOLUTIONS FOR ERROR
3
3
Check and Solutions
444C-E-MMA03-A03-04
444C-EEn-PcNa-013
• The whole and the individual nozzle recogni-
tion image can be checked.
[Possible factors]
• Nozzle setting mistake
• Foreign bodies on the nozzle tip
• Chipped nozzle tip
• Deformation of the nozzle
• Contamination of the reflector
• Contamination of the LED cover
• Contamination of the camera lens
[Solutions]
• Cleaning the nozzle, reflector, camera lens,
and cover lens
• Replacing the nozzle
8. Press .
9. After solving the error, press
UNLOCK
+ Nozl set chk .
• The message “Nozzle is set correctly.” ap-
pears.
10. Press OK .
• Resume the production.