00196742-01 - Install Guide SIPLACE Explorer 2.7_de.pdf - 第32页
3 In st al lati o n de s SIP LACE Ex plor e r Inst al l atio ns - und Ko nfi gu rat io ns an le itun g S IPL AC E Exp lo rer 3. 1 E rst inst all atio n vo n S IPLA CE E xplo rer 2.7 Au sga be 03 /201 0 DE 32 3 Ab b. 3 - …
Installations- und Konfigurationsanleitung SIPLACE Explorer 3 Installation des SIPLACE Explorer
Ausgabe 03/2010 DE 3.1 Erstinstallation von SIPLACE Explorer 2.7
31
→ In diesem Fall können Sie entweder den Pfad des Ordners J2SE Runtime Environment 6
Update 1 direkt im Textfeld eingeben oder die Schaltfläche Browse (Durchsuchen) anklicken
und mit Hilfe des Dialogfensters Open File (Datei öffnen) den Ordner J2SE Runtime
Environment 6 Update 1 suchen.
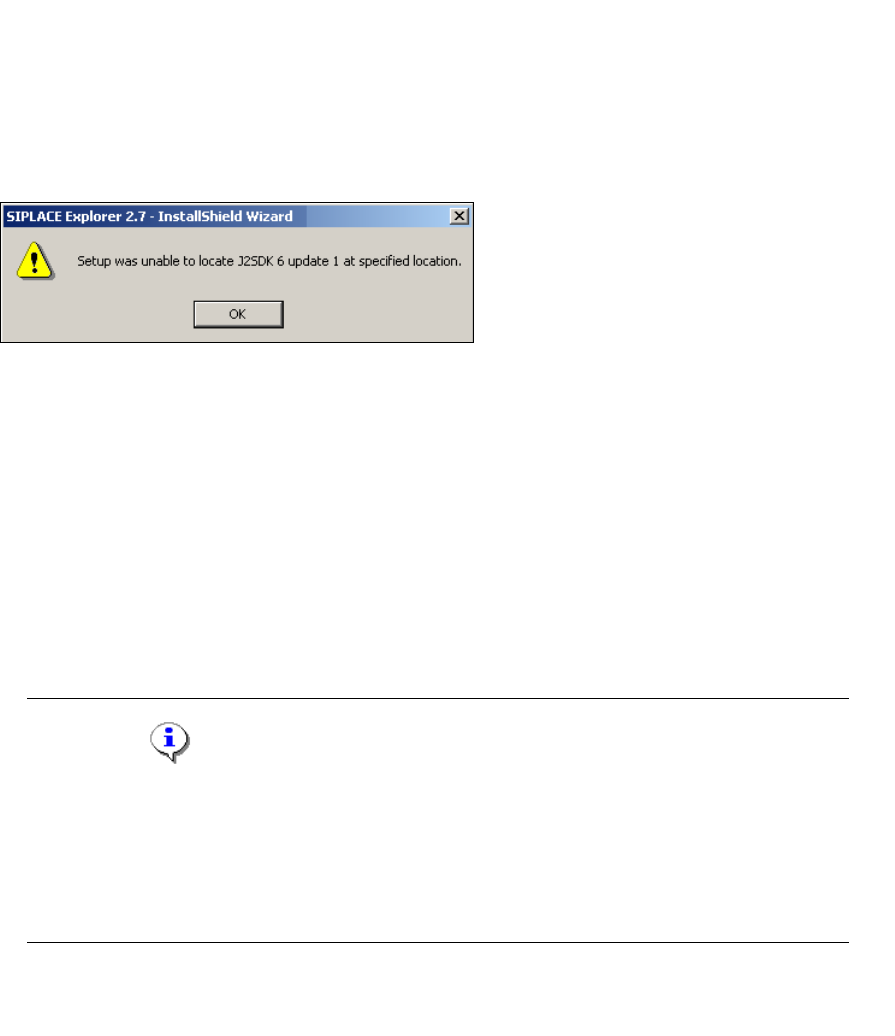
→ Wenn Sie den Ordner nicht korrekt angegeben haben, in dem J2SE Runtime Environment 6
Update 1 installiert ist, erhalten Sie nachfolgende Meldung.
3
Abb. 3 - 5 SIPLACE Explorer Setup - J2SE kann nicht gefunden werden
→ Klicken Sie OK, um zum vorangegangenen Dialogfenster zurückzukehren. SIPLACE Explorer
erfordert vor der Installation von SIPLACE Explorer, dass J2SE Runtime Environment 6
Update 1 installiert wurde.
→ An dieser Stelle können Sie entweder den J2SE Runtime Environment 6 Update 1 Ordner
nochmals eingeben oder Cancel (Abbrechen) anklicken, um die Installation des SIPLACE
Explorer abzubrechen.
→ Haben Sie Cancel (Abbrechen) gewählt, installieren Sie die auf der Support Media DVD
enthaltene Version von J2SE Runtime Environment 6 Update 1. Beginnen Sie anschließend
die Installation des SIPLACE Explorer erneut.
HINWEIS
Wenn auf Ihrem System die von Sun Microsystems unter http://java.sun.com/j2se erhältliche
J2 Runtime Umgebung (und nicht J2SE Runtime Environment 6 Update 1) installiert ist,
funktioniert die von SIPLACE Explorer Website Builder erstellte Website nicht einwandfrei,
da diese auf JSP basiert, was wiederum J2SE Runtime Environment 6 Update 1
voraussetzt. 3
→ Die Installation von SIPLACE Explorer 2.7 wird nach Lokalisierung von J2SE Runtime
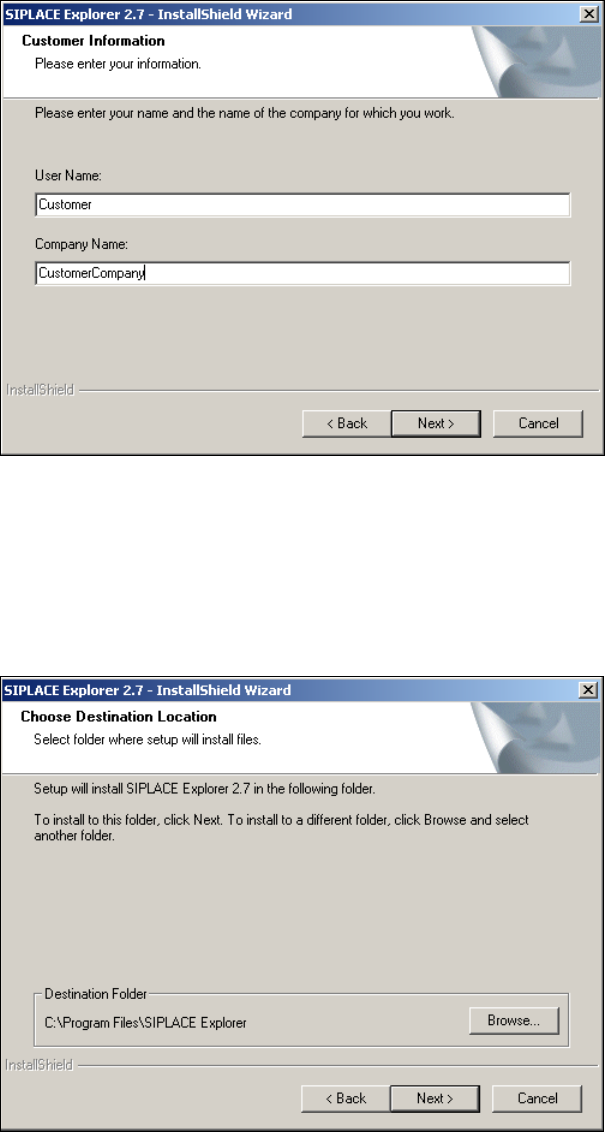
Environment 6 Update 1 fortgesetzt. Das Dialogfenster Customer Information wird geöffnet.
3 Installation des SIPLACE Explorer Installations- und Konfigurationsanleitung SIPLACE Explorer
3.1 Erstinstallation von SIPLACE Explorer 2.7 Ausgabe 03/2010 DE
32
3
Abb. 3 - 6 SIPLACE Explorer setup - Kundeninformation angeben
→ Geben Sie in dem Feld User Name Ihren Namen an und im Feld Company Name den Namen
Ihrer Firma. Klicken Sie dann auf Next (Weiter). Das Dialogfenster Choose Destination
Location wird geöffnet.
→ Geben Sie jetzt den Ordner an, in dem Sie die Anwendung installieren möchten. Der
standardmäßig eingestellte Ordner ist C:\Program Files\SIPLACE Explorer.
3
Abb. 3 - 7 SIPLACE Explorer setup - Zielordner wählen
→ Sie können die Standardeinstellung durch Betätigung der Schaltfläche Browse (Durchsuchen)
verändern.
Installations- und Konfigurationsanleitung SIPLACE Explorer 3 Installation des SIPLACE Explorer
Ausgabe 03/2010 DE 3.1 Erstinstallation von SIPLACE Explorer 2.7
33
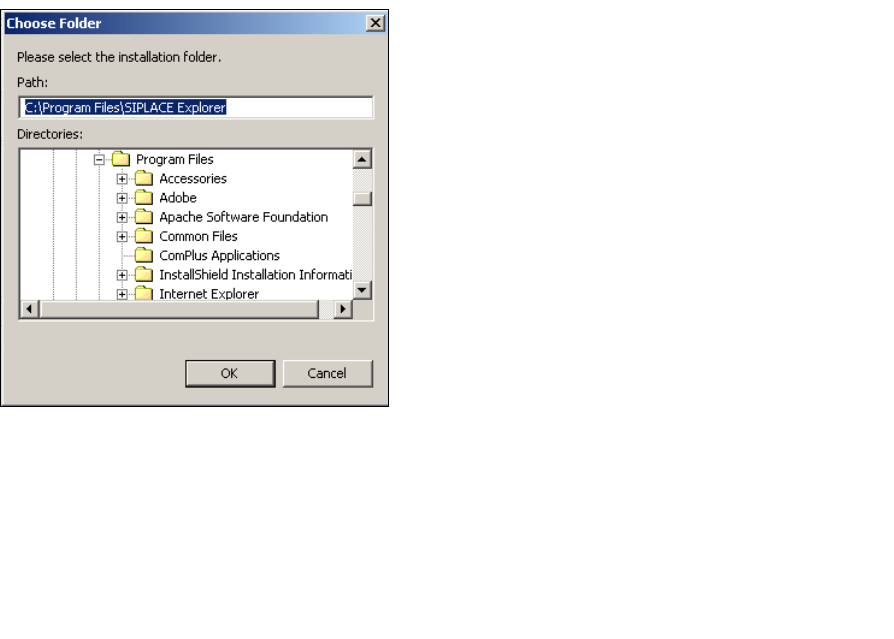
→ Das Dialogfenster Choose Folder (Ordner auswählen) erscheint, um den gewünschten
Ordner zu wählen.
3
Abb. 3 - 8 SIPLACE Explorer Setup - Dialogfenster 'choose folder' (’Ordner auswählen’)
→ Geben Sie den gewünschten Ordner an und klicken Sie OK, um Ihre Auswahl zu bestätigen.
Im Dialogfenster Choose Destination Location (Zielinstallationsordner auswählen) wird der
ausgewählte Ordner angezeigt.
→ Um die Auswahl des Zielordners zu bestätigen, klicken Sie im Dialogfenster Choose
Destination Location (Zielinstallationsordner auswählen) die Schaltfläche Next (Weiter) an.
→ Das Dialogfenster Select Features (Installationsoptionen auswählen) öffnet sich. Wählen Sie
aus den folgenden drei Komponenten aus: SIPLACE Explorer Runtime Environment,
Factor Configuration Utility (Werks-Konfigurations-Utility) und SIPLACE Explorer
Development Environment.