SIPLACE D系列Servicemanual.pdf - 第25页
Service Work D1/D2 Gantry Servicemanual (internal version) SIPLACE D Series 25 Installation Legend 1. Adhesive device, fitted at the gantry (not fully visible) X Fit the adh esive devic e at the gantry, in p lace of the …
Service Work
Gantry D1/D2
24 Servicemanual (internal version) SIPLACE D Series
Removal
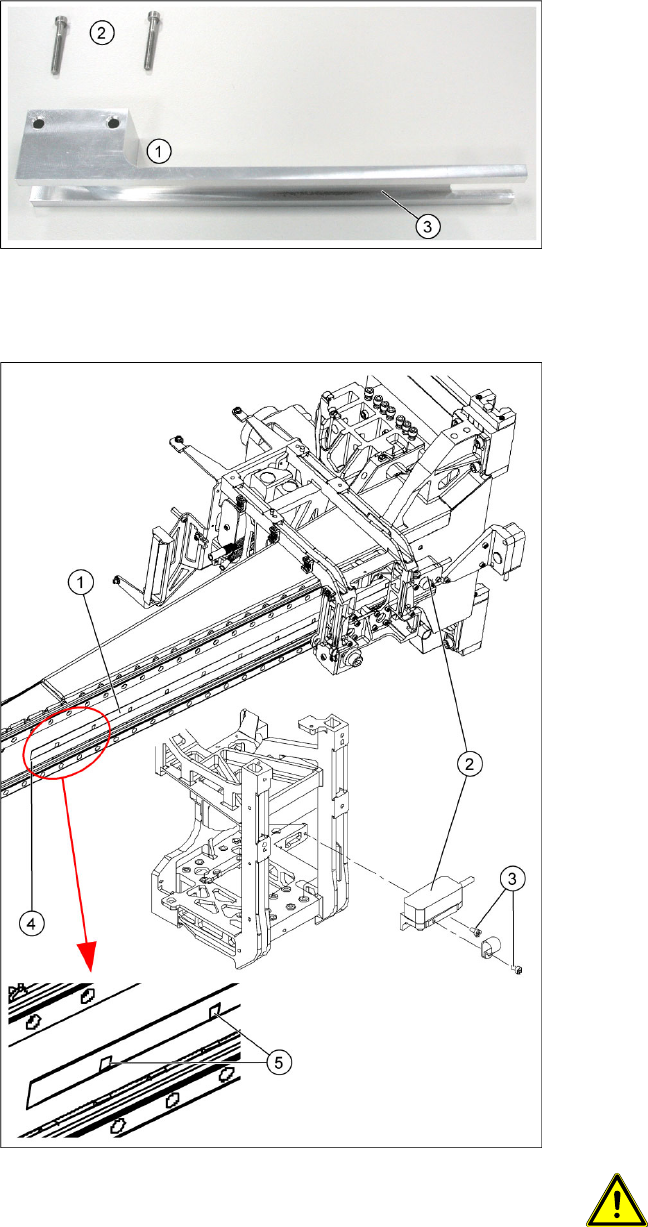
4-3: Adhesive device for scale
Legend
1. Adhesive device for scale
2. Fastening screws
3. Scale guide
Legend
1. X-axis scale
2. X-axis incremental encoder (read head)
3. Fastening screws for incremental encoder
4. Starting position of scale
5. Zero pulse on scale
X Move the relevant changeover table out of the
machine.
X Switch off the machine.
X Move the gantry into the position which allows
you best access.
X Loosen the two screws (3) fastening the
incremental encoder (2). Let the encoder
dangle down below the gantry, from its cable.
X Use a scribing iron to mark the starting position
(4) of the scale, near the deflection unit,
opposite the X motor.
X Wear protective gloves.
X Use the chisel to lever the old scale (1) off the
machine frame and then remove the scale.
X Clean the contact surface with a cleansing
tissue and ethanol, to remove any remaining
adhesive. The contact surface must be clean
and free of grease. If you are unable to
achieve this with the cleansing tissue alone,
use the chisel to help you.
ATTENTION:
Make sure that you do not scratch the
contact surface!
Service Work
D1/D2 Gantry
Servicemanual (internal version) SIPLACE D Series
25
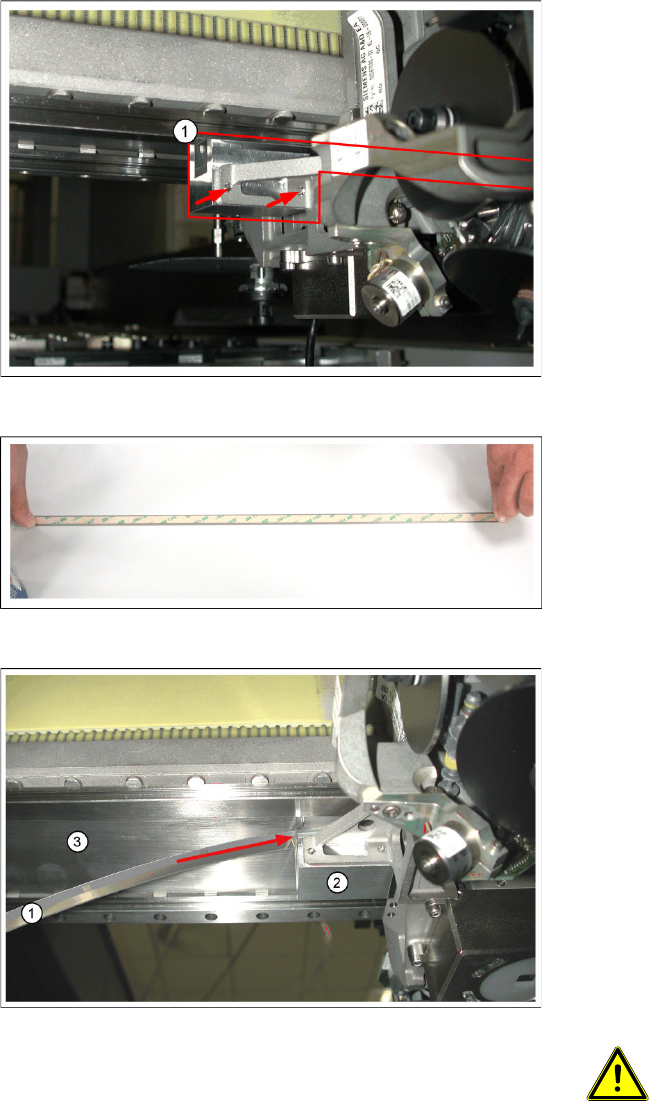
Installation
Legend
1. Adhesive device, fitted at the gantry (not fully
visible)
X Fit the adhesive device at the gantry, in place
of the incremental encoder. To do this, thread
the long, thin part of the adhesive device in
under the head mount, so that this long, thin
part is pointing towards the deflection unit.
X Press the adhesive device up, against the
gantry, and fix it in place with the two screws
provided ((arrows) – the picture only shows
the ends of the screws).
X Place the new scale on a clean work surface.
X Clean the back of the scale with the cleaning
agent provided. The surface to be fixed down
must be clean and free of grease.
X Attach the double-sided adhesive tape to the
back of the new scale.
Legend
1. Scale
2. Adhesive device
3. Adhesive surface on the underside of the
gantry
X Remove the protective cover from the
adhesive strip on the back of the scale.
X Thread the scale into the adhesive device
(arrow). Make sure that the scale does not yet
remain sticking to the adhesive surface on the
underside of the gantry.
ATTENTION: Aligning the scale
When viewed in the direction of
transport, the zero pulses must be on
the left side of the gantry i.e. aligned
towards the C&P head. You can also
use the zero pulse window of the scan
head for orientation.
Service Work
Gantry D1/D2
26 Servicemanual (internal version) SIPLACE D Series
SITEST
X Start SITEST.
X Select
Single Functions
and perform (for all heads) a
head reference run
.
X Select
Gantry-Gantry axis functions
and perform a
reference run
for the X-axis.
X If the single reference run is successful (no errors), perform a
complete reference run
.
X Calibrate the
Machine zero point:
(for both gantries if using a D2).
X Save the machine data.
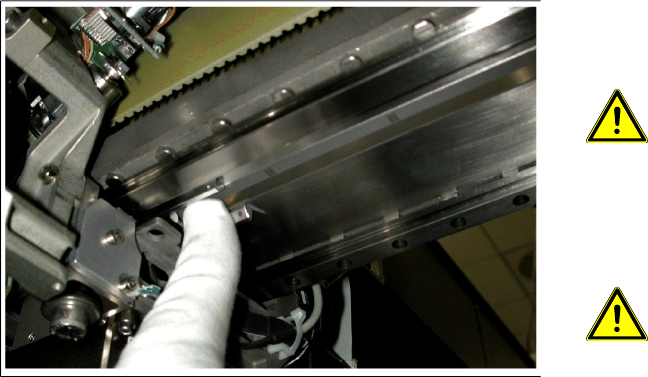
4-4: Fixing the X scale
X Place the scale in the previously marked
starting position and press it down firmly in this
position.
ATTENTION: Make sure the scale is
not bent or rubbed against any
parts.
X Move the adhesive device with the head
mount. While doing so, press the scale firmly
against the adhesive surface with your finger
(see fig.).
ATTENTION: Make sure that no
blisters or uneven areas are formed.
If this does occur, the scale must be
removed and replaced with a new
scale.
X In order to fix the last part of the scale, move
the head mount back and press the rest of the
scale down firmly with your hand.
X Make sure that the whole scale is fixed firmly
onto the gantry.
X If necessary, clean the scale and the
incremental encoder lens again.
X Fit the incremental encoder with the two
fastening screws so that there is a gap of 0.4
mm between the incremental encoder and the
scale. Use a suitable thickness gauge
(plastic). (See also: "Replacing the X-Axis
Incremental Encoder " in the service manual).
X Move the gantry out of the table area.
X Switch the machine on.
X Insert the changeover table into the machine.