SIPLACE D系列Servicemanual.pdf - 第28页
Service Wo rk Gantry D1/D2 28 Servicemanual (internal ve rsion) SIPLACE D Series Removal Legend 1. Incremental encoder bracket 2. Y-axis increme ntal encoder (rea d head) X Move both changeover tables out of the machine.…
Service Work
D1/D2 Gantry
Servicemanual (internal version) SIPLACE D Series
27
4.1.2.2 Replacing the Y-Axis Scale [03015980]
Equipment required
Scale - adhesive device set (HD1/D2) [03055047-xx]
– Adhesive device for scale (D1/D2)
– Double-sided adhesive strip
– Protective gloves
– Cleansing tissues
– Chisel
– Assembly guide
– Centering pin
Double-sided adhesive strip - Scotch Y-9460 [00343774-xx]
Protective sheet 12mm wide [00378511-xx]
Multiflex pad
Ethanol
SIPLACE cleansing tips [00352931-xx] (if needed)
WARNING: STRONG MAGNETIC FIELDS!
Always follow the special safety instructions when working in the vicinity of powerful magnetic
fields, caused by the permanent magnets.
ATTENTION:
Make sure that you do not scratch or bend the scale!
NOTE:
X Enlist the help of a second person for replacement of the Y scale.
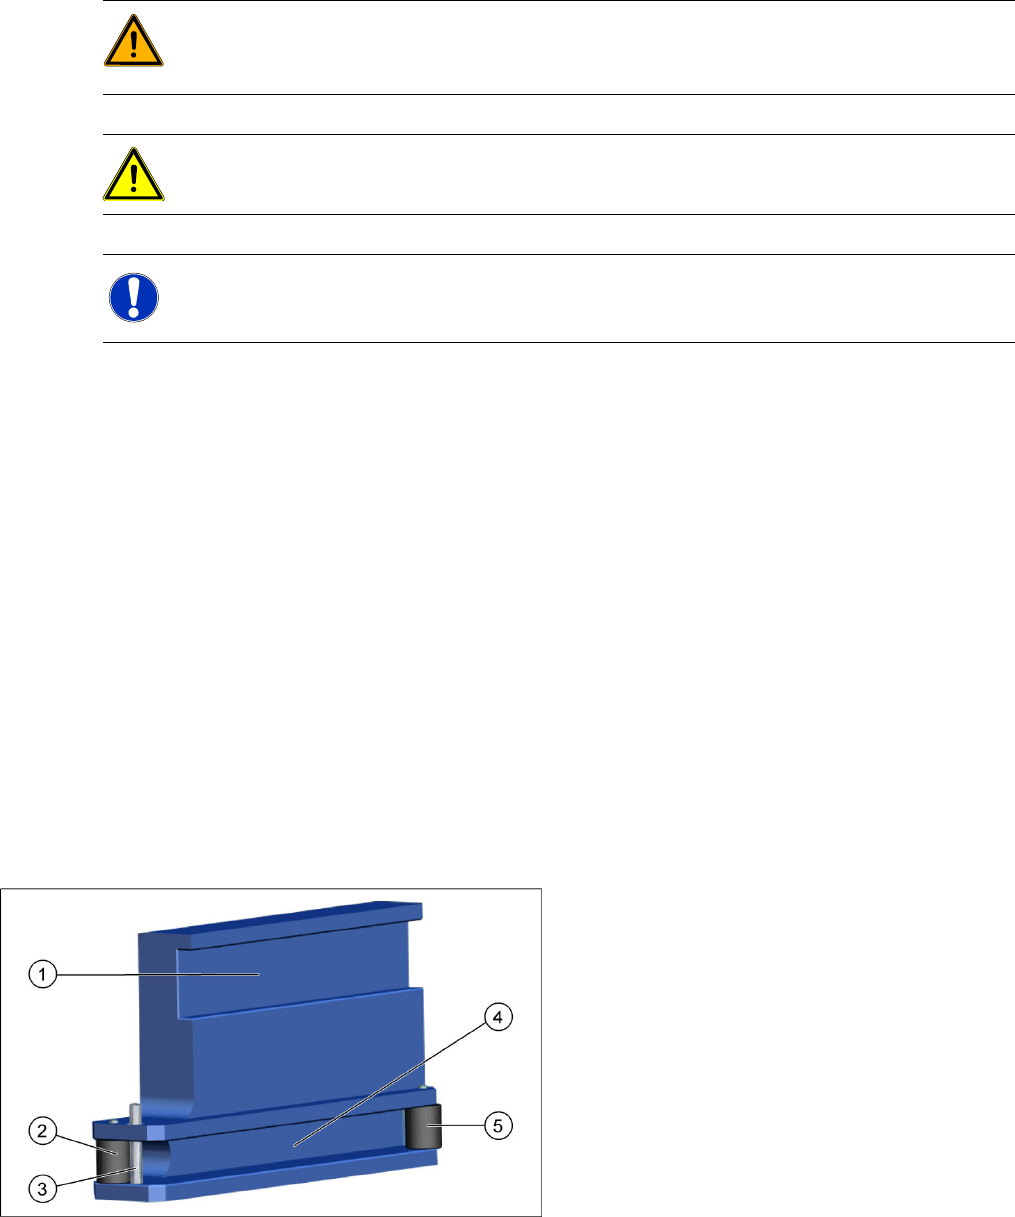
4-5: Adhesive device
Legend
1. Guidance on the linear rail
2. Guide roller
3. Fixing pin
4. Scale guide
5. Press roller
Service Work
Gantry D1/D2
28 Servicemanual (internal version) SIPLACE D Series
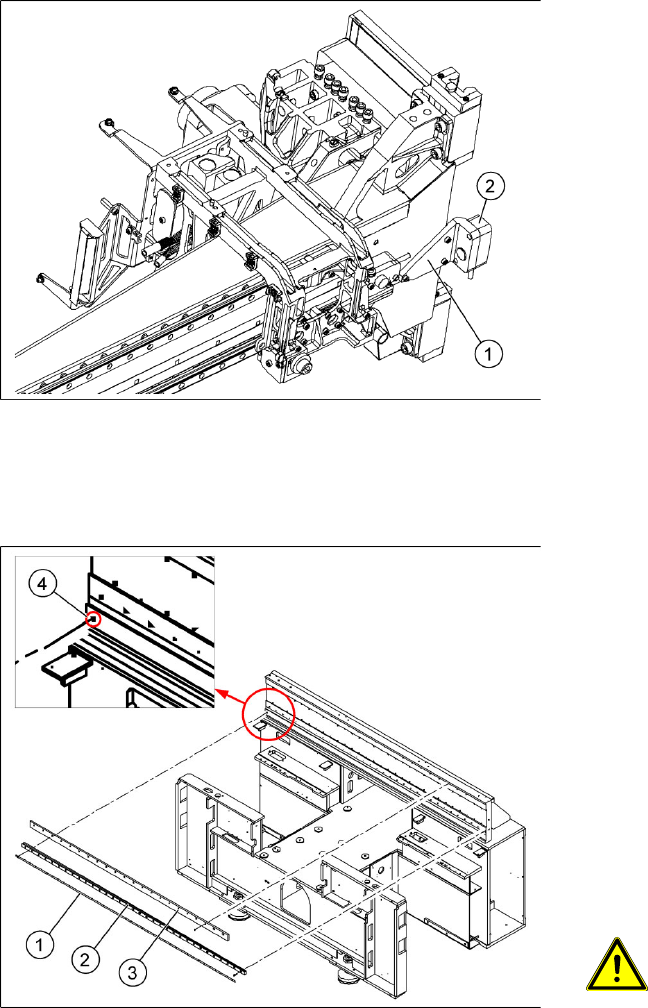
Removal
Legend
1. Incremental encoder bracket
2. Y-axis incremental encoder (read head)
X Move both changeover tables out of the
machine.
X Switch off the machine.
X Move the gantries into the position which
allows you best access.
X Loosen the three screws on the bracket (1)
and carefully lift off the incremental encoder
(2) with the bracket.
X Temporarily fix the incremental encoder to a
suitable place (e.g. with adhesive tape or a
cable tie to the back of the gantry). Make sure
that the gantry can still be moved along the Y
axis.
Legend
1. Scale
2. Linear rail
3. Flat rail
4. Drilling
X Move the gantries into the position which
allows you best access.
X Wear protective gloves.
X Use the chisel to lever (beginning from the
right side, when viewed in the direction of
transport) the scale (1) off the machine frame.
ATTENTION:
X Make sure that you do not damage
the drilling (4).
X Remove the scale (1).
X Use the chisel to carefully remove any
adhesive residues from the contact surface.
X Then polish the contact surface with the
Muliflex pad until it is smooth and clean.
X Clean the contact surface with ethanol. This
must be must be clean and free of grease.
Service Work
D1/D2 Gantry
Servicemanual (internal version) SIPLACE D Series
29
Installation
X Place the new scale on a clean work surface.
X Attach the cover strip to the front side of the scale.
X Attach the double-sided adhesive tape to the back of the new scale. The surface to be fixed down
must be clean and free of grease.
X Always move the gantries to the position which gives you the best access to the current working
area.
X Place the scale under the gantries in the machine.
X Pull the transparent cover strip back until you can see the drilling on the scale and have enough room
to feed in the adhesive device. Start from the left side (when viewed in the direction of transport).
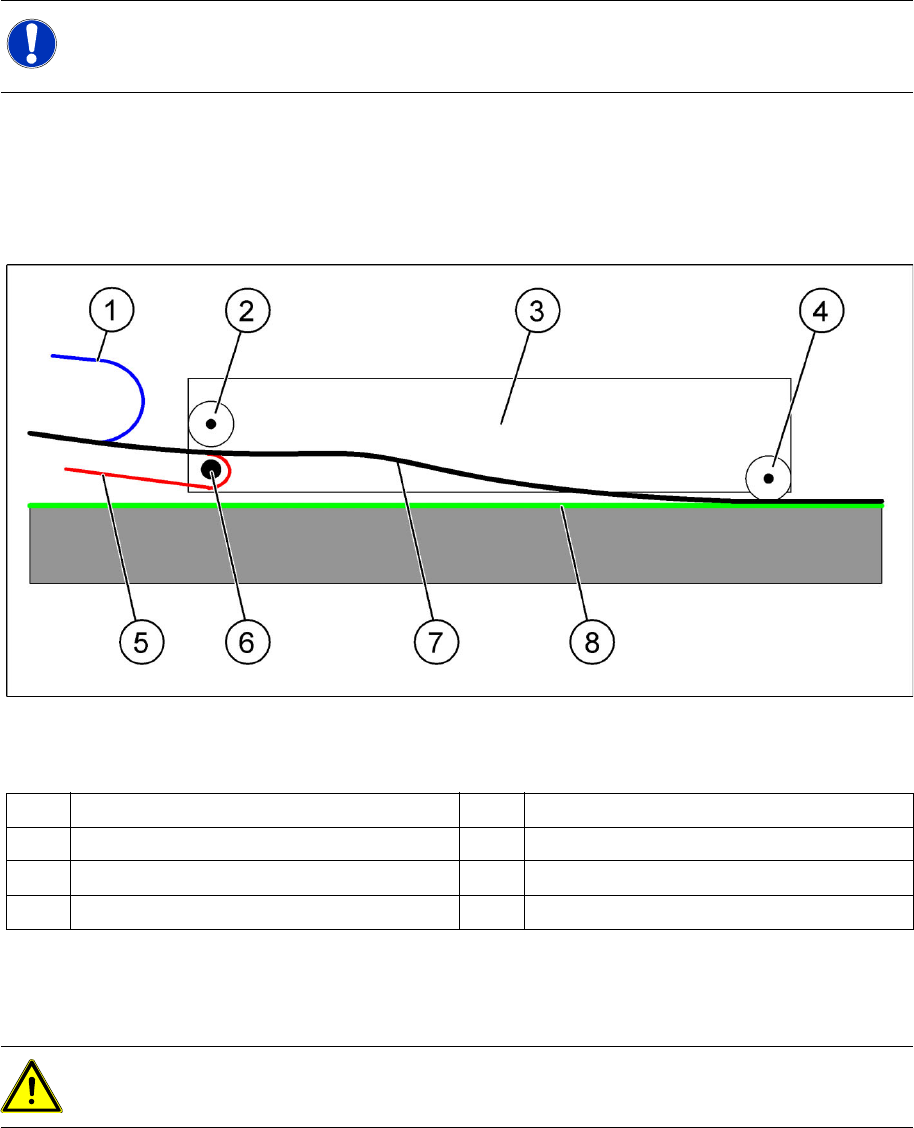
4-6: Threading the scale into the adhesive device (cross-section from above)
Legend
X Thread the scale, with its cover strip and adhesive strip, into the adhesive device. To do this, pull the
protective cover on the adhesive strip partly off the scale and wind it around the fixing pin (see
diagram).
NOTE: Cover strip on scale
X There is now a cover strip protecting the front of the scale. Only remove this cover strip during
installation (not before).
1 Transparent cover strip 5 Cover strip on adhesive strip
2 Guide roller 6 Fixing pin (removable)
3 Adhesive device 7 Scale
4 Press roller 8 Adhesive surface
ATTENTION: Make sure the scale is not bent or rubbed against any parts.