03217917-01-01E By DEK Technical Reference Manual Vol 1_enPDFA.pdf - 第148页
10 PRINT CARRIAGE MODULE 10.4 REPLACEMENT PROCEDURES 148 TECHNICAL REFERENCE MANUAL Vol 1 E By DEK 04/2019 10.4 REPLACEMENT PROCEDURES 10.4.1 Timing Belt To replace the print carriage timing belt, carry out the following…
10 PRINT CARRIAGE MODULE
10.3 ADJUSTMENTS AND SETTINGS
TECHNICAL REFERENCE MANUAL Vol 1 E By DEK 04/2019 147
► If the adjustment is correct go to Adjustment Complete - Close Up.
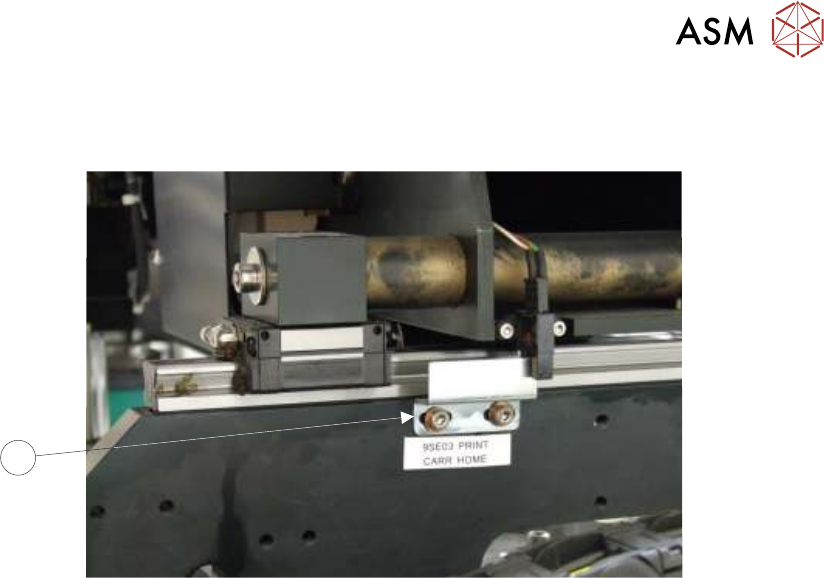
► Gain access to the print carriage home sensor vane (3) on the right hand printhead.
3
► Adjust the position of the home sensor vane (3).
► Close the printhead cover.
► Press the System button.
► Repeat measurement procedure until a measurement of 612.0mm +/- 2.0mm is achieved.
Adjustment Complete - Close Up
► Open the printhead cover.
► Refit the stencil.
► Close the printhead cover.
► Remove the isolator lock; turn the mains isolator switch ON.
► Press the System button.
► Select Exit.
► Select Exit.
► Select Back.
10 PRINT CARRIAGE MODULE
10.4 REPLACEMENT PROCEDURES
148 TECHNICAL REFERENCE MANUAL Vol 1 E By DEK 04/2019
10.4 REPLACEMENT PROCEDURES
10.4.1 Timing Belt
To replace the print carriage timing belt, carry out the following procedure:
► Select Open Cover Commands.
► If required, select Carriage to Front.
► Select Back.
► Select Shut Down.
► Select Continue.
► Turn the mains isolator OFF; lockout the isolator switch.
► Gain access to the right hand printhead.
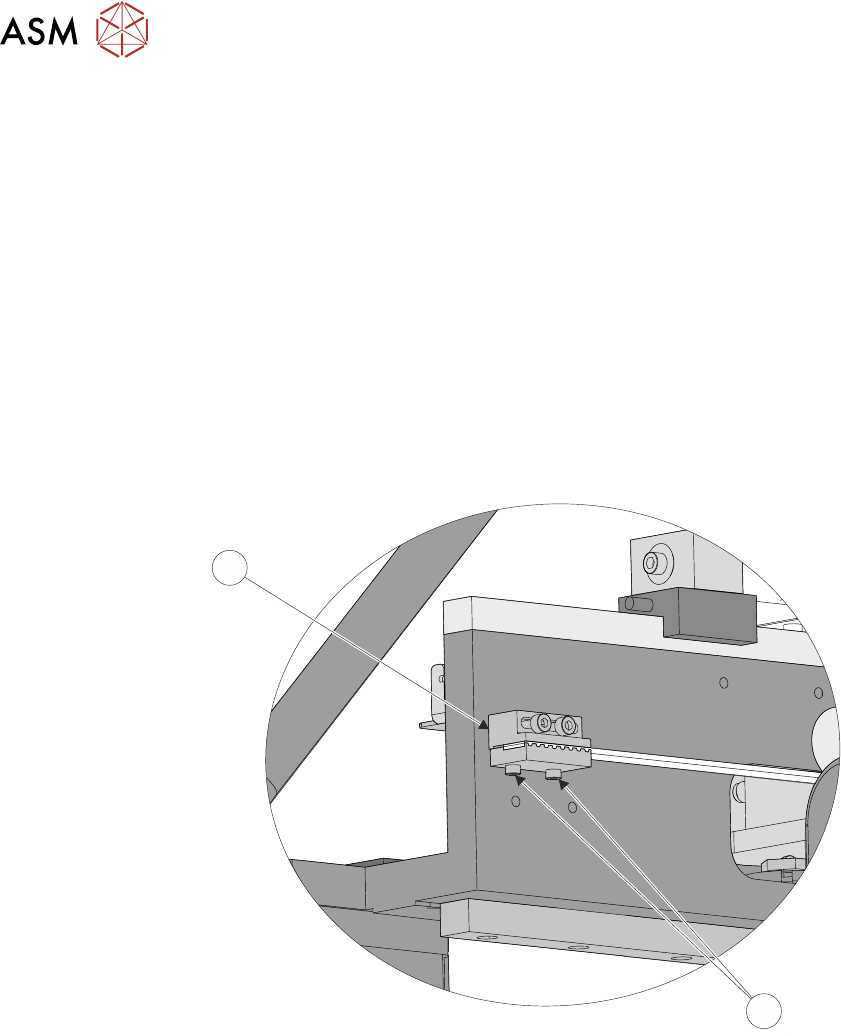
► Locate the rear print carriage timing belt clamp (2) on the inner face of the right hand print-
head. Loosen the two belt securing screws (1) and remove the belt end from the clamp.
1
2
► Unthread the timing belt from print carriage motor pulley and idle pulleys.
► Locate the front print carriage timing belt clamp on the inner face of the right hand printhead.
Loosen the two belt securing screws, remove and discard the timing belt.
► Fit the replacement timing belt into the front belt clamp and tighten the securing screws suffi-
ciently to hold the belt.
10 PRINT CARRIAGE MODULE
10.4 REPLACEMENT PROCEDURES
TECHNICAL REFERENCE MANUAL Vol 1 E By DEK 04/2019 149
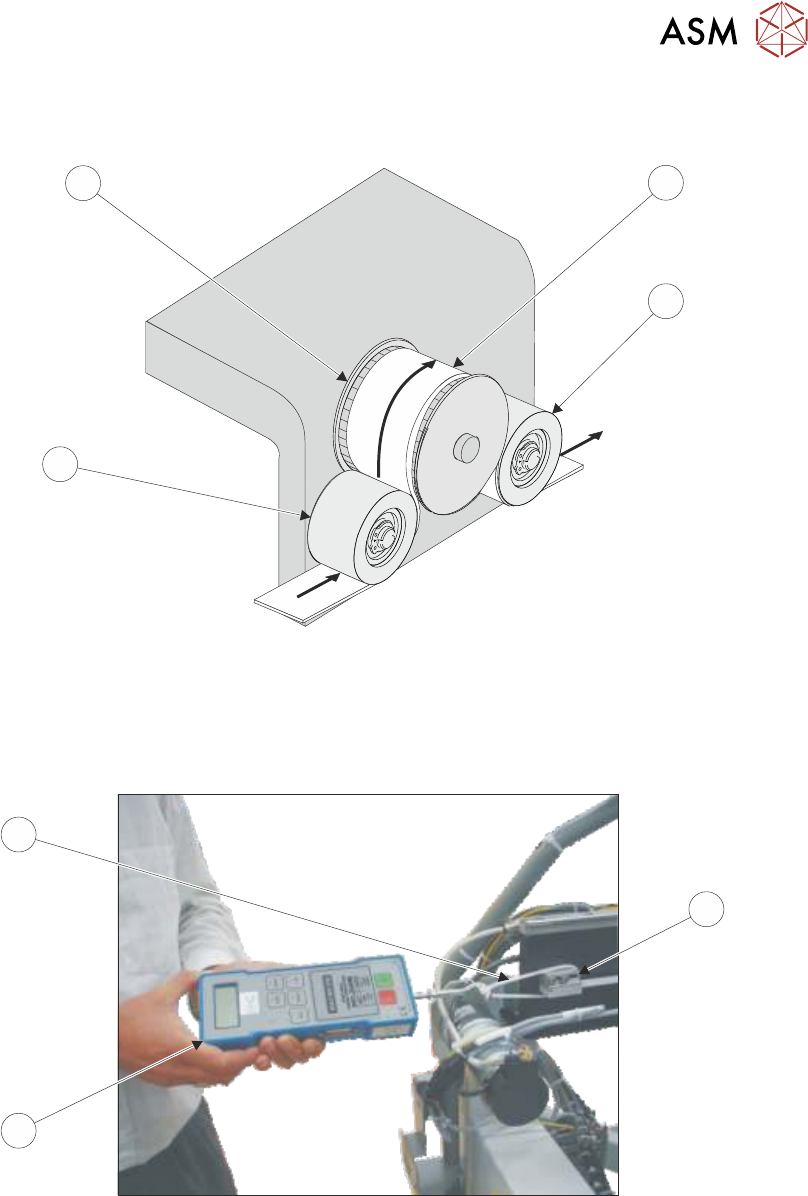
► Thread the timing belt (3) under the front print carriage idle pulley (5), over the print carriage
motor pulley (6) and under the rear print carriage idle pulley (2).
6
3
4
5
► Fasten the belt to the rear belt clamp using the belt securing screws tightened sufficiently to
hold the belt.
► Loosen the rear belt clamp securing screws sufficiently to allow clamp movement.
► Loop a cable tie (9) around the clamp (7).
12.00
7
9
8
► Attach a forcemeter (8) to the cable tie (9) and apply a horizontal force of 12kg.
► Tighten the rear belt clamp securing screws whilst maintaining the tension on the belt.
► Remove the forcemeter (8) and cable tie (9).
► Refit any covers removed for access.
► Remove the isolator lock; turn the mains isolator switch ON.
► Select Maintenance.
► Select Diagnostics.
► Use Next or Previous to highlight Print Carriage.
► Select Select Module.