CP-7[732-742]-series Mechanical Reference(2.9E).pdf - 第128页
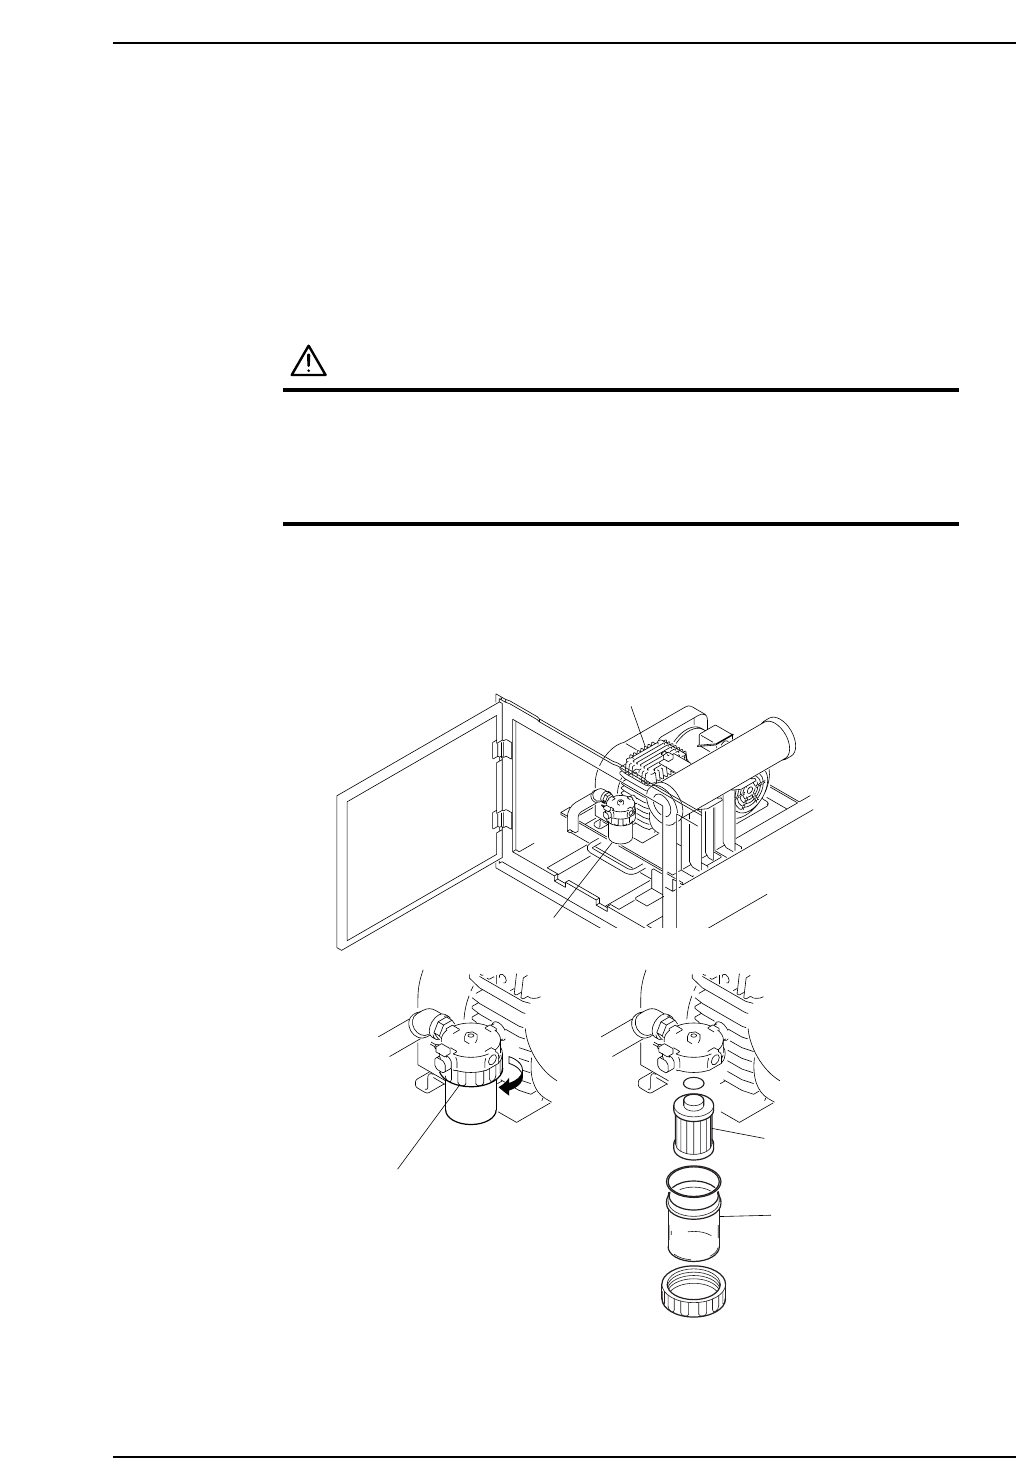
3.6 Replacing the V acuum Pump Filter Element Point Air which is sucked into the pump must be clean. The filter element should therefore be replaced when it becomes excessively soiled. Procedure W ARNING • Be sure to swi…
2. Open the cover on the bottom surface of the light source box.
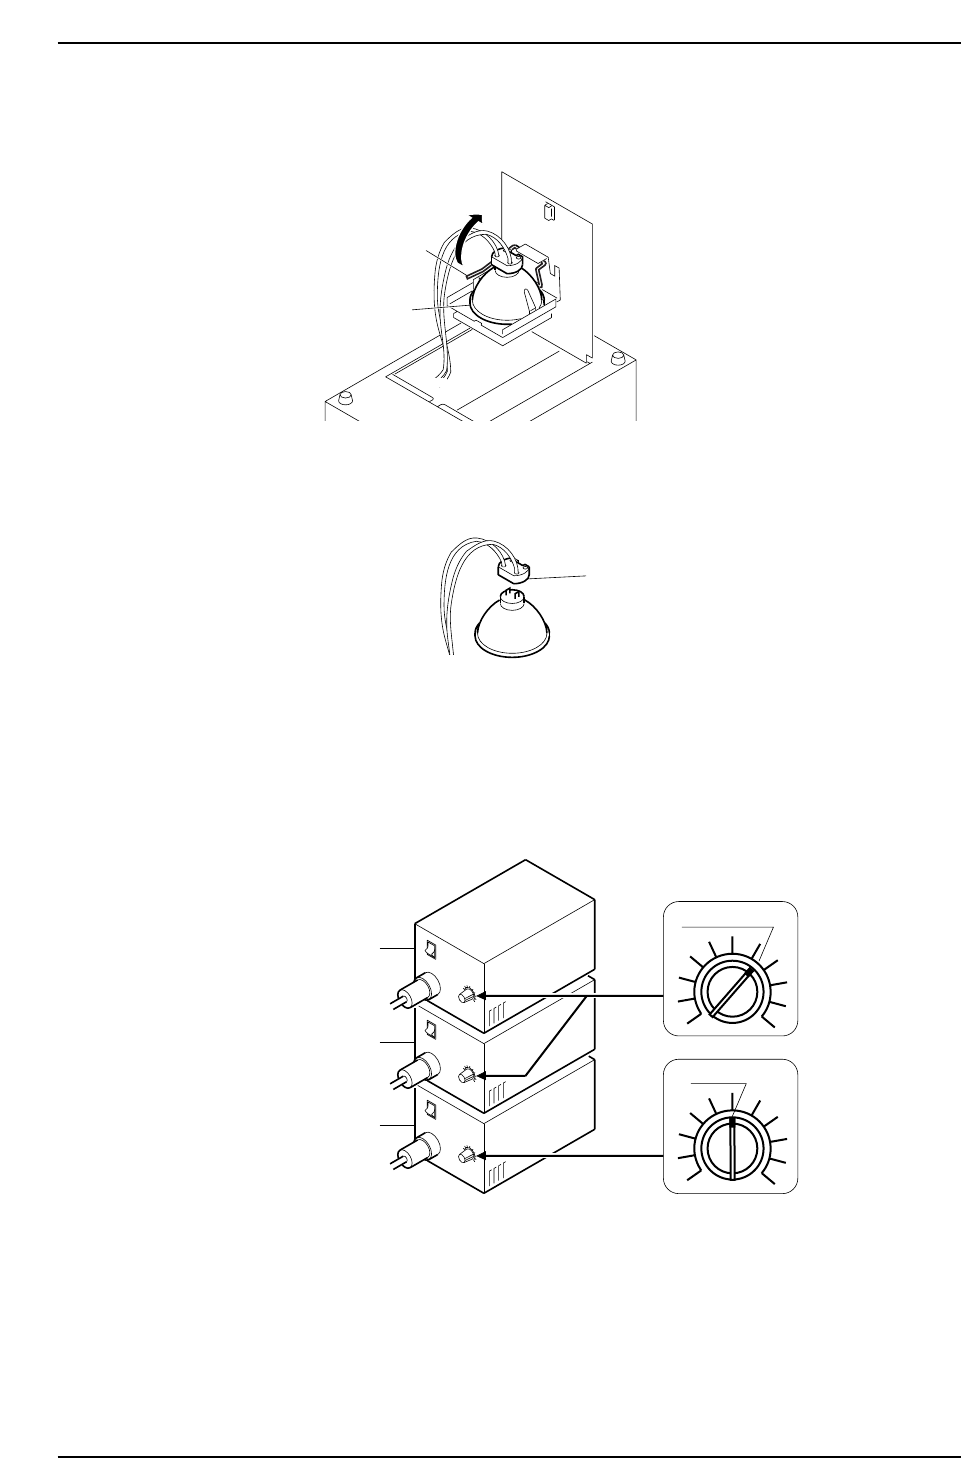
3. Collapse the lever and remove the halogen lamp.
4. Disconnect the connector.
5. Install the new halogen lamp.
6. Replace the light source box into the machine. Turn the light source box’s switch
ON.
7. Adjust the frontlight’s intensity. Set the light source box’s volume dial as shown
below.
C7SM3034E
Light source box 1
Light source box 2
Light source box 3
I
O
I
O
I
O
6.5 Scale
5 Scale
C7SM3033E
Connector
C7SM3032E
Lever
Halogen lamp
Part 3 Chapter 3 Replacing Consumable Parts
Edition 2.7 3-3-8 CP-7 series Mechanical Reference
3.6 Replacing the Vacuum Pump Filter Element
Point
Air which is sucked into the pump must be clean. The filter element should therefore be
replaced when it becomes excessively soiled.
Procedure
WARNING
• Be sure to switch off the 200V power supply before
beginning this procedure.
• Do not touch the vacuum pump immediately after
operation as it may be extremely not. Allow the
pump to cool before performing this procedure.
Loosen the filter case holder, then extract the filter case by pulling it downward. After
extracting the filter case, replace the filter element.
Vacuum pump
Air filter
Flter case holder
Filter case
Filter element
C7SM3054E
Part 3 Chapter 3 Replacing Consumable Parts
Edition 2.7 3-3-9 CP-7 series Mechanical Reference
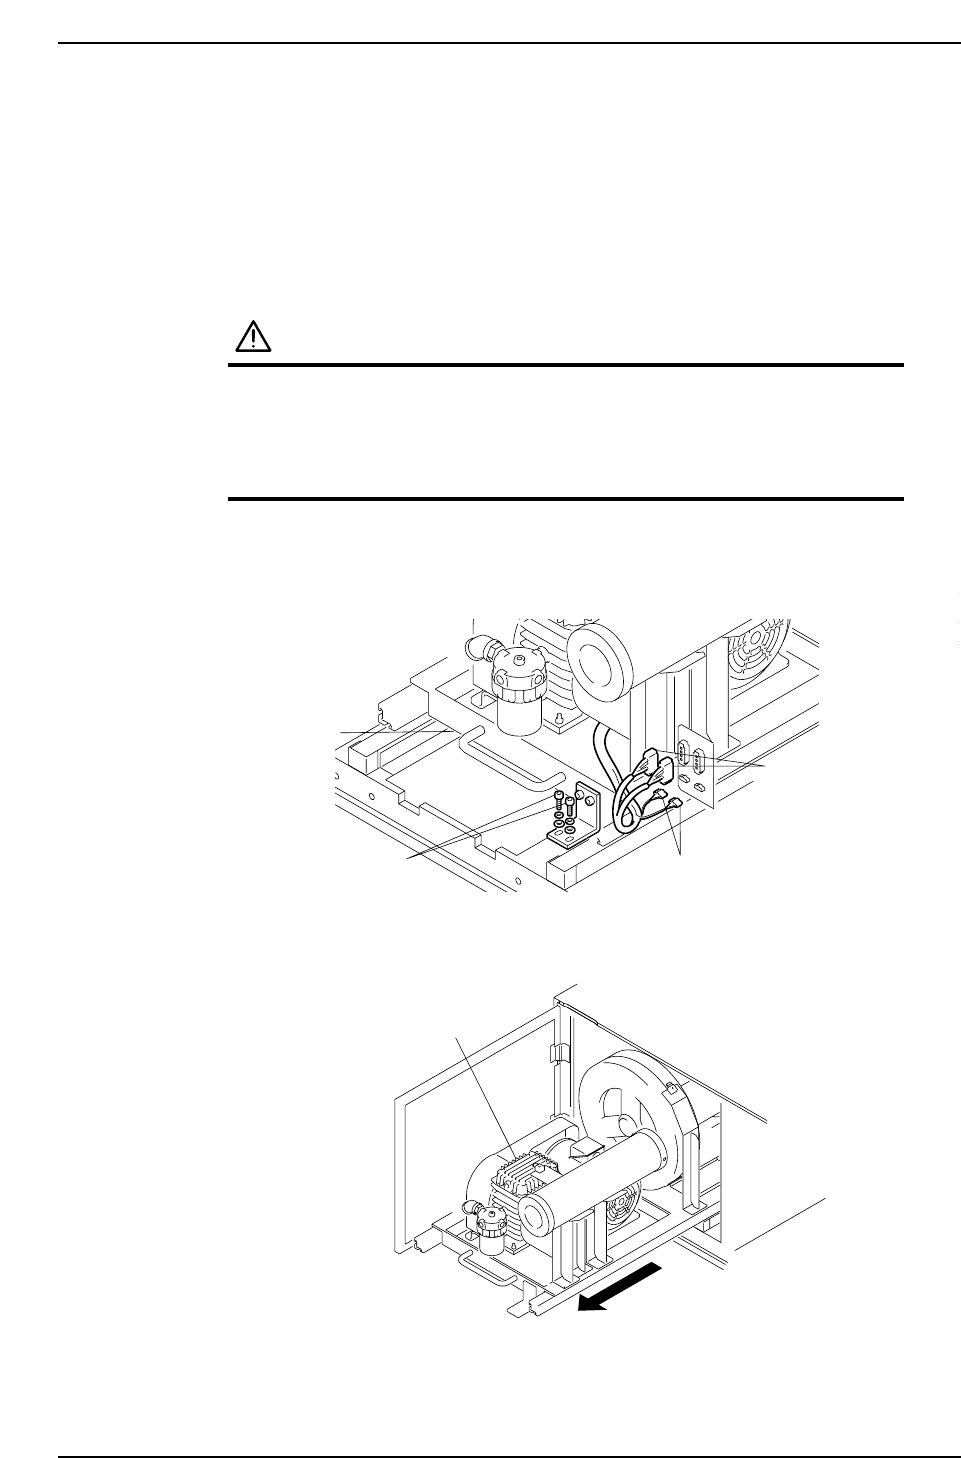
3.7 Replacing the Vacuum Pump Belt
Point
The vacuum pump belt should be replaced when broken or damaged.
Procedure
WARNING
• Be sure to switch off the 200V power supply before
beginning this procedure.
• Do not touch the vacuum pump immediately after
operation as it may be extremely not. Allow the
pump to cool before performing this procedure.
1. Remove the bracket bolts which secure the vacuum pump table, then disconnect
the harness connectors.
2. Pull out the vacuum pump together with the table.
Vacuum pump
C7SM3056E
Bolts
Connectors
Table
Connectors
C7SM3055E
Part 3 Chapter 3 Replacing Consumable Parts
Edition 2.7 3-3-10 CP-7 series Mechanical Reference