CP-7[732-742]-series Mechanical Reference(2.9E).pdf - 第89页
1.13 Cleaning the Carrier Rodless Cylinder (Monthly) Point There is a tendency for scattered parts and fine fibers etc. to adhere to the slide surface of the rodless cylinder used to drive the carrier. As a result, it is…
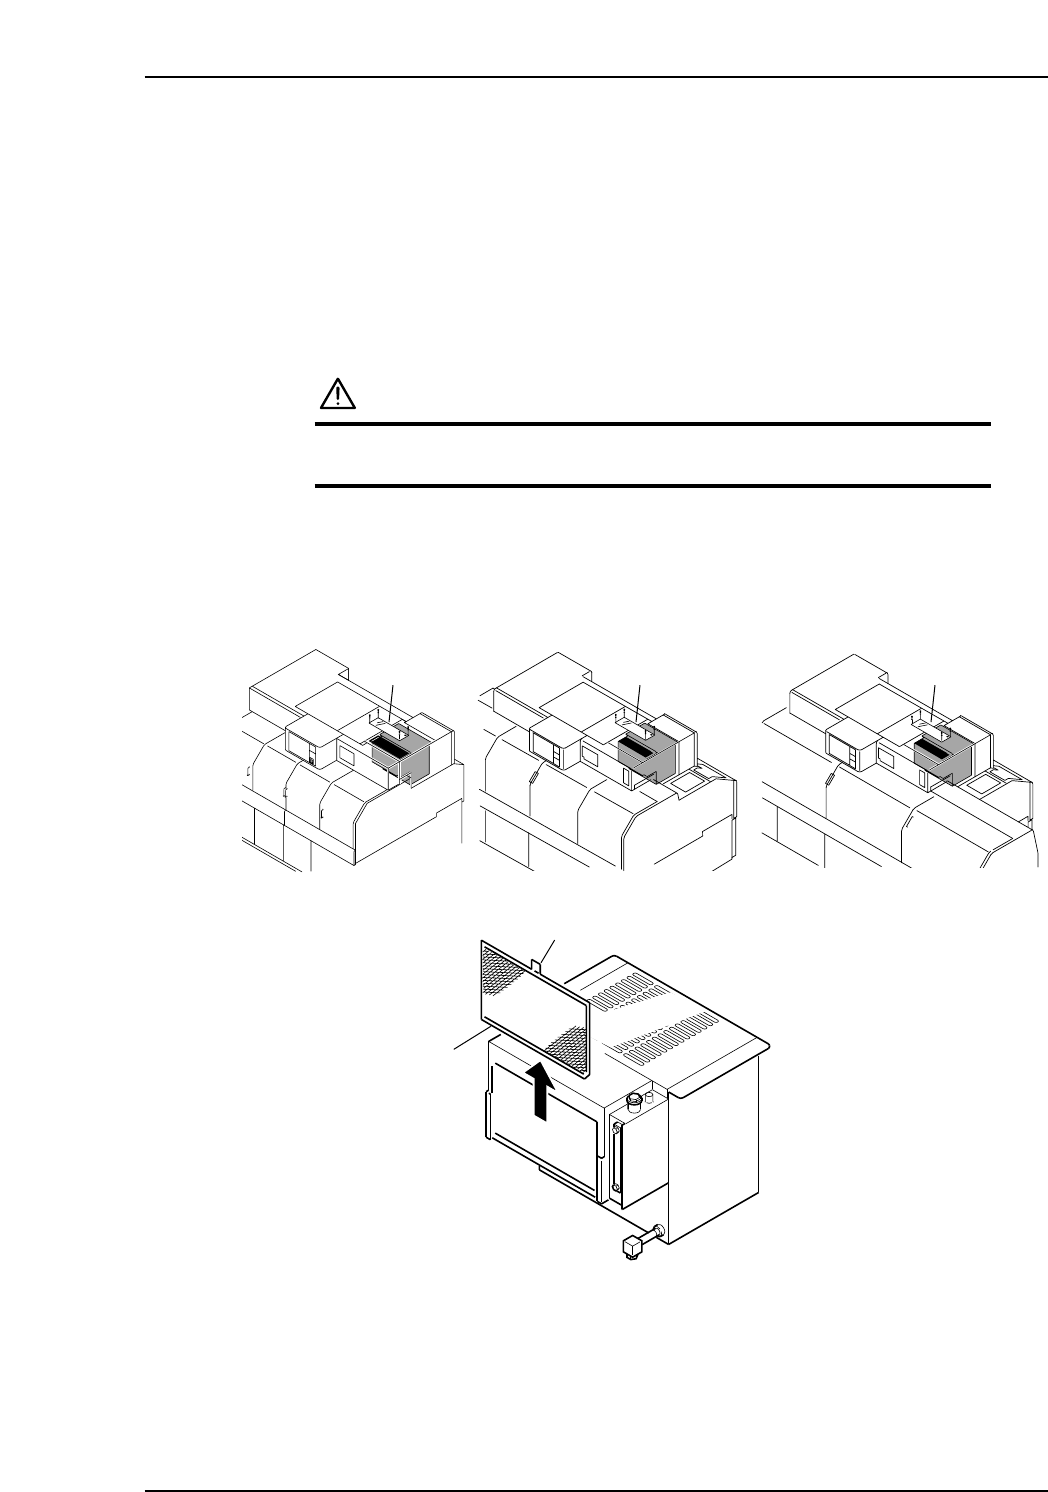
1.12 Cleaning the Oil Cooler Air Filter (Monthly)
Point
A filter is attached to the oil cooler unit. The air filter should be cleaned periodically to
prevent damage to the machine as a result of blockage.
Procedure
WARNING
Be sure to turn the main power off before performing this
procedure.
1. Remove the acrylic cover from the top of the machine.
2. Hold the tab and lift the filter upwards to remove.
3. Clean the filter with a vacuum cleaner.
C7SM3025a
Filter
Tab
Acrylic cover Acrylic cover Acrylic cover
<CP-732E> <CP-742E><CP-742ME>
Part 3 Chapter 1 Cleaning
Edition 2.9 3-1-13 CP-7 series Mechanical Reference
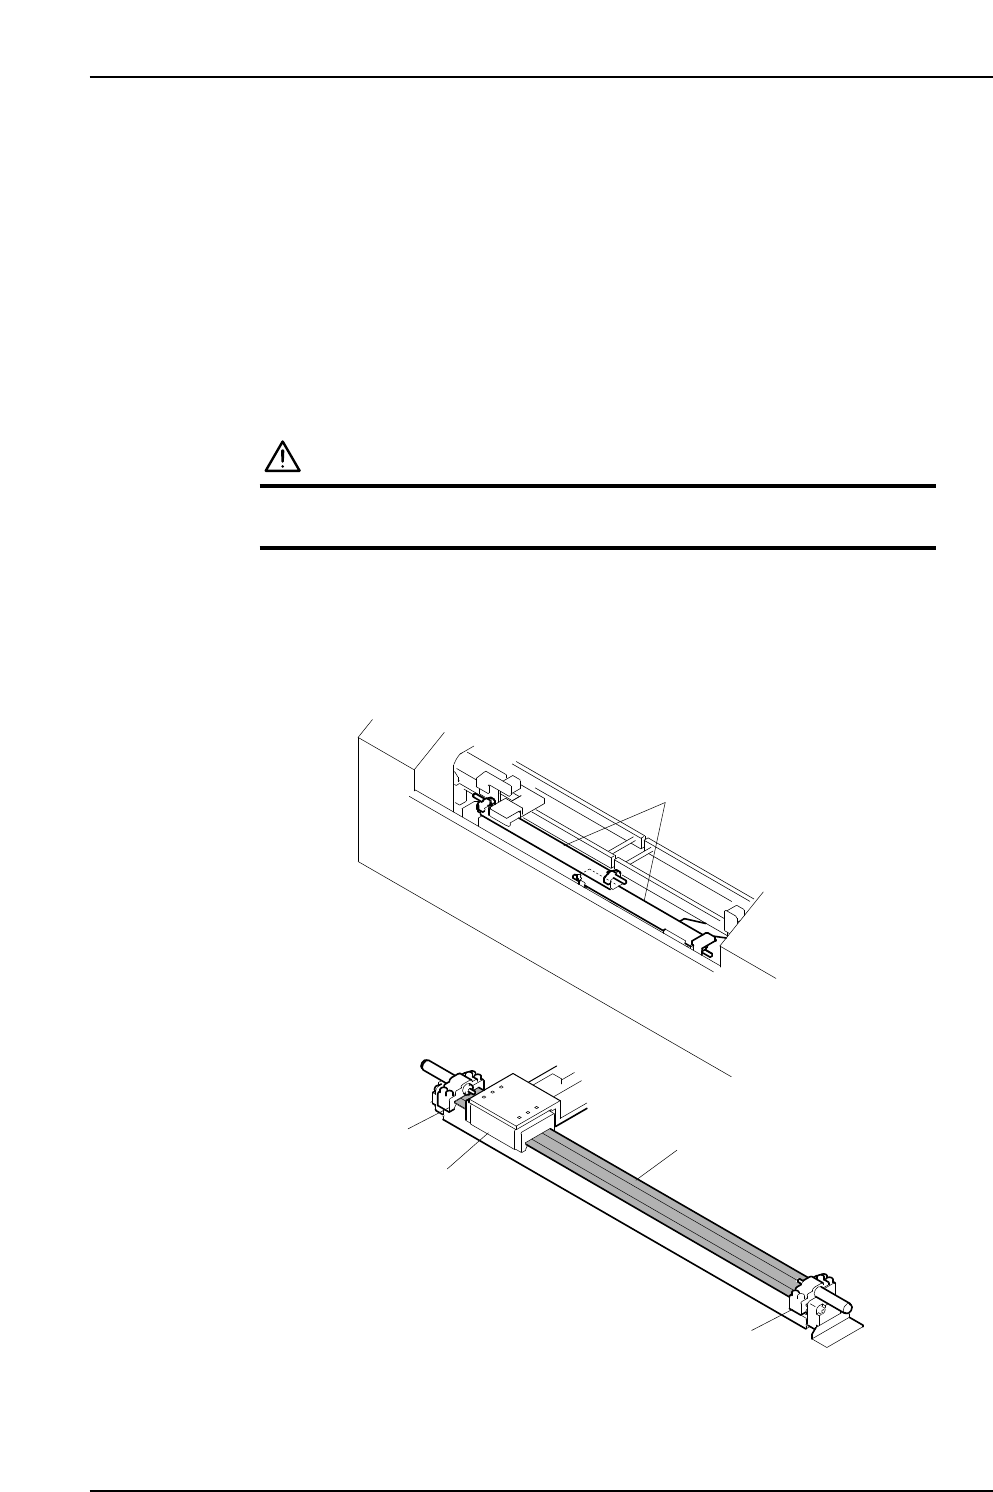
1.13 Cleaning the Carrier Rodless Cylinder
(Monthly)
Point
There is a tendency for scattered parts and fine fibers etc. to adhere to the slide surface of
the rodless cylinder used to drive the carrier. As a result, it is necessary to perform
periodic cleaning.
Procedure
WARNING
Be sure to turn the main power off before performing this
procedure.
1. Lightly wipe the slide surface of the rodless cylinder using a fine cloth.
Furthermore, ensure to remove any dirt etc. that has accumulated between the
ends of the slider surface and the absorber holder.
2. Apply some grease to a fine cloth and wipe along the slider surface.
Note: Ensure to use Daphne Eponex No. 2 by Idemitsu.
Carrier cylinder
Absorber holder
Slider
Slide surface
Absorber holder
Part 3 Chapter 1 Cleaning
Edition 2.9 3-1-14 CP-7 series Mechanical Reference
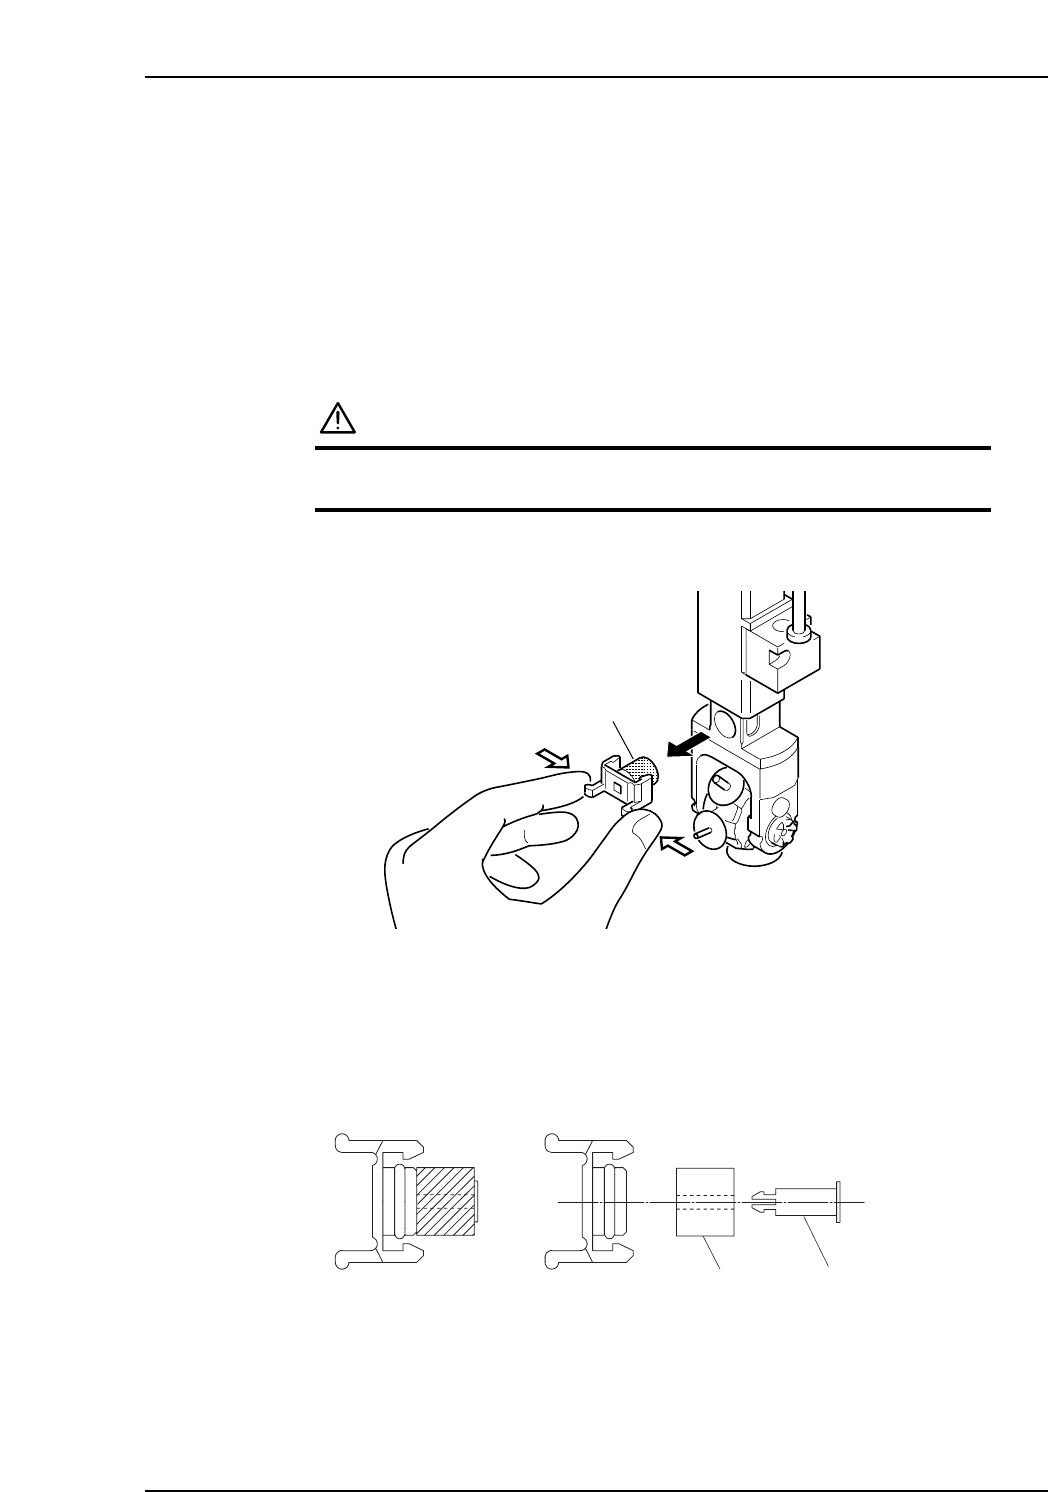
1.14 Replacing the Nozzle Filter (Every 3 Months)
Point
The filter inside the shaft becomes soiled during the course of machine operation, and
should be replaced approximately every 3 months. If errors occur frequently for a
specific nozzle, it is probable that the flow of air is being impeded by a dirty filter.
Procedure
WARNING
Be sure to turn the main power off before performing this
procedure.
Squeeze in the levers shown in the figure below, and carefully extract the filter.
Caution:
1. Do not apply excess force to the nozzle shaft.
2. Ensure that the filter is returned to the nozzle with the levers at the bottom.
2. Remove the pin from the filter Assy, and replace both the filter and the pin.
C7SM3111
Pin
Filter
C7SM3008
Filter Assy
Part 3 Chapter 1 Cleaning
Edition 2.9 3-1-15 CP-7 series Mechanical Reference