00196497-07_SM_SXDX12_en.pdf - 第134页
Service Work Conveyor Placement heads 3.5.5 Replacing the Twin/VHF Head 134 Service Manual SIPLACE SX1/SX2/DX1/DX2 FS02 ► If you need to perform further work on this head ( e.g. replacin g spare parts), fit the head to t…
Service Work Conveyor
3.5.5 Replacing the Twin/VHF Head Placement heads
Service Manual SIPLACE SX1/SX2/DX1/DX2 FS02 133
Removal
NOTICE!
When using modules with undetachable screws (1), you
may need to fit these screws on the other side, depending
on the installation position.
NOTICE
Twin and Twin VHF head
Removal and installation of the Twin VHF head follows the same procedure as that for the Twin
head. Any differences will be explicitly indicated.
► Switch off the machine, disconnect it from the power
supply and secure it to prevent unauthorized reacti-
vation. Observe the instructions in section "1.2 Pre-
paratory Work..." [ ➙ 13].
► Move the gantry into a position which allows you best
access.
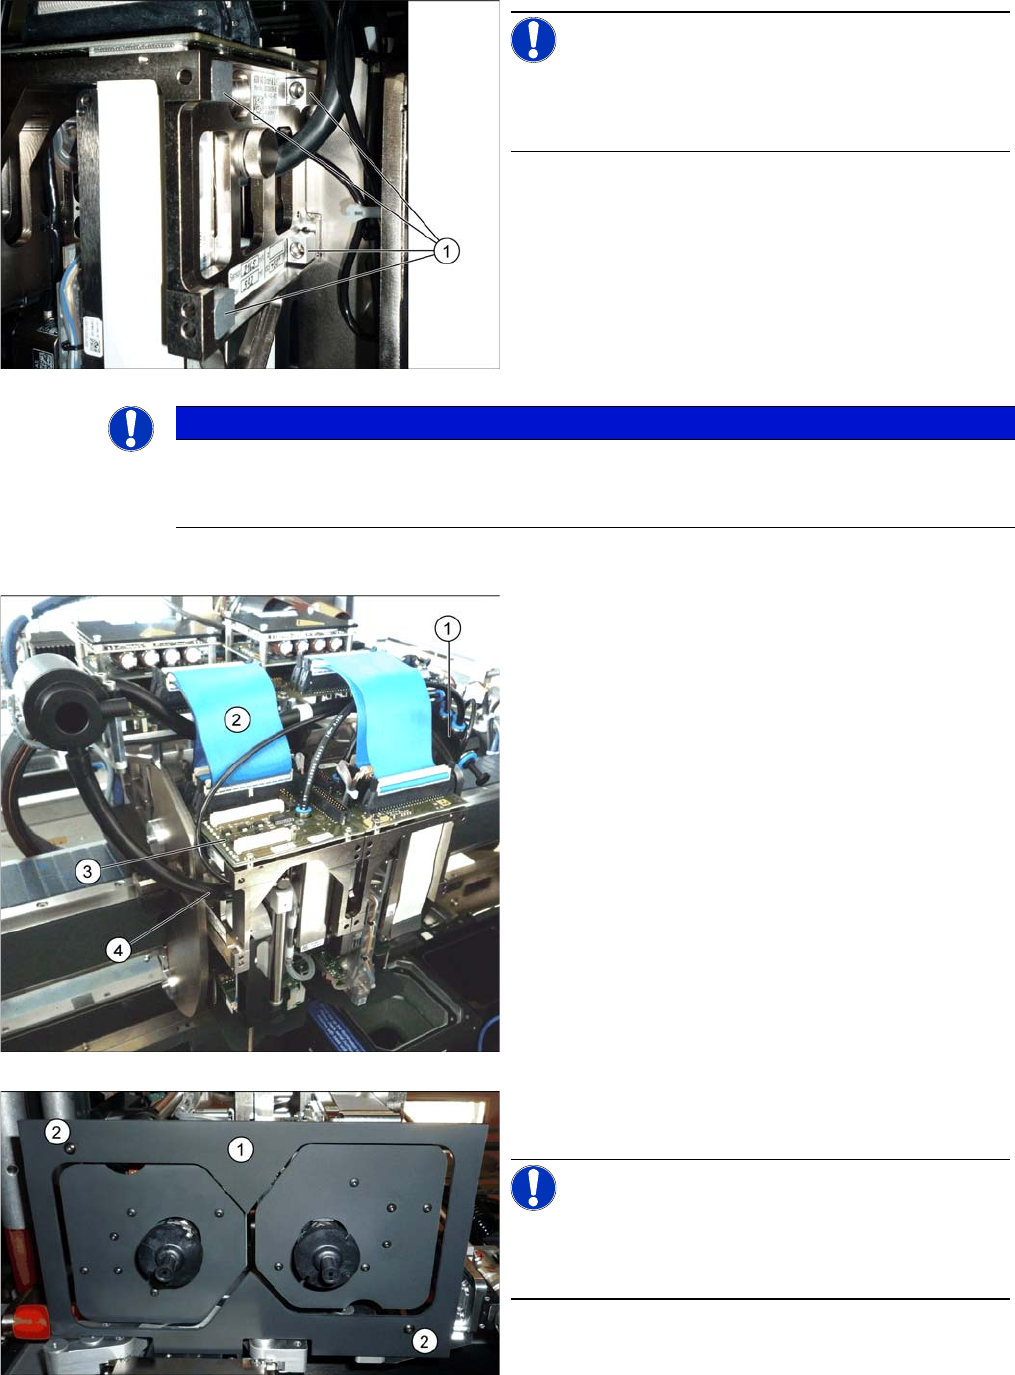
► Unplug the pneumatic connection from the TwinHead
vacuum generator to the pneumatic distributor (1)
and the silencer.
► Disconnect the exhaust air silicone hose from the
TwinHead vacuum generator (4).
► Unplug the pneumatic connection from the pneumat-
ic distributor (1) to the TwinHead return cylinder.
► Unplug the flat ribbon cable (2) from the head main
board (3) on the TwinHead.
► Remove the camera screen (1). This is fastened with
two black screws (2).
NOTICE!
Only use these screws to fix the camera screen. This pre-
vents reflection when measuring components with the
stationary camera.

Service Work Conveyor
Placement heads 3.5.5 Replacing the Twin/VHF Head
134 Service Manual SIPLACE SX1/SX2/DX1/DX2 FS02
► If you need to perform further work on this head (e.g. replacing spare parts), fit the head to the head
mount [03056231-xx].
Installation
► Follow the removal instructions in reverse order for installation. Also observe the following instruc-
tions:
See also
4.9.2 Calibration [ ➙ 294]
3.5.7 Installation Positions on the Head Plate [ ➙ 138]
4.9.2.2 Calibrating the Heads and Cameras (SW70x) [ ➙ 295]
Each module is fixed with four screws to the head plate
and is positioned with two pins.
► Remove the four M4x14 fastening screws (1) with a
long Allen key.
► Pull the module out of the locating pins.
CAUTION
Installation instructions
► Fit the fastening screws on the other side of the module, if needed (see above).
► Make a note of the force values for the new module. These force values can be found on
a label at the side of the module.
► Make sure that the assembly position is correct.
► Perform a head calibration.
Service Work Conveyor
3.5.6 Replacing the DLM4 Head Placement heads
Service Manual SIPLACE SX1/SX2/DX1/DX2 FS02 135
3.5.6
3.5.6 Replacing the DLM4 Head
Replacing the DLM4 Head
Parts, Equipment and Tools
▪ DLM4 head with 12 segments (without sleeves) [03082533-xx]
▪ Adapter plate assembly DLM4-DX1/2 [03082158-xx], if necessary
▪ Torque screwdriver 1-5 Nm [03078400-xx]
▪ Extension/straight TX20 [03073256-xx]
▪ Bit holder for Torque Vario-S screwdriver [03078706-xx]
▪ Extension/straight [03043440-xx]
▪ Extension / with joint [03042635-xx]
▪ Torx Allen screwdriver TX8 [03080081-xx]
▪ Calibration tool version 3 [03010565-xx]
▪ 12x calibration nozzles type 3056 [00330538-xx]
▪ For additional work on the placement head:
Head assembly stand [03056231-xx]
Service manual "DLM3/DLM4/DLM head" [DE: 00197466-xx] [EN: 00197467-xx]
Overview
NOTICE
The adapter plate is only needed for the DLM4 heads.
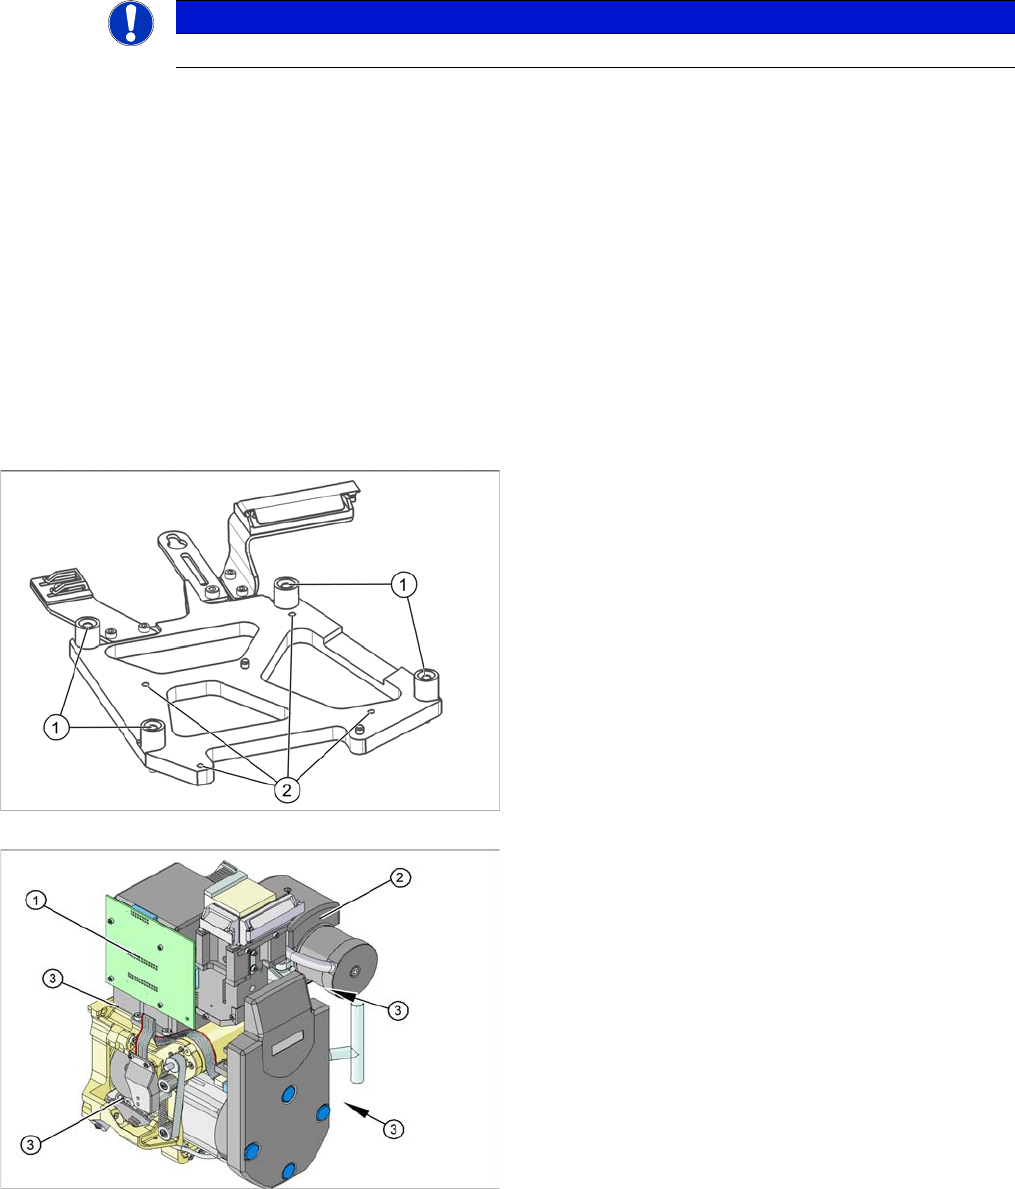
Adapter plate assembly DLM4-DX1/2 [03082158-xx]
1. Fastening screws for the adapter plate on the head
plate
2. Fastening screws for the DLM head on the adapter
plate
1. Illumination control
2. Vacuum generator
3. Four fastening screws M4x18 on the adapter plate