00196497-07_SM_SXDX12_en.pdf - 第138页
Service Work Conveyor Placement heads 3.5.7 Installation Positions on the Head Plate 138 Service Manual SIPLACE SX1/SX2/DX1/DX2 FS02 3.5.7 3 . 5 . 7 I n s t a lla t io n P o s it io n s o n t h e H e a d P la t e Install…
Service Work Conveyor
3.5.6 Replacing the DLM4 Head Placement heads
Service Manual SIPLACE SX1/SX2/DX1/DX2 FS02 137
► Remove the compressed air hoses from the pneumatic coupling of the vacuum generator.
► At the head, unplug the press-fit connections to the head interface and head adapter.
► Loosen the four undetachable fastening screws (M4x18) on the adapter plate.
The head is now hanging on the safety hook of the head mount, together with the adapter plate.
► From the front, take the head off the pins and safety hook.
► Place the head down on the adapter plate.
► Undo the four screws fastening the camera and then remove the camera.
► Remove all sleeves.
► Undo the four screws fastening the adapter plate and then remove the adapter plate.
► If you need to perform further work on this head (e.g. replacing spare parts), fit the head to the head
mount [03056231-xx].
Installation
The head is delivered without a camera, sleeves or adapter plate. These need to be installed from the
old head, as part of a spare parts changeover.
► Place the head on the adapter plate and screw it tight. Make sure that the parallel pins on the adapter
plate slide into the holes drilled into the back part of the head.
► Fix the camera in place with the four screws.
► Unplug the camera cable from the base adapter.
► Insert all sleeves with calibration nozzles of type 3056 [00330538-xx].
► Hook the head with the adapter plate onto the safety hook of the head plate.
► Carefully push the head towards the head plate until it slides onto the cylinder pins and lies flat
against the head plate.
► Fix the head and adapter plate to the head plate with the four screws.
► Connect the compressed air hoses to the pneumatic coupling on the vacuum generator.
► Reconnect to the electricity system.
► Calibrate the head with the help of the station software.
See also
3.5.7 Installation Positions on the Head Plate [ ➙ 138]
4.9.2 Calibration [ ➙ 294]
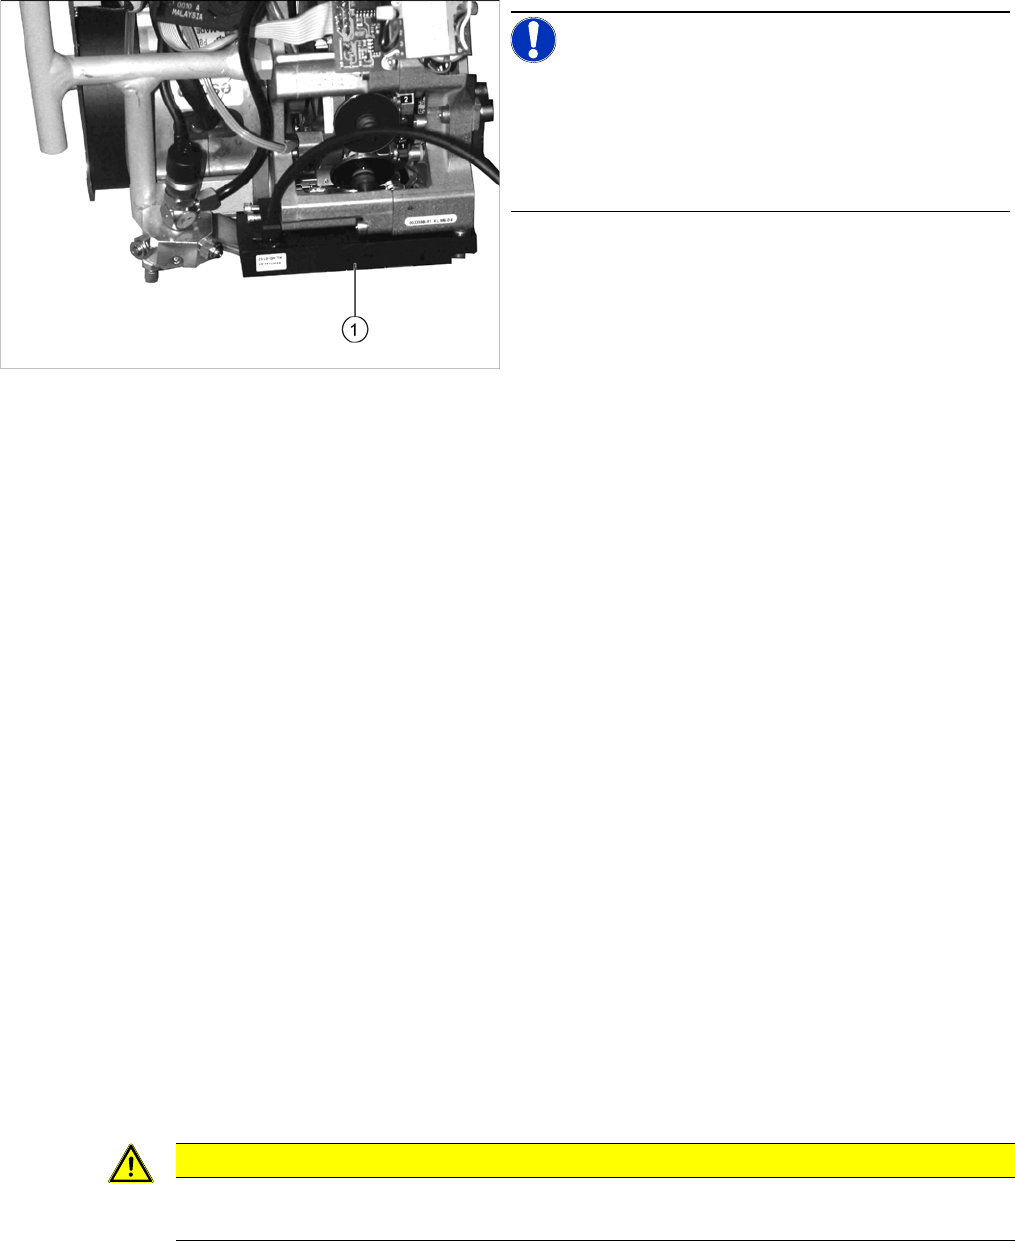
NOTICE!
The component sensor is optional.
If a component sensor (1) is available, undo the two fas-
tening screws and remove the head.
The DLM4 head does not support the component sensor;
for this reason it is missing.
CAUTION
Observe the torque
The screws fastening the adapter plate and the head must be tightened with a torque of 2.7 Nm.
Service Work Conveyor
Placement heads 3.5.7 Installation Positions on the Head Plate
138 Service Manual SIPLACE SX1/SX2/DX1/DX2 FS02
3.5.7
3.5.7 Installation Positions on the Head Plate
Installation Positions on the Head Plate
3.5.7.1
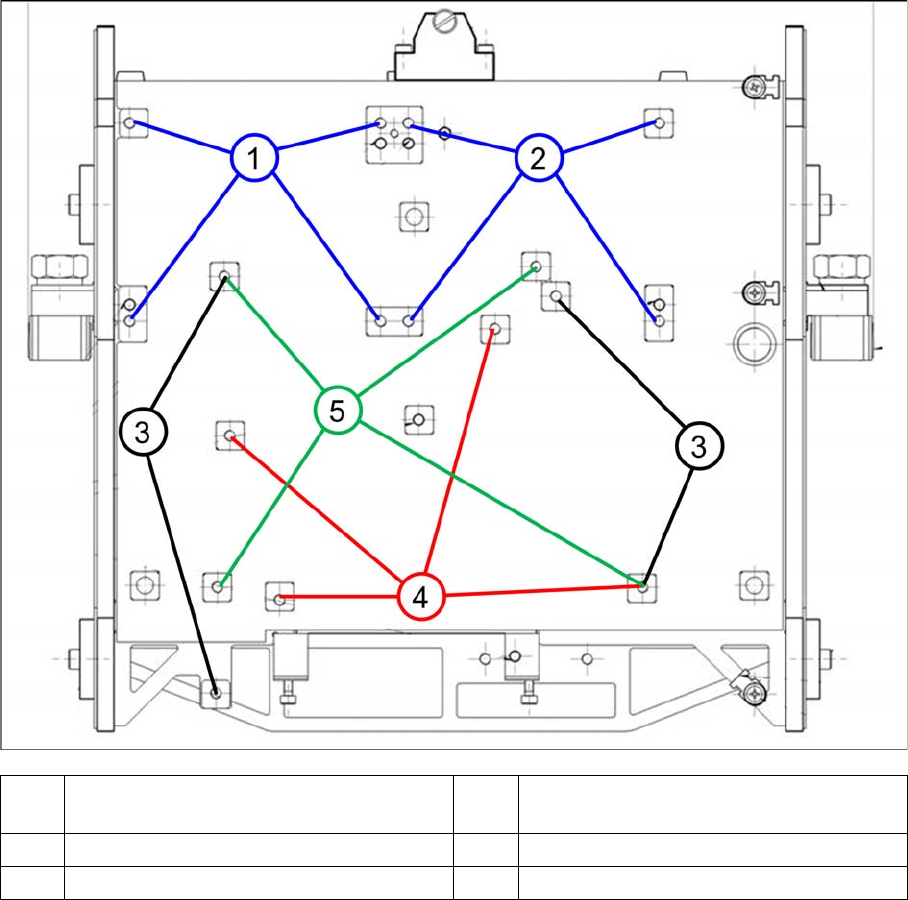
3.5.7.1 Installation Positions on the Standard Head Plate
Installation Positions on the Standard Head Plate
1 Installation position Twin head segment 1 2 Installation position Twin head segment 2
and VHF P&P
3 Installation position CPP head 4 Installation position C&P20 A/P head
5 Installation position DLM head (C&P12)
Service Work Conveyor
3.5.7 Installation Positions on the Head Plate Placement heads
Service Manual SIPLACE SX1/SX2/DX1/DX2 FS02 139
3.5.7.2
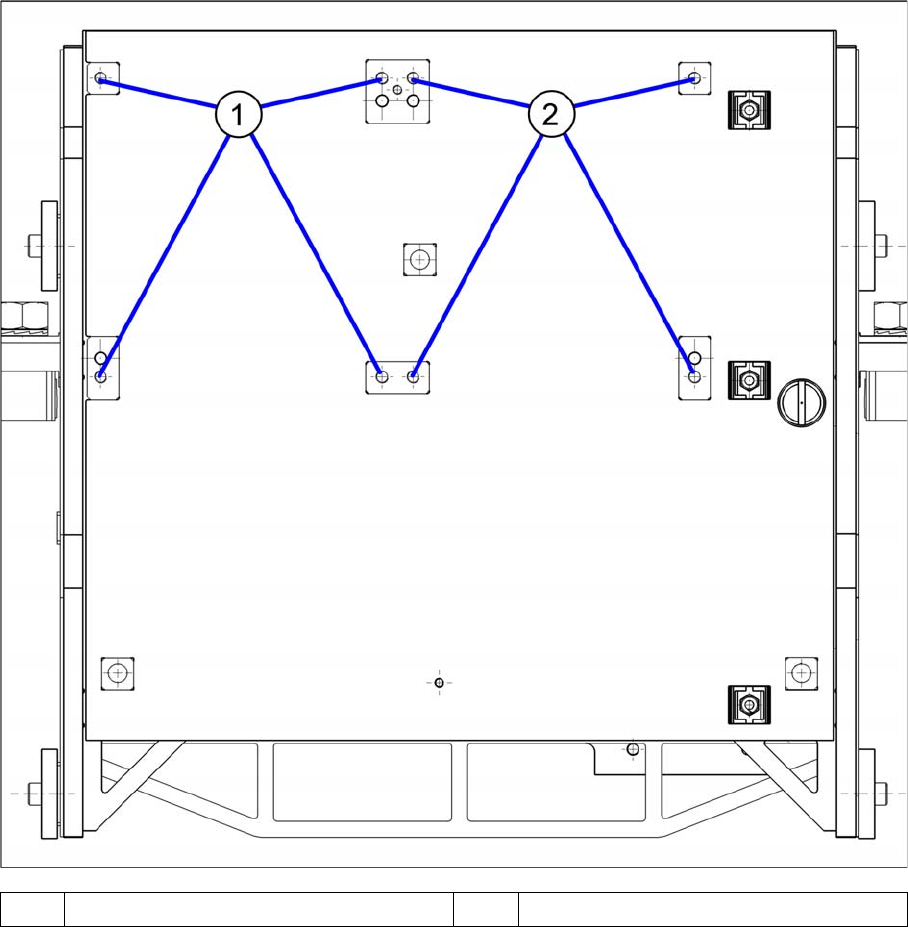
3.5.7.2 Installation Positions on the Twin VHF Head Plate
Installation Positions on the Twin VHF Head Plate
1 Installation position Twin VHF segment 1 2 Installation position Twin VHF segment 2