00196497-07_SM_SXDX12_en.pdf - 第203页
Service Work Conveyor 3.9.9 Replacing the Used Tape Chute Manual table Service Manual SIPLACE SX1/SX2/DX1/DX2 FS02 203 ► Further removal and installation of the feeder lock is the same as that for the front section of th…
Service Work Conveyor
Manual table 3.9.8 Replacing the Feeder Lock on the Manual Table [03082778-xx]
202 Service Manual SIPLACE SX1/SX2/DX1/DX2 FS02
3.9.8
3.9.8 Replacing the Feeder Lock on the Manual Table [03082778-xx]
Replacing the Feeder Lock on the Manual Table [03082778-xx]
Please also observe section Replacing the Locking Latch [03069205-xx].
Parts, equipment and tools
Select the correct spare part:
▪ Rubber mallet
Overview
Removal
Machine type Designation Item No.
X-Series S Feeder lock/X-Series (1x) 03023777-xx
SX1/SX2, DX1/DX2 Feeder lock 30/2-fold
(1x per 30 track manual table or component trolley)
(2x per 60 track manual table or component trolley)
03081586-xx
DX4 Feeder lock 40-fold
(1x per manual table or component trolley)
03082778-xx
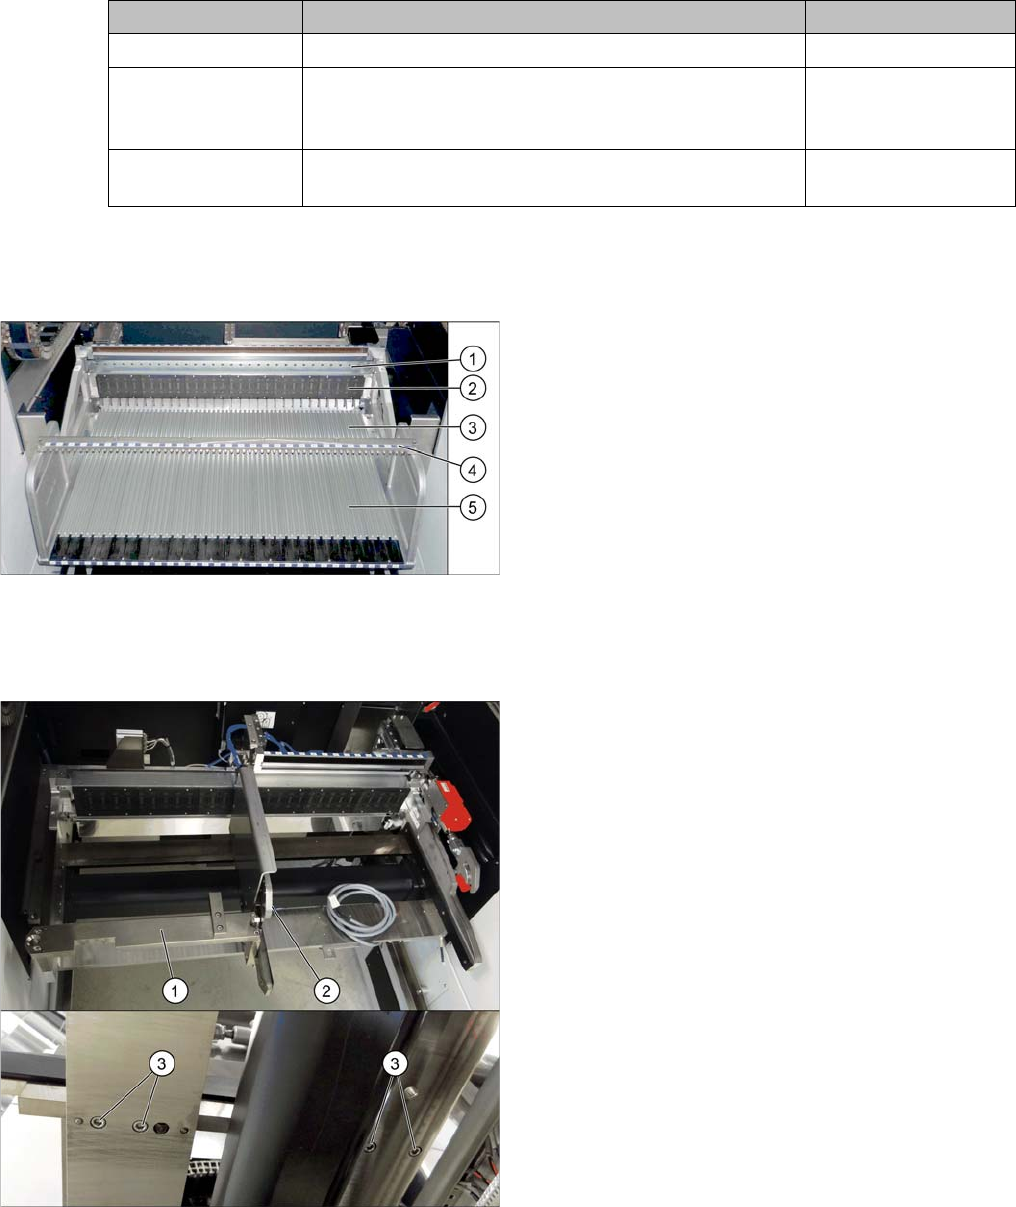
Manual table (using example of DX1/DX2)
1. Centering bar
2. FCU
3. Front section with feeder lock (with locking latches)
4. Fixture bar
5. Back part
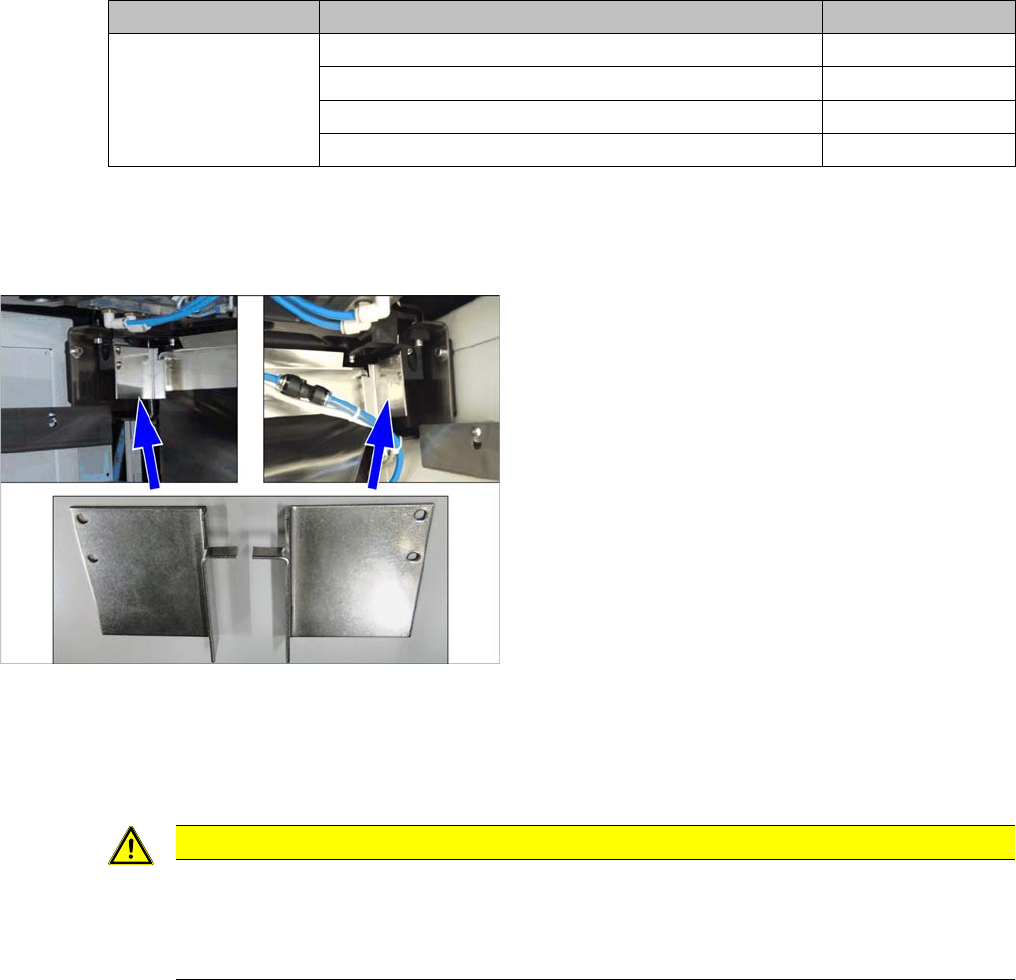
If there is a WPC at the same location, perform the follow-
ing two steps as well:
► Dismantle the WPC docking rail (1).
► Dismantle the left side of the insert mechanism (2).
Loosen the 4 fastening screws (3) on the underside
and the 2 fastening screws on the top of the empty
tape duct.
Service Work Conveyor
3.9.9 Replacing the Used Tape Chute Manual table
Service Manual SIPLACE SX1/SX2/DX1/DX2 FS02 203
► Further removal and installation of the feeder lock is the same as that for the front section of the man-
ual table. For more information about this, read section "3.9.3 Removing the Front Section of the
Manual Table" [ ➙ 194].
Installation
► Follow the removal instructions in reverse order for installation.
See also
3.9.2 Removing the Back Section of the Manual Table [ ➙ 193]
3.9.9
3.9.9 Replacing the Used Tape Chute
Replacing the Used Tape Chute
Parts, Equipment and Tools
Select the correct spare part:
Removal
► Switch off the machine, disconnect it from the power supply and secure it to prevent unauthorized
reactivation. Observe the instructions in section "1.2 Preparatory Work..." [ ➙ 13].
Component Supply - Manual Tables - Dismantling Protections - Color Version
► Loosen the two screws fastening the used tape chute fixtures. There are one screw on the left and
one on the right of the used tape chute.
► Remove the screws fastening the used tape chute.
► Take the used tape chute down and out of the machine.
Machine type Designation Item No.
DX1/DX2 Used tape chute 60 tracks 03064026-xx
Used tape chute 30 tracks 03073312-xx
If required, secure used tape chute DX1/DX2 left 03094519-xx
If required, secure used tape chute DX1/DX2 right 03094522-xx
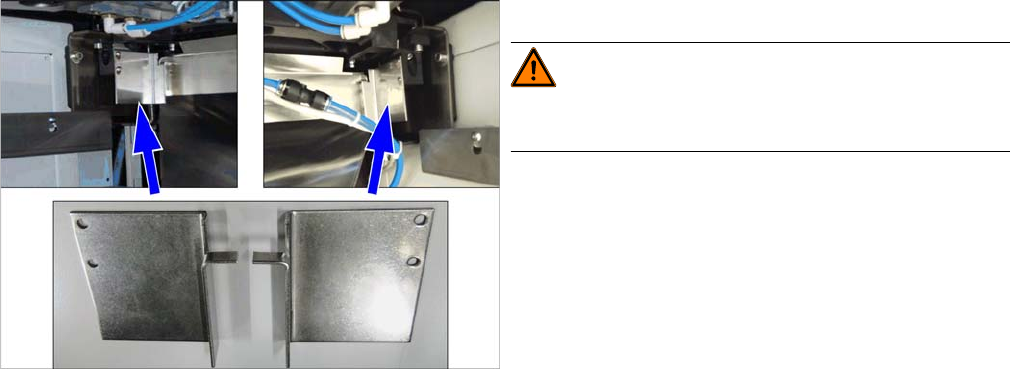
Manual tables only:
► Dismantle the protections:
– Protection waste chute DX1/2 left [03094519-xx]
– Protection waste chute DX1/2 right [03094522-
xx]
CAUTION
Risk of cutting
The cutter is located under the tape channel. The blades there have very sharp edges.
► Do not reach into the cutter and make sure that it is never freely accessible for longer peri-
ods or without supervision.
Service Work Conveyor
Manual table 3.9.9 Replacing the Used Tape Chute
204 Service Manual SIPLACE SX1/SX2/DX1/DX2 FS02
Installation
► Follow the removal instructions in reverse order for installation. Also observe the following instruc-
tions:
Compone nt Supply - Manual Tables - Fitting Pr otections - Color Version
Manual tables only:
WARNING!
There is a risk of injury on manual tables without the two
protections.
► Fit the two protections:
– Protection waste chute DX1/2 left [03094519-xx]
– Protection waste chute DX1/2 right [03094522-
xx]