00196497-07_SM_SXDX12_en.pdf - 第219页
Service Work Conveyor 3.10.7 Replacing the CAN Terminator Board [03046 863-xx] (WPC5 f eed-in only) COT insert Service Manual SIPLACE SX1/SX2/DX1/DX2 FS02 219 3.10.7 3 . 1 0 . 7 R e p la c in g t h e C A N T e r m in a t…
Service Work Conveyor
COT insert 3.10.6 Replacing the Insert Control [03123949-xx]
218 Service Manual SIPLACE SX1/SX2/DX1/DX2 FS02
3.10.6
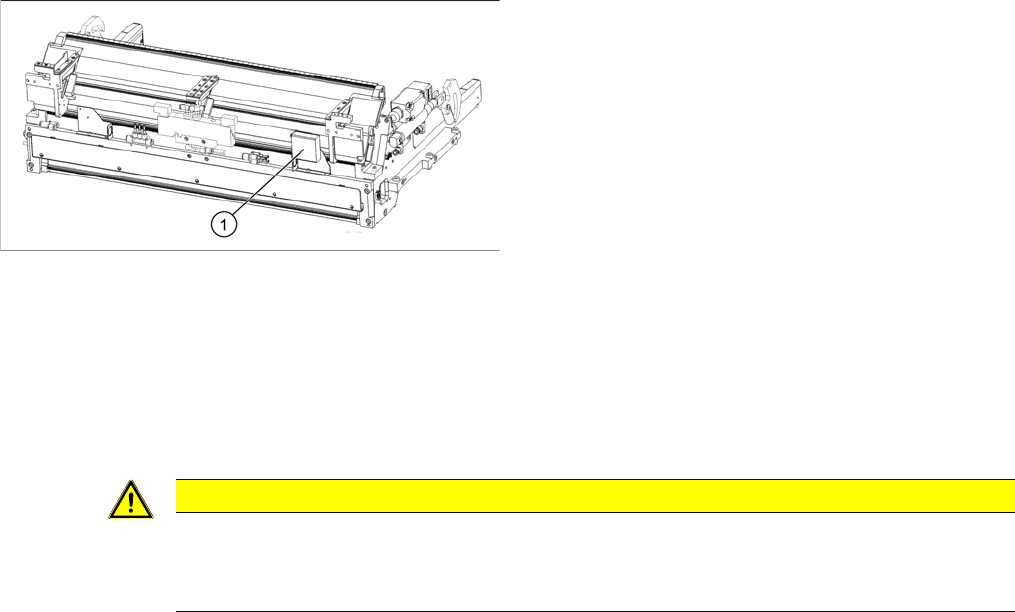
3.10.6 Replacing the Insert Control [03123949-xx]
Replacing the Insert Control [03123949-xx]
Parts, Equipment and Tools
▪ Insert control SX1/2 cpl. [03123949-xx] (replaces [03079305-xx])
Overview
Removal
► Switch off the machine and secure it to prevent unauthorized reactivation. Observe the instructions
in section "1.2 Preparatory Work..." [ ➙ 13].
► To gain better access, you may need to disconnect the COT insert and pull it slightly out of the ma-
chine.
Alternatively, you can also remove the upper section of the component camera to gain better access.
► Unplug all electrical connections to the insert control. You may want to mark their positions, to make
clear assignment easier later on.
► Remove the screws fastening the insert control and remove the insert control from the machine.
Installation
► Follow the removal instructions in reverse order for installation.
1. Insert control
CAUTION
Component Camera
► The component camera mirror has sharp edges.
► Take care not to damage the component camera.
Service Work Conveyor
3.10.7 Replacing the CAN Terminator Board [03046863-xx] (WPC5 feed-in only) COT insert
Service Manual SIPLACE SX1/SX2/DX1/DX2 FS02 219
3.10.7
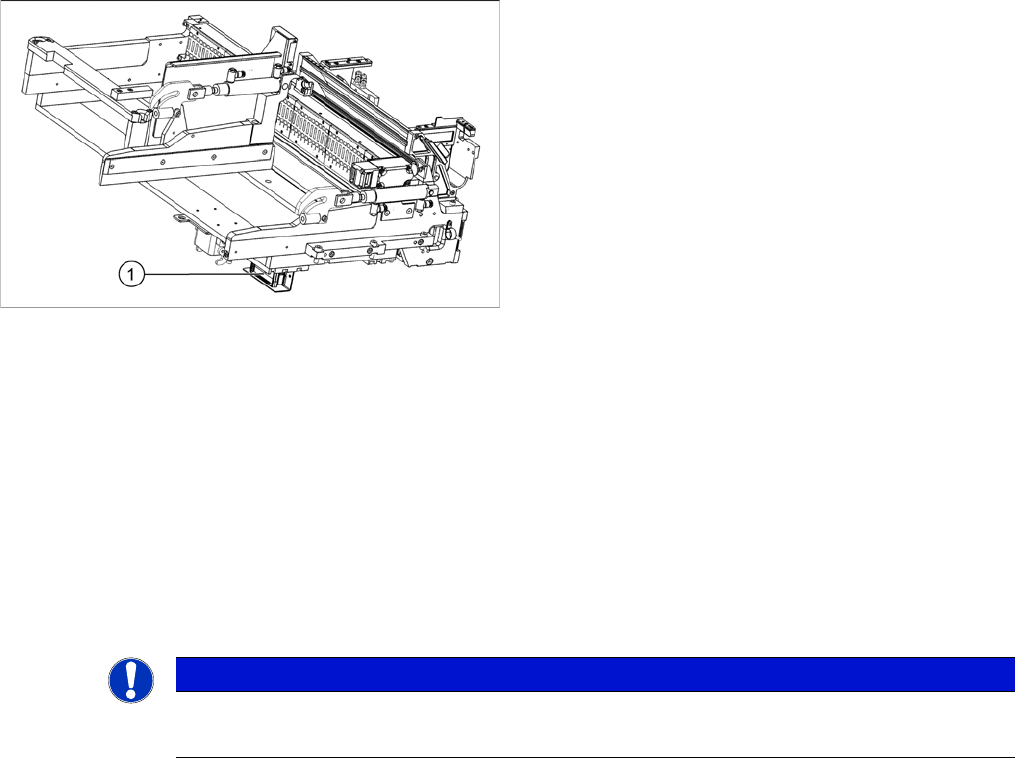
3.10.7 Replacing the CAN Terminator Board [03046863-xx] (WPC5 feed-in only)
Replacing the CAN Terminator Board [03046863-xx] (WPC5 feed-in only)
Parts, Equipment and Tools
▪ CAN Bus terminator board for changeover table [03046863-xx]
Overview
Removal
► Switch off the machine and secure it to prevent unauthorized reactivation. Observe the instructions
in section "1.2 Preparatory Work..." [ ➙ 13].
► Unplug all electrical connections to the CAN terminator board. You may want to mark their positions,
to make clear assignment easier later on.
► Remove the screws fastening the CAN terminator board and remove the CAN terminator board from
the machine.
Installation
► Follow the removal instructions in reverse order for installation.
See also
5.4.3 CAN bus terminator for CO table [03046863-xx] [ ➙ 328]
1. CAN terminator board
NOTICE
Installation instructions
► Set the DIP switches (see "5.4.3 CAN bus terminator for CO table [03046863-xx]" [➙328]).
Service Work Conveyor
COT insert 3.10.8 Upgrade Kit COT-I-30 CAN Switch for 2nd WPC [03085518-xx]
220 Service Manual SIPLACE SX1/SX2/DX1/DX2 FS02
3.10.8
3.10.8 Upgrade Kit COT-I-30 CAN Switch for 2nd WPC [03085518-xx]
Upgrade Kit COT-I-30 CAN Switch for 2nd WPC [03085518-xx]
Parts, Equipment and Tools
▪ Upgrade Kit COT-I-30 CAN Switch for 2nd WPC [03085518-xx]
3.10.9
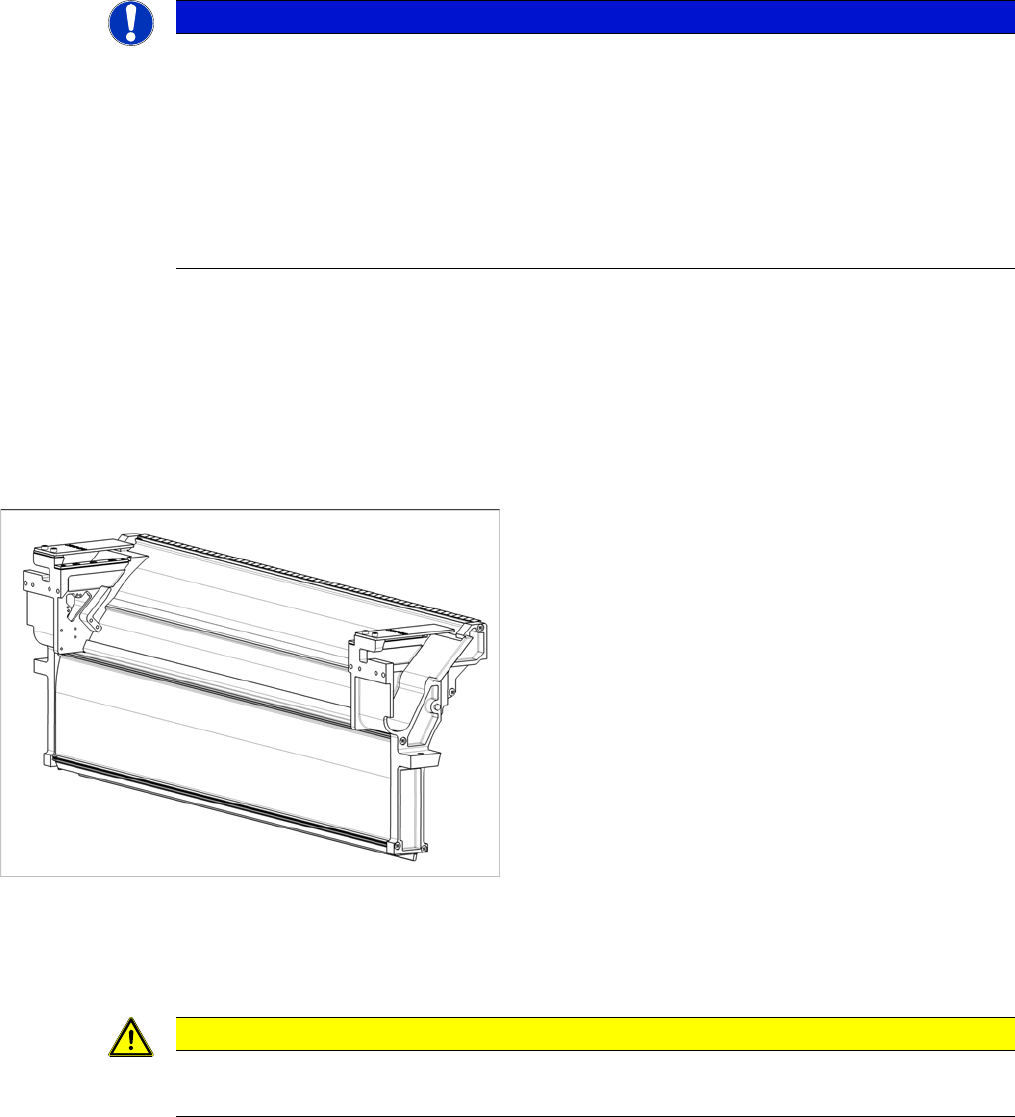
3.10.9 Replacing the Used Tape Channel [03057897-xx]
Replacing the Used Tape Channel [03057897-xx]
Parts, Equipment and Tools
▪ Assembly Instructions "Manual Tray - SIPLACE SX1/SX2" [DE+EN: 00196823-xx]
Removal/Installation
► For removal and installation read the assembly instructions "Manual Tray - SIPLACE SX1/SX2"
[DE+EN: 00196823-xx] Observe the following note:
NOTICE
Required for 2nd WPC
This CAN switch is needed when two WPCs are installed at a SX1/SX2/DX1/DX2 machine.
► If a second WPC is installed, you need to integrate one CAN switch for each WPC at the
CAN interface. This is the case if one of the following options is installed:
COT insert 30 / P01 [03067106-xx]
COT insert 30/2-fold DX1/2 [03089844-xx]
► Refer to the Assembly instructions "WPC on SIPLACE SX1/SX2" [00196630-xx].
► Set the DIP switches (see "4.3.5 Setting the DIP Switch on the CAN Switch" [ ➙ 261]).
▪ Used tape channel compl. 60 [03057897-xx]
CAUTION
Installation instructions
► Make sure that the tape cutter and the used tape channel are aligned correctly.