00196497-07_SM_SXDX12_en.pdf - 第221页
Service Work Conveyor 3.10.10 Replacing the Waste Tape Chute COT insert Service Manual SIPLACE SX1/SX2/DX1/DX2 FS02 221 3.10.10 3 . 1 0 . 1 0 R e p la c in g t h e W a s t e T a p e C h u t e Replacing the Wa ste Tape Ch…
Service Work Conveyor
COT insert 3.10.8 Upgrade Kit COT-I-30 CAN Switch for 2nd WPC [03085518-xx]
220 Service Manual SIPLACE SX1/SX2/DX1/DX2 FS02
3.10.8
3.10.8 Upgrade Kit COT-I-30 CAN Switch for 2nd WPC [03085518-xx]
Upgrade Kit COT-I-30 CAN Switch for 2nd WPC [03085518-xx]
Parts, Equipment and Tools
▪ Upgrade Kit COT-I-30 CAN Switch for 2nd WPC [03085518-xx]
3.10.9
3.10.9 Replacing the Used Tape Channel [03057897-xx]
Replacing the Used Tape Channel [03057897-xx]
Parts, Equipment and Tools
▪ Assembly Instructions "Manual Tray - SIPLACE SX1/SX2" [DE+EN: 00196823-xx]
Removal/Installation
► For removal and installation read the assembly instructions "Manual Tray - SIPLACE SX1/SX2"
[DE+EN: 00196823-xx] Observe the following note:
NOTICE
Required for 2nd WPC
This CAN switch is needed when two WPCs are installed at a SX1/SX2/DX1/DX2 machine.
► If a second WPC is installed, you need to integrate one CAN switch for each WPC at the
CAN interface. This is the case if one of the following options is installed:
COT insert 30 / P01 [03067106-xx]
COT insert 30/2-fold DX1/2 [03089844-xx]
► Refer to the Assembly instructions "WPC on SIPLACE SX1/SX2" [00196630-xx].
► Set the DIP switches (see "4.3.5 Setting the DIP Switch on the CAN Switch" [ ➙ 261]).
▪ Used tape channel compl. 60 [03057897-xx]
CAUTION
Installation instructions
► Make sure that the tape cutter and the used tape channel are aligned correctly.
Service Work Conveyor
3.10.10 Replacing the Waste Tape Chute COT insert
Service Manual SIPLACE SX1/SX2/DX1/DX2 FS02 221
3.10.10
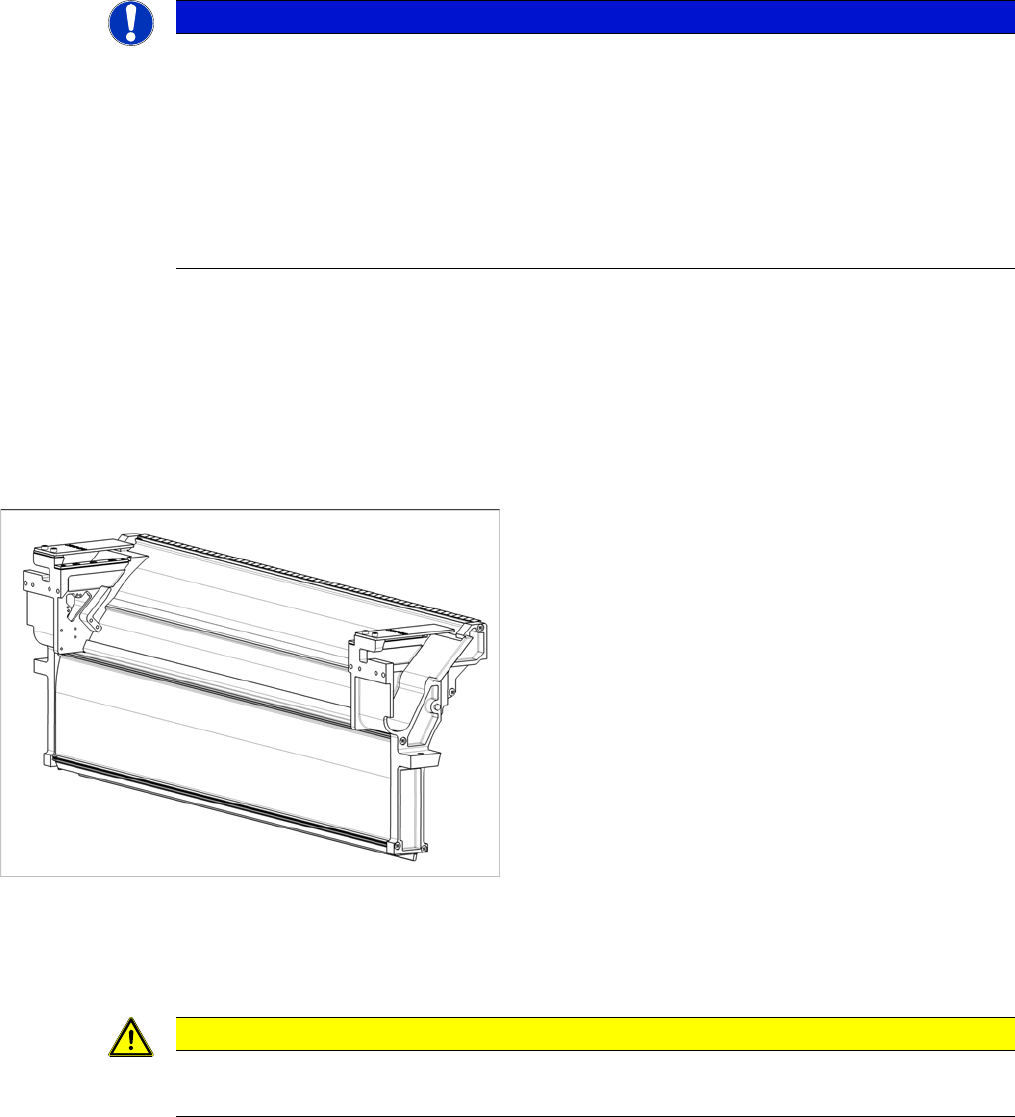
3.10.10 Replacing the Waste Tape Chute
Replacing the Waste Tape Chute
Parts, Equipment and Tools
Select the appropriate waste tape chute:
You may need the following parts in addition:
▪ Protection waste chute DX1/2 left [03094519-xx]
▪ Protection waste chute DX1/2 right [03094522-xx]
Removal
Component Supply - Manual Tables - Dismantling Protections - Color Version
► Unhook the waste tape chute.
Assembly Waste tape chute
Manual table MT 60 [03081652-xx] Waste chute DX1/2 COT60 [03088958-xx]
Manual table MT 30 [03082686-xx] Waste chute DX1/2 COT30 [03088960-xx]
COT insert 60 / P001 [03059353-xx]
COT insert 60/2-slots [03089843-xx]
Waste chute SX1/2 COT60 [03064026-xx]
COT insert 30 / P001 [03067206-xx]
COT insert 30/2-slots [03089844-xx]
Waste chute SX1/2 COT30 [03073312-xx]
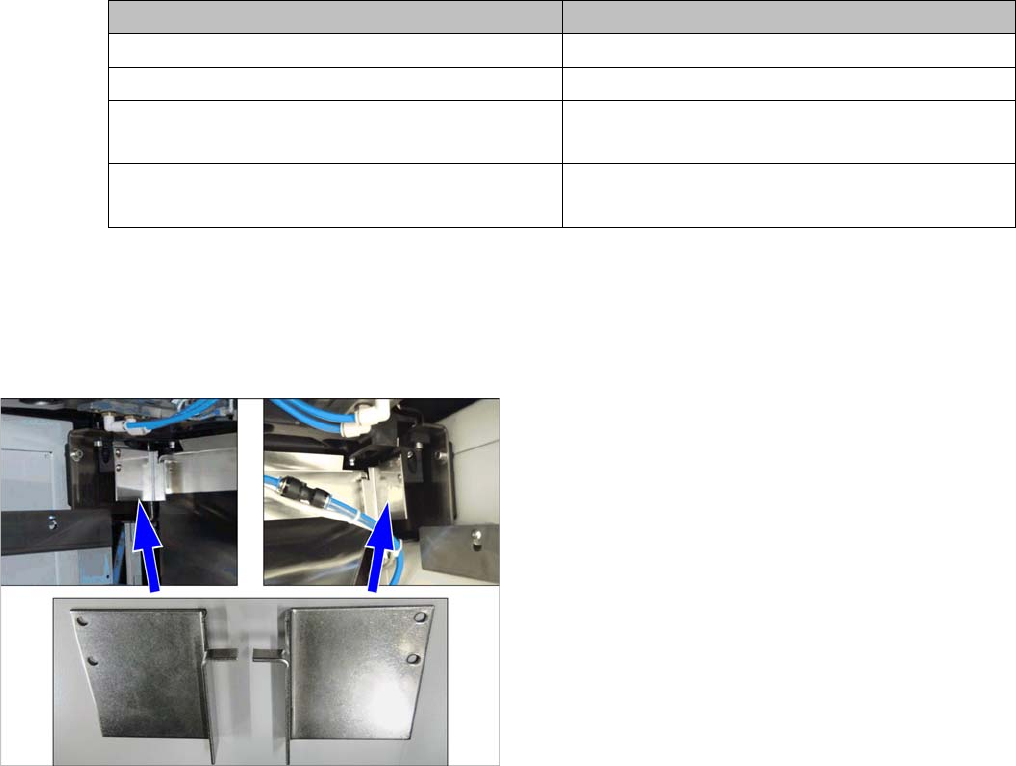
Manual tables only:
► Dismantle the protections:
– Protection waste chute DX1/2 left [03094519-xx]
– Protection waste chute DX1/2 right [03094522-
xx]
Service Work Conveyor
COT insert 3.10.10 Replacing the Waste Tape Chute
222 Service Manual SIPLACE SX1/SX2/DX1/DX2 FS02
Installation
► Hook the waste tape chute into place.
SXDX12V1V2 – Tape Cutter – Waste Tape Chute – Pay Attention to the Plastic Strips – Color Version
Compone nt Supply - Manual Tables - Fitting Pr otections - Color Version
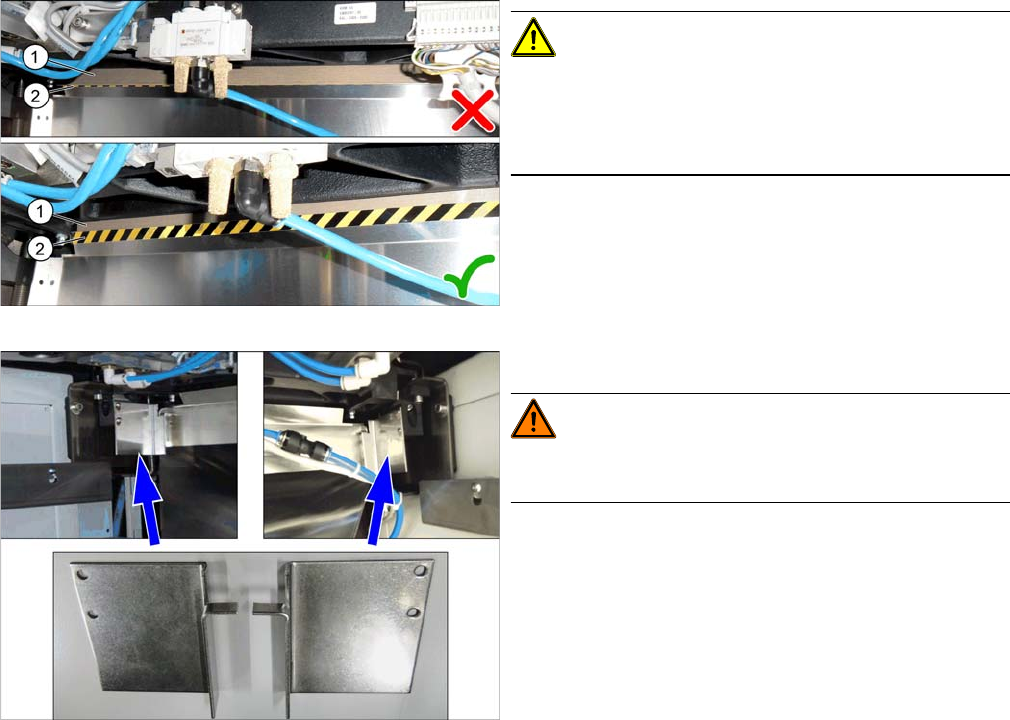
CAUTION!
Make sure that the plastic strips (1) (if present) are locat-
ed behind the plate (2).
The black-yellow hatched label must be completely visi-
ble.
Manual tables only:
WARNING!
There is a risk of injury on manual tables without the two
protections.
► Fit the two protections:
– Protection waste chute DX1/2 left [03094519-xx]
– Protection waste chute DX1/2 right [03094522-
xx]