00196497-07_SM_SXDX12_en.pdf - 第232页
Service Work Conveyor Cutter 3.11.4 Replacing the Short-Stroke Cylinder [0 3058693-xx] 232 Service Manual SIPLACE SX1/SX2/DX1/DX2 FS02 3.11.4 3 . 1 1 . 4 R e p la c in g t h e S h o r t - S t r o k e C y lin d e r [ 0 3 …
Service Work Conveyor
3.11.3 Replacing the Articulated Joint on the Short-Stroke Cylinder [03058685-xx] Cutter
Service Manual SIPLACE SX1/SX2/DX1/DX2 FS02 231
Installation
► Follow the removal instructions in reverse order for further installation. Also observe the following
instructions:
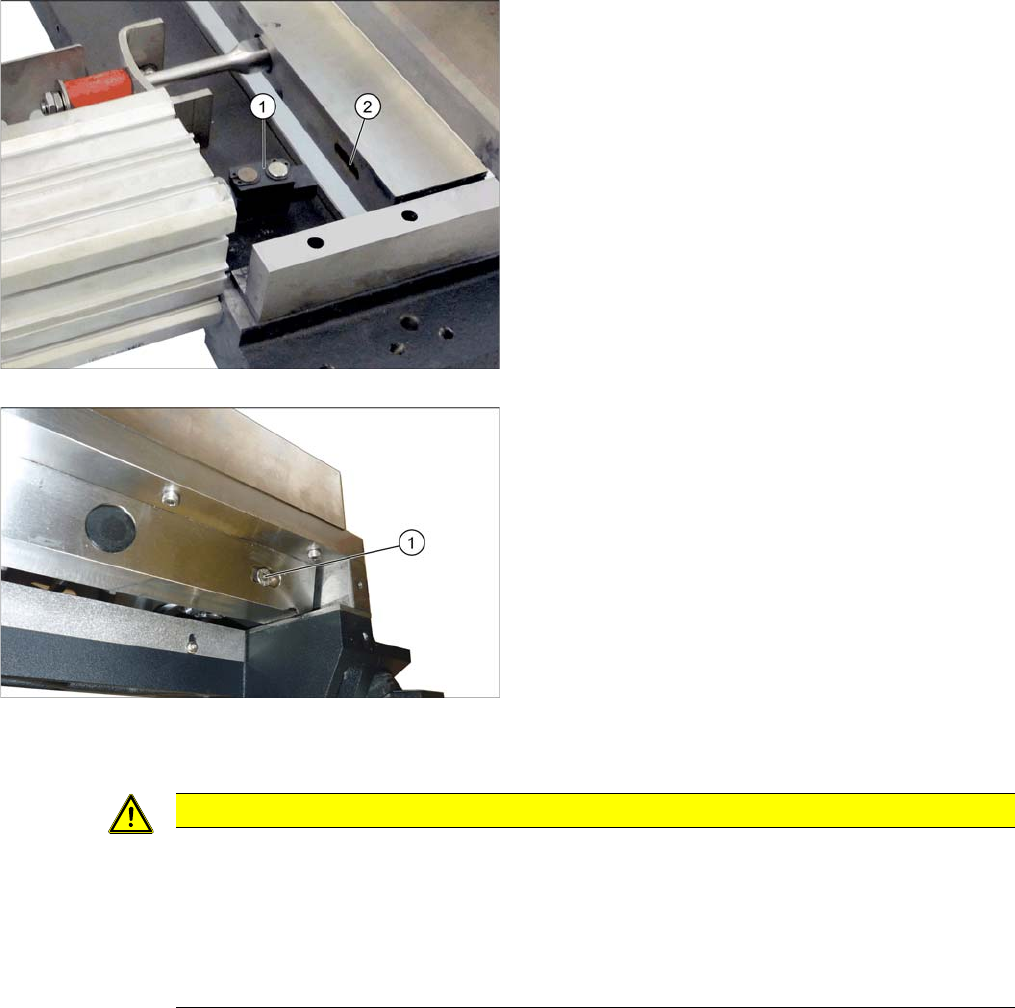
► Screw the articulated joint (1) into the short-stroke
cylinder with a torque of 22 Nm. Make sure that the
joint is horizontal so that it fits into the recess (2) in the
moveable blade. Secure the screw with Loctite 243.
► Screw the articulated joint to the moveable blades.
Tighten the screws to a torque of 8.8 Ncm.
CAUTION
Installation instructions
► Secure with screws with Loctite.
► Insert the new screw caps. Remove the protruding plastic residues with a knife.
► Hook the waste tape chute into place. Please also observe section "3.10.10 Replacing the
Waste Tape Chute" [ ➙ 221]. Pay particular attention to the plastic strips and the fuses (if
present).
Service Work Conveyor
Cutter 3.11.4 Replacing the Short-Stroke Cylinder [03058693-xx]
232 Service Manual SIPLACE SX1/SX2/DX1/DX2 FS02
3.11.4
3.11.4 Replacing the Short-Stroke Cylinder [03058693-xx]
Replacing the Short-Stroke Cylinder [03058693-xx]
Parts, Equipment and Tools
▪ Dia 63 mmx40 SMC cylinder (short-stroke cylinder) [03058693-xx]
Overview
Removal
► Switch off the machine, disconnect it from the power supply and secure it to prevent unauthorized
reactivation. Observe the instructions in section "1.2 Preparatory Work..." [ ➙ 13].
► Remove the cutter from the machine (see "3.11.1 Replacing the Cutter [03063781Sxx]" [ ➙ 223]).
► Remove the articulated joint from the short-stroke cylinder (see "3.11.3 Replacing the Articulated
Joint on the Short-Stroke Cylinder [03058685-xx]" [ ➙ 228]). The joint can be removed after you
have removed the short-stroke cylinder.
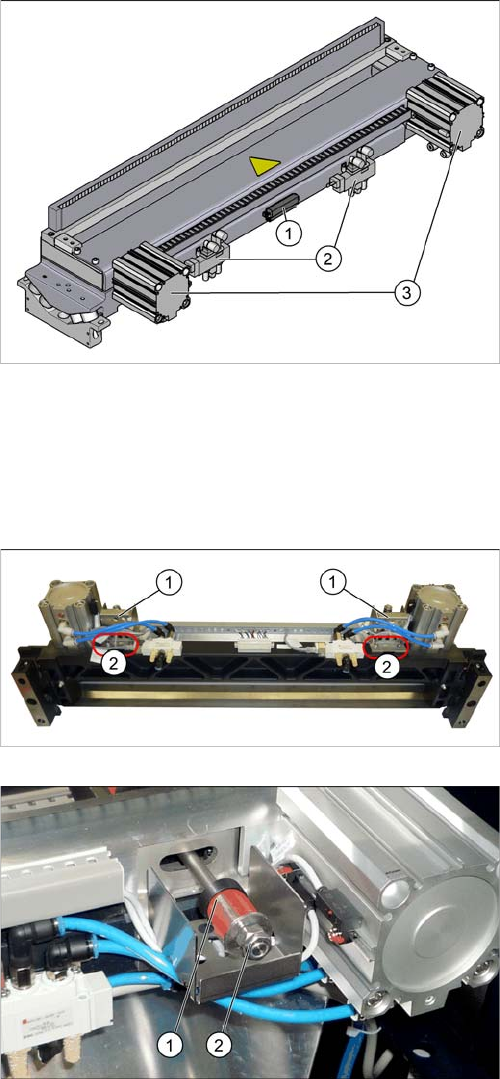
1. Connection for control system
2. Solenoid valves
3. Short-stroke cylinder
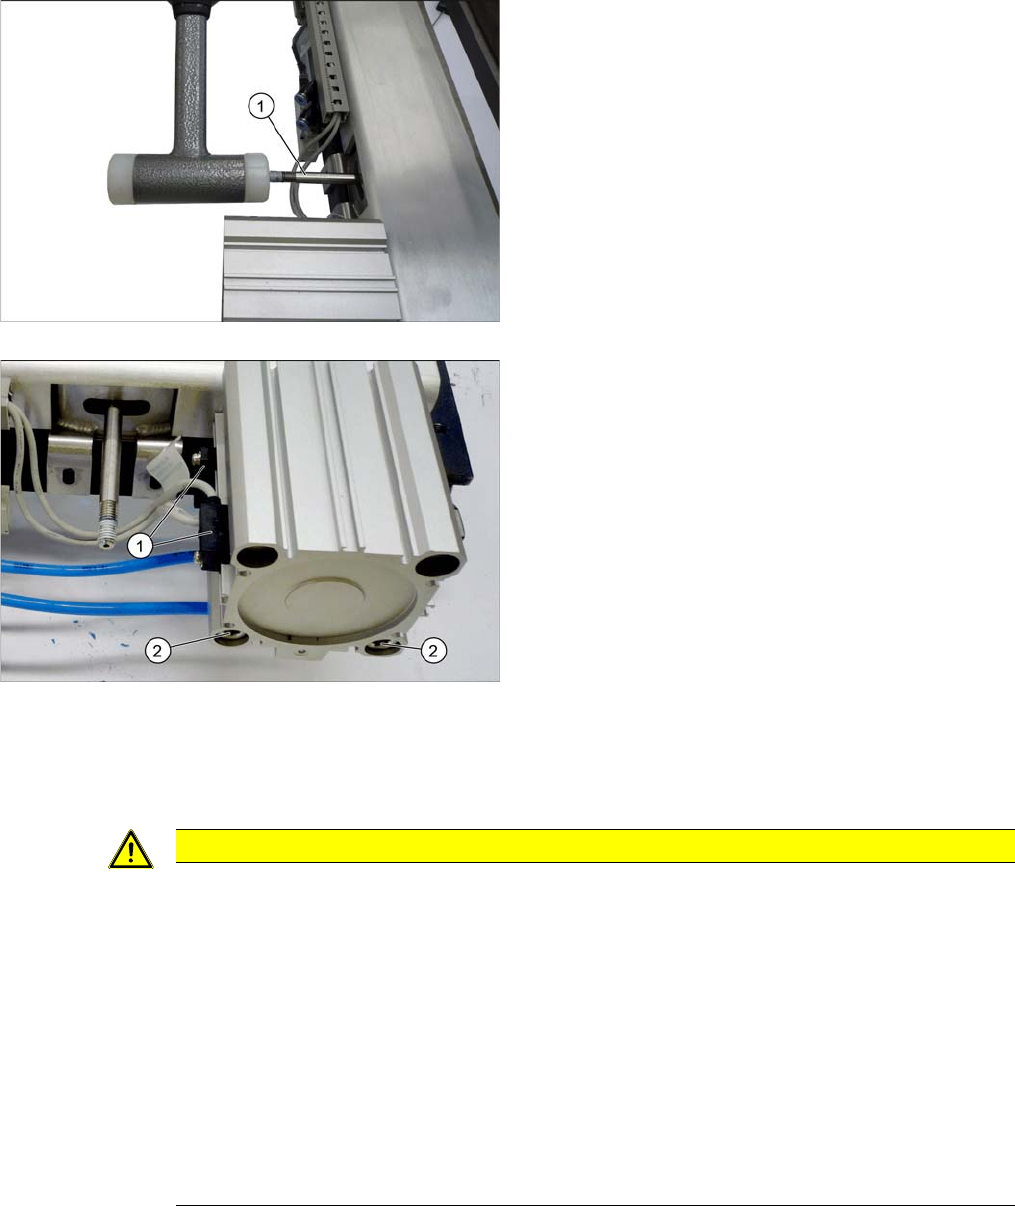
► Open the cable ties at the bottom of the protective
plates (1).
► Undo the screws (2) fastening the protective plates
and then remove the protective plates.
► Remove the locked screws (2) on the left and right of
the return rods.
► Remove the elastomeric springs (1).
Service Work Conveyor
3.11.4 Replacing the Short-Stroke Cylinder [03058693-xx] Cutter
Service Manual SIPLACE SX1/SX2/DX1/DX2 FS02 233
Installation
► Follow the removal instructions in reverse order for installation. Also observe the following instruc-
tions:
► Check that the return rods (1) can be moved. You
may need to carefully loosen these up with a rubber
mallet.
► Remove the screws fastening the proximity
switch (1). Mark their positions, to make clear assign-
ment easier later on.
► Undo the two screws (2) fastening the short-stroke
cylinder and remove the cylinder.
CAUTION
Installation instructions
► Tighten the fastening screws for the short-stroke cylinder with a torque of 21.4 Nm.
► Set the proximity switch (see "3.11.2 Replacing the Proximity Switch [03061575]" [➙226]).
► The one-way restrictors have been factory set.
Up to SW701.1: Do not change this setting.
From SW701.1: See "4.7.1 Times for Setting the Throttle on the Cutter (From SW707.1)"
[ ➙ 291]).
► Check the distance (gap) of the blades to one another (see also "3.11.5 Replacing the Cut-
ter Blades" [ ➙ 234]).
► Hook the waste tape chute into place. Please also observe section "3.10.10 Replacing the
Waste Tape Chute" [ ➙ 221]. Pay particular attention to the plastic strips and the fuses (if
present).