00196497-07_SM_SXDX12_en.pdf - 第244页
Service Work Conveyor Cutter 3.11.7 Connector Assignment on the Cutter 244 Service Manual SIPLACE SX1/SX2/DX1/DX2 FS02 3.11.7 3 . 1 1 . 7 C o n n e c t o r A s s ig n m e n t o n t h e C u t t e r Connector Assignment on…
Service Work Conveyor
3.11.6 Replacing the Elastomeric Spring (Blade Damping) Cutter
Service Manual SIPLACE SX1/SX2/DX1/DX2 FS02 243
► Never apply Loctite 243 to the thread of the return rod.
► Screw the narrow nut onto the return rod and lock both nuts. Make sure that you do not rotate the
return rod out of position.
► Remove the setting gauge.
► Check the marking on the return rod again to make sure that it is still vertical. Adjust it if necessary.
► Follow the removal instructions in reverse order for further installation.
See also
3.11.1 Replacing the Cutter [03063781Sxx] [ ➙ 223]
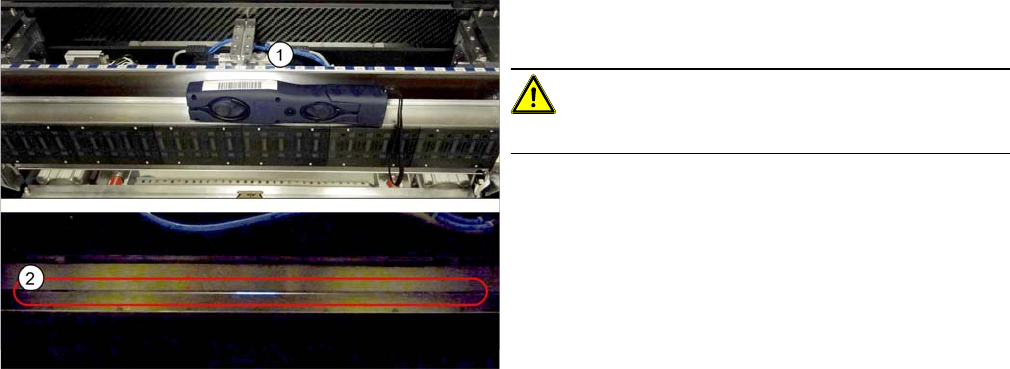
► Place a switched-on flashlight (1) into the empty tape
duct.
CAUTION!
Make sure that the duct coating is not damaged!
► Tighten the wide nut until the buffer can no longer be
turned. You must be able to see an evenly narrow
band of light (2) along the entire length of the blade.
Service Work Conveyor
Cutter 3.11.7 Connector Assignment on the Cutter
244 Service Manual SIPLACE SX1/SX2/DX1/DX2 FS02
3.11.7
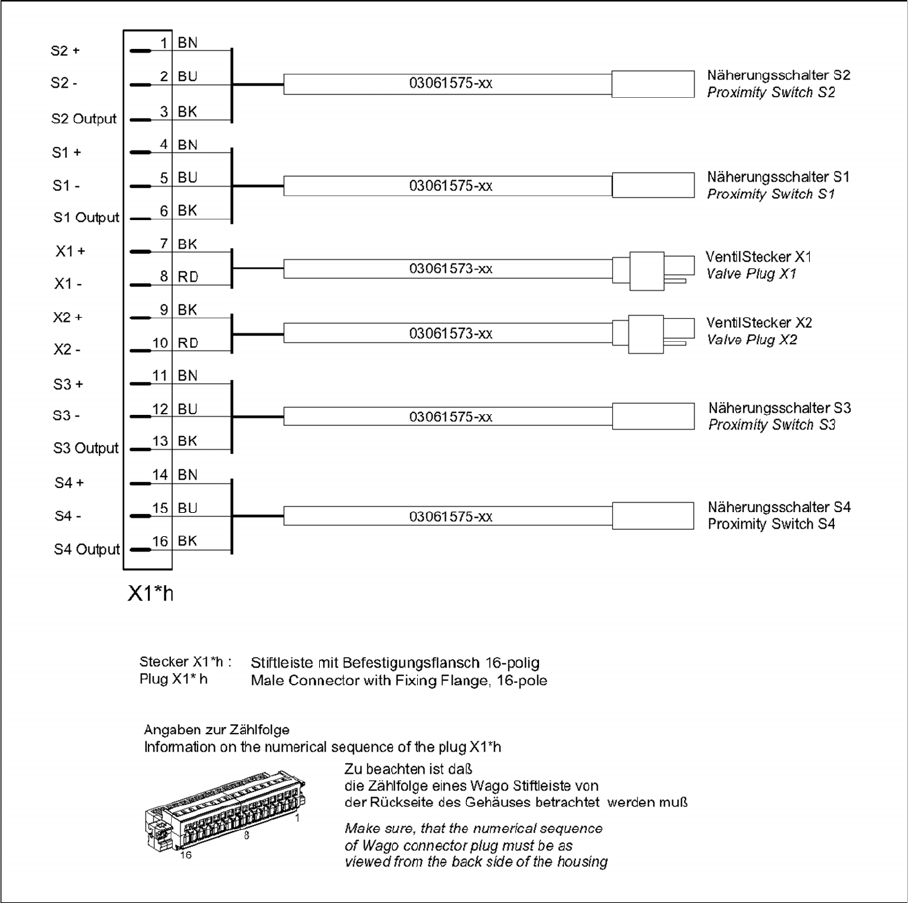
3.11.7 Connector Assignment on the Cutter
Connector Assignment on the Cutter
Service Work Conveyor
3.12.1 Replacing the Nozzle Changer [03103649-xx] Nozzle Changer
Service Manual SIPLACE SX1/SX2/DX1/DX2 FS02 245
3.12
3.12 Nozzle Changer
Nozzle Changer
3.12.1
3.12.1 Replacing the Nozzle Changer [03103649-xx]
Replacing the Nozzle Changer [03103649-xx]
Parts, Equipment and Tools
▪ NC basic structure short CP/all [03103649-xx] (replaces: [03062463-xx])
▪ Nozzle changer CPP SX-Series (short) [00519841-xx]
▪ Nozzle changer CPP SX-Series (short, pos. 3 or 4) [00519842-xx]
▪ Nozzle changer C&P20 SX1/SX2 [00519715-xx]
▪ Nozzle changer C&P20 SX1/SX2 (pos. 3 or 4) [00519843-xx]
▪ If required, NC adjusting plates [03021079-xx]
▪ Depth measuring gauge (300 mm) [03079617-xx]
▪ Plastic plate
Overview
Fragment – Overview of new nozzle changers, short (4 magazines)
Removal
► Switch off the machine, disconnect it from the power supply and secure it to prevent unauthorized
reactivation. Observe the instructions in section What To Do Before Starting Servicing Work....
► Remove all magazines.
► Remove the four fastening screws.
► Unplug the nozzles changer from all electrical and pneumatic connections. You may want to mark
the positions, to make clear assignment easier later on.
► Take care not to lose the support plates. Remember their exact positions, as they will need to be
returned to these original positions, during assembly.
► Carefully lift the nozzle changer out of the machine.
Installation
► Follow the removal instructions in reverse order for installation. Also observe the following instruc-
tions:
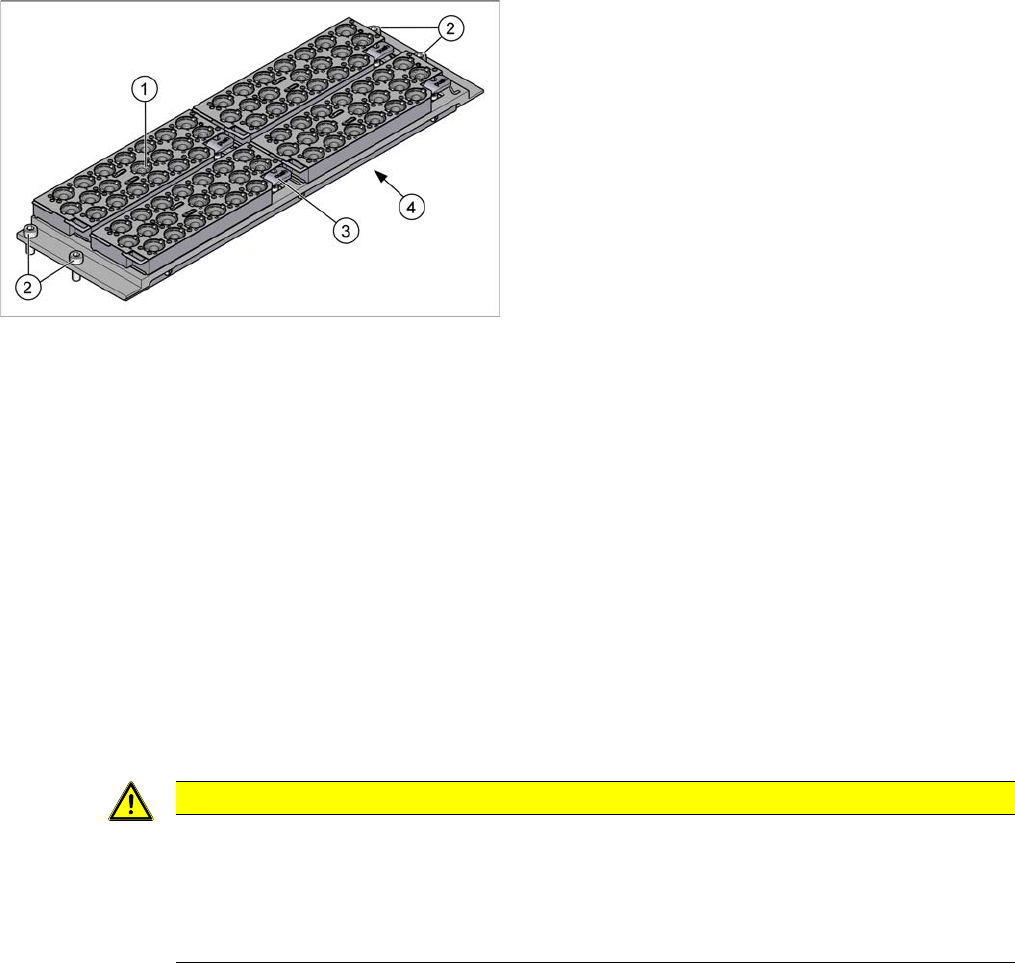
1. Nozzle magazine
2. Four fastening screws
3. Lever for removal of nozzle magazine
4. Cover on the underside
The electronic and pneumatic components are under
the cover.
CAUTION
Installation instructions
► If present: Check the switch on the nozzle changer (see "4.5.3 Jumpers on the Nozzle
Changer" [ ➙ 272]).
► Re-insert the support plates. Check the mechanical installation height of the nozzle changer
(see "4.5.1 Setting the Nozzle Changer Height (DLM, C&P20, CPP, TH)" [ ➙ 271]).