00196497-07_SM_SXDX12_en.pdf - 第245页
Service Work Conveyor 3.12.1 Replacing the Nozzle Changer [03103649-xx] N ozzle Changer Service Manual SIPLACE SX1/SX2/DX1/DX2 FS02 245 3.12 3 . 1 2 N o z z le C h a n g e r Nozzle Changer 3.12.1 3 . 1 2 . 1 R e p la c i…
Service Work Conveyor
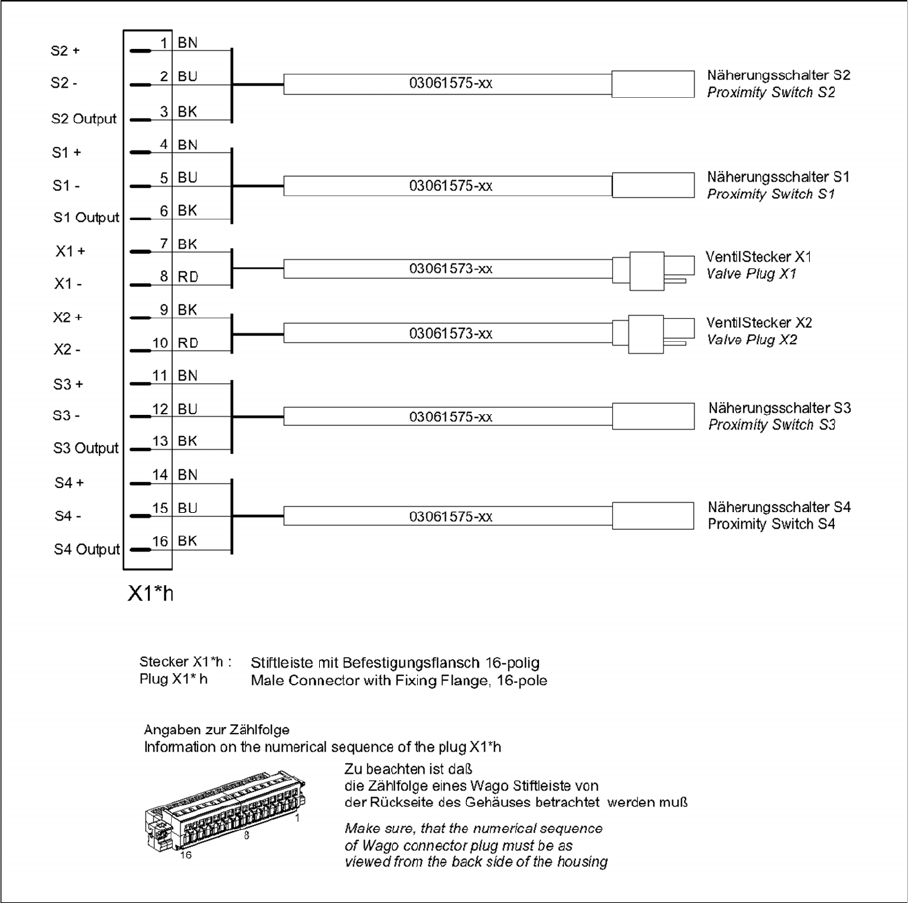
Cutter 3.11.7 Connector Assignment on the Cutter
244 Service Manual SIPLACE SX1/SX2/DX1/DX2 FS02
3.11.7
3.11.7 Connector Assignment on the Cutter
Connector Assignment on the Cutter
Service Work Conveyor
3.12.1 Replacing the Nozzle Changer [03103649-xx] Nozzle Changer
Service Manual SIPLACE SX1/SX2/DX1/DX2 FS02 245
3.12
3.12 Nozzle Changer
Nozzle Changer
3.12.1
3.12.1 Replacing the Nozzle Changer [03103649-xx]
Replacing the Nozzle Changer [03103649-xx]
Parts, Equipment and Tools
▪ NC basic structure short CP/all [03103649-xx] (replaces: [03062463-xx])
▪ Nozzle changer CPP SX-Series (short) [00519841-xx]
▪ Nozzle changer CPP SX-Series (short, pos. 3 or 4) [00519842-xx]
▪ Nozzle changer C&P20 SX1/SX2 [00519715-xx]
▪ Nozzle changer C&P20 SX1/SX2 (pos. 3 or 4) [00519843-xx]
▪ If required, NC adjusting plates [03021079-xx]
▪ Depth measuring gauge (300 mm) [03079617-xx]
▪ Plastic plate
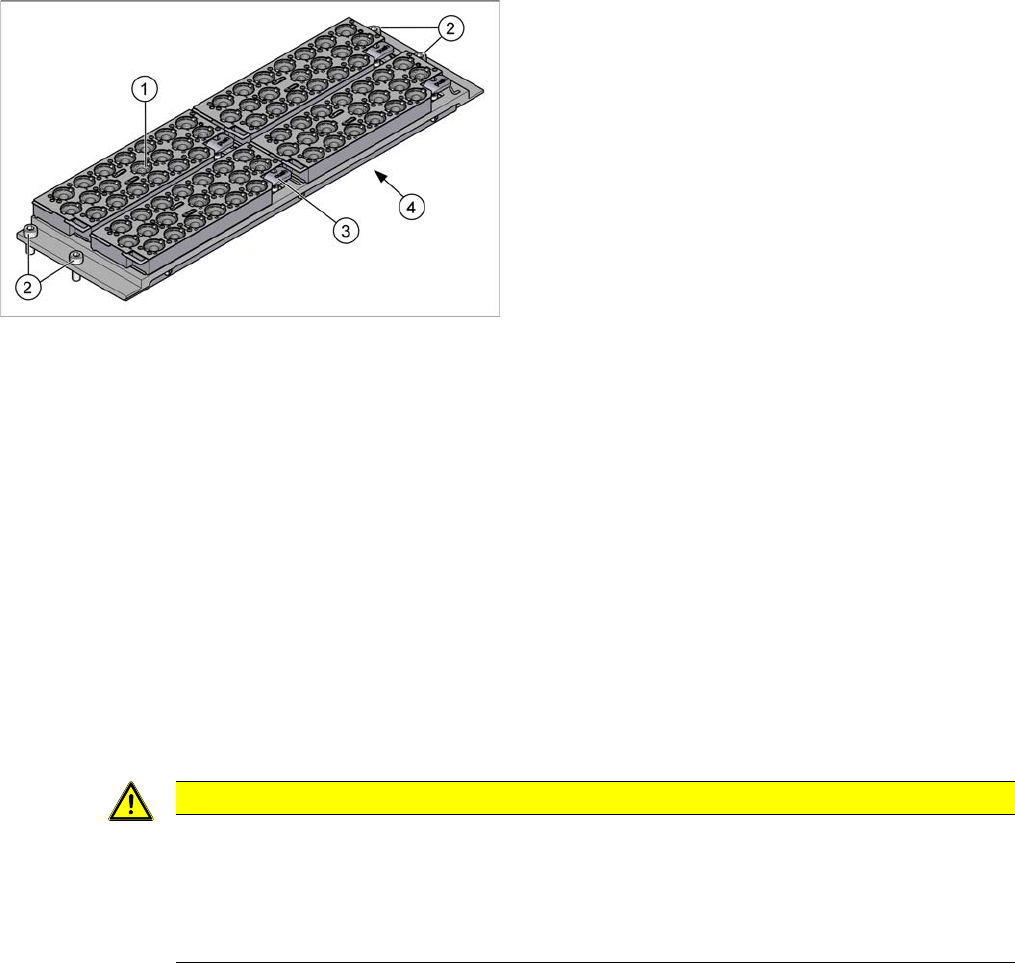
Overview
Fragment – Overview of new nozzle changers, short (4 magazines)
Removal
► Switch off the machine, disconnect it from the power supply and secure it to prevent unauthorized
reactivation. Observe the instructions in section What To Do Before Starting Servicing Work....
► Remove all magazines.
► Remove the four fastening screws.
► Unplug the nozzles changer from all electrical and pneumatic connections. You may want to mark
the positions, to make clear assignment easier later on.
► Take care not to lose the support plates. Remember their exact positions, as they will need to be
returned to these original positions, during assembly.
► Carefully lift the nozzle changer out of the machine.
Installation
► Follow the removal instructions in reverse order for installation. Also observe the following instruc-
tions:
1. Nozzle magazine
2. Four fastening screws
3. Lever for removal of nozzle magazine
4. Cover on the underside
The electronic and pneumatic components are under
the cover.
CAUTION
Installation instructions
► If present: Check the switch on the nozzle changer (see "4.5.3 Jumpers on the Nozzle
Changer" [ ➙ 272]).
► Re-insert the support plates. Check the mechanical installation height of the nozzle changer
(see "4.5.1 Setting the Nozzle Changer Height (DLM, C&P20, CPP, TH)" [ ➙ 271]).
Service Work Conveyor
Nozzle Changer 3.12.2 Nozzle Changer Control Board
246 Service Manual SIPLACE SX1/SX2/DX1/DX2 FS02
3.12.2
3.12.2 Nozzle Changer Control Board
Nozzle Changer Control Board
3.12.3
3.12.3 Replacing the Control Board Cable NC Valve [00334212-xx]
Replacing the Control Board Cable NC Valve [00334212-xx]
Parts, equipment and tools
▪ Control board cable for NC valve [00334212-xx]
Overview
Removal
► Remove the nozzle changer (see "3.12.1 Replacing the Nozzle Changer [03103649-xx]" [ ➙ 245]).
► Loosen the press-fit connections on the cable at both ends and remove the cable. You may need to
also loosen cable ties.
Installation
► Follow the removal instructions in reverse order for installation. Also observe the following instruc-
tions:
NOTICE
No replacement possible
The control board for SX and DX series nozzle changers can not be replaced.
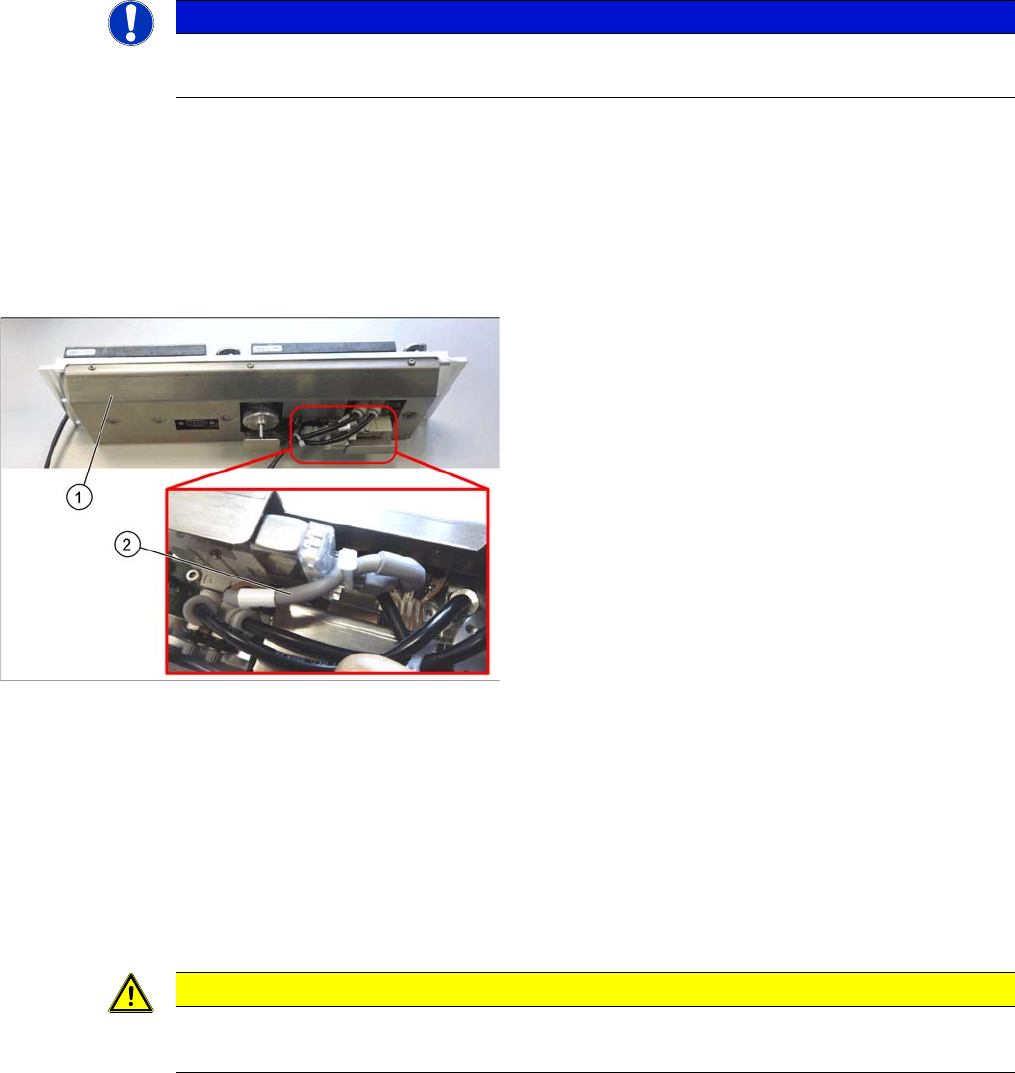
1. Nozzle Changers
2. Control board cable for NC valve
CAUTION
Installation instructions
► Replace any opened cable ties.