00196497-07_SM_SXDX12_en.pdf - 第247页
Service Work Conveyor 3.12.3 Replacing the Control Board Cable NC Valve [00334212-xx] JEDEC Tray Feeder Service Manual SIPLACE SX1/SX2/DX1/DX2 FS02 247 3.13 3 . 1 3 J E D E C T r a y F e e d e r JEDEC Tray Feeder NOTICE …
Service Work Conveyor
Nozzle Changer 3.12.2 Nozzle Changer Control Board
246 Service Manual SIPLACE SX1/SX2/DX1/DX2 FS02
3.12.2
3.12.2 Nozzle Changer Control Board
Nozzle Changer Control Board
3.12.3
3.12.3 Replacing the Control Board Cable NC Valve [00334212-xx]
Replacing the Control Board Cable NC Valve [00334212-xx]
Parts, equipment and tools
▪ Control board cable for NC valve [00334212-xx]
Overview
Removal
► Remove the nozzle changer (see "3.12.1 Replacing the Nozzle Changer [03103649-xx]" [ ➙ 245]).
► Loosen the press-fit connections on the cable at both ends and remove the cable. You may need to
also loosen cable ties.
Installation
► Follow the removal instructions in reverse order for installation. Also observe the following instruc-
tions:
NOTICE
No replacement possible
The control board for SX and DX series nozzle changers can not be replaced.
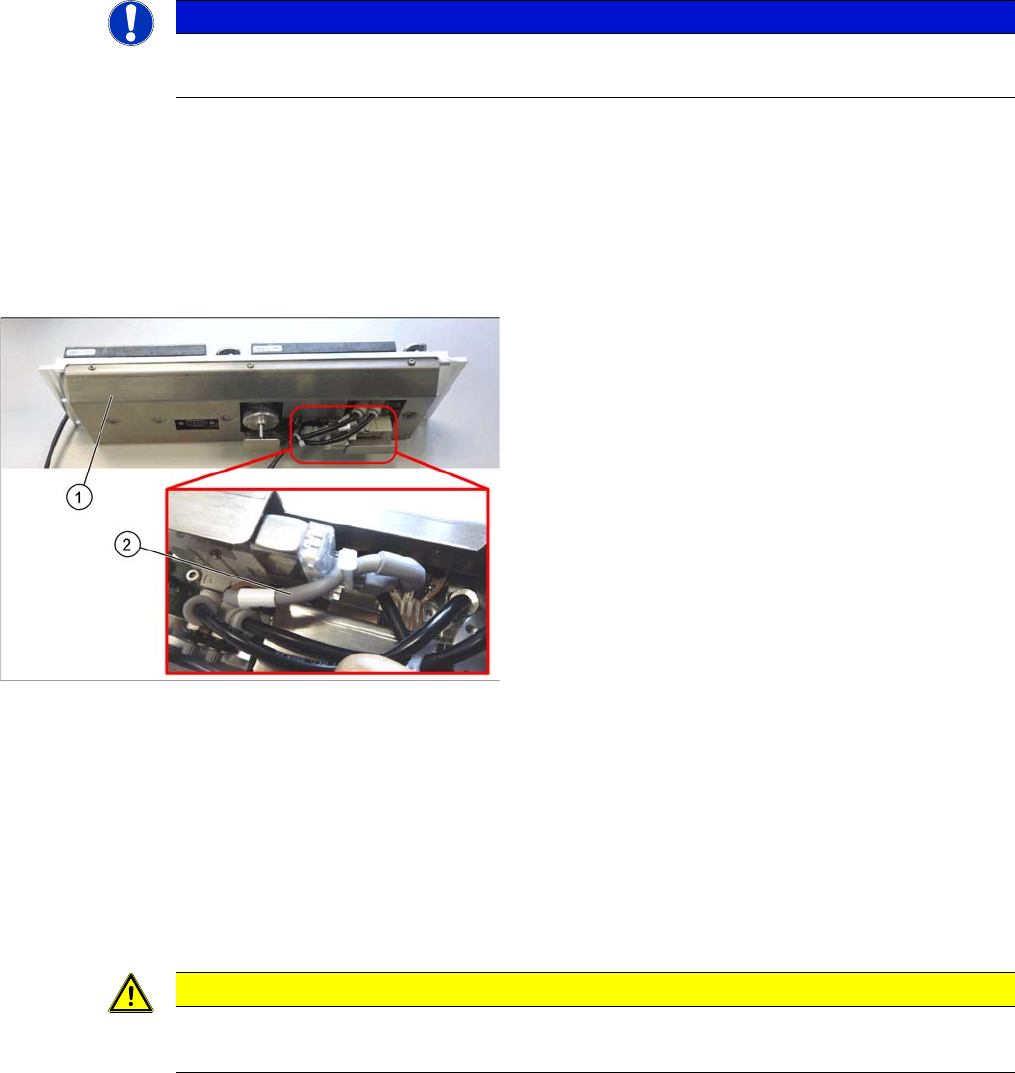
1. Nozzle Changers
2. Control board cable for NC valve
CAUTION
Installation instructions
► Replace any opened cable ties.

Service Work Conveyor
3.12.3 Replacing the Control Board Cable NC Valve [00334212-xx] JEDEC Tray Feeder
Service Manual SIPLACE SX1/SX2/DX1/DX2 FS02 247
3.13
3.13 JEDEC Tray Feeder
JEDEC Tray Feeder
NOTICE
See the assembly instructions
► For more information about the manual table and the JEDEC tray feeder, read the assem-
bly instructions "JEDEC Tray Feeder – SX1/SX2" [00197453-xx].
Service Work Conveyor
Vacuum Pump 3.14.1 Replacing the Vacuum Pump
248 Service Manual SIPLACE SX1/SX2/DX1/DX2 FS02
3.14
3.14 Vacuum Pump
Vacuum Pump
3.14.1
3.14.1 Replacing the Vacuum Pump
Replacing the Vacuum Pump
► Also read the assembly instructions "Vacuum Pump SX1/SX2, DX1/DX2" [DE+EN: 00196614-xx].
Observe the following instructions:
See also
1.2 Preparatory Work... [ ➙ 13]
3.14.2
3.14.2 Replacing the Exhaust Tube [03087599-xx]
Replacing the Exhaust Tube [03087599-xx]
Parts, equipment and tools
▪ Exhaust tube ID100 [03087599-xx]
Overview
Removal
► Switch off the machine, disconnect it from the power supply and secure it to prevent unauthorized
reactivation. Observe the instructions in section "1.2 Preparatory Work..." [ ➙ 13].
► Loosen the two screws fastening the hose holder. The hose holder has two keyholes. The fastening
screws do not need to be completely loosened.
► Turn the hose holder a little and remove it.
► Open the hose clamp and remove the hose.
Installation
► Follow the removal instructions in reverse order for installation.
CAUTION
Installation instructions
► Hook the waste tape chute into place. Please also observe section "3.10.10 Replacing the
Waste Tape Chute" [ ➙ 221]. Pay particular attention to the plastic strips and the fuses (if
present).
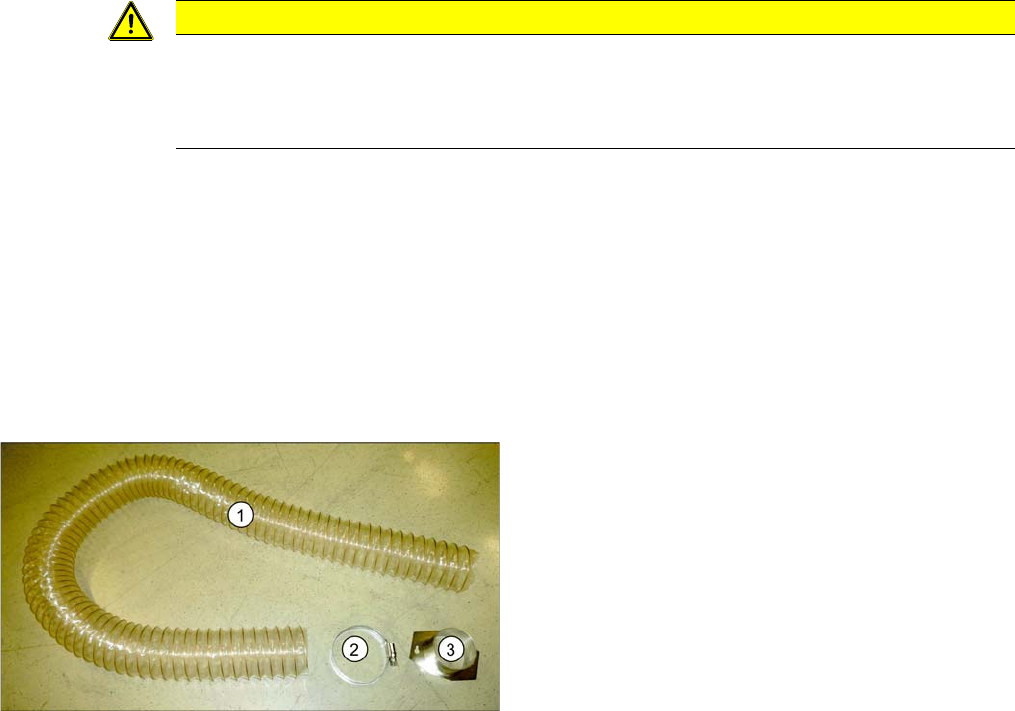
1. Exhaust tube
2. Hose clamp
3. Hose holder
The exhaust tube is fixed to the underside of the ma-
chine.