00196497-07_SM_SXDX12_en.pdf - 第249页
Settings 4.2.1 Setting the Machine Covers Measuring Equipment and Tools Service Manual SIPLACE SX1/SX2/DX1/DX2 FS02 249 4 4 S e t t in g s Settings 4.1 4 . 1 M e a s u r in g E q u ip m e n t a n d T o o ls Measuring Equ…
Service Work Conveyor
Vacuum Pump 3.14.1 Replacing the Vacuum Pump
248 Service Manual SIPLACE SX1/SX2/DX1/DX2 FS02
3.14
3.14 Vacuum Pump
Vacuum Pump
3.14.1
3.14.1 Replacing the Vacuum Pump
Replacing the Vacuum Pump
► Also read the assembly instructions "Vacuum Pump SX1/SX2, DX1/DX2" [DE+EN: 00196614-xx].
Observe the following instructions:
See also
1.2 Preparatory Work... [ ➙ 13]
3.14.2
3.14.2 Replacing the Exhaust Tube [03087599-xx]
Replacing the Exhaust Tube [03087599-xx]
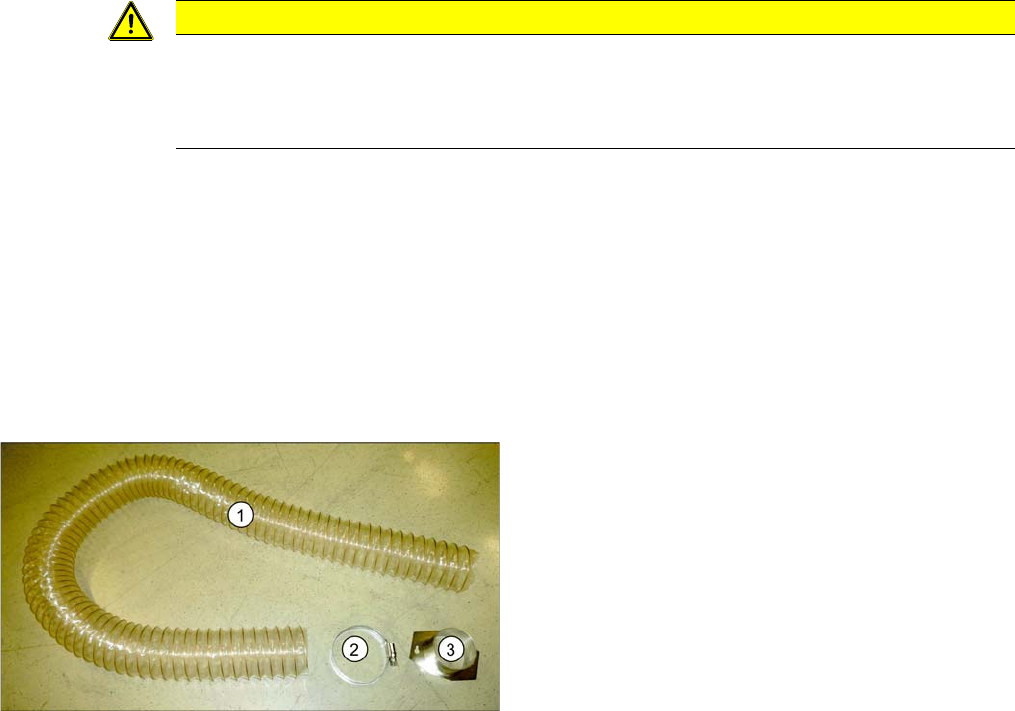
Parts, equipment and tools
▪ Exhaust tube ID100 [03087599-xx]
Overview
Removal
► Switch off the machine, disconnect it from the power supply and secure it to prevent unauthorized
reactivation. Observe the instructions in section "1.2 Preparatory Work..." [ ➙ 13].
► Loosen the two screws fastening the hose holder. The hose holder has two keyholes. The fastening
screws do not need to be completely loosened.
► Turn the hose holder a little and remove it.
► Open the hose clamp and remove the hose.
Installation
► Follow the removal instructions in reverse order for installation.
CAUTION
Installation instructions
► Hook the waste tape chute into place. Please also observe section "3.10.10 Replacing the
Waste Tape Chute" [ ➙ 221]. Pay particular attention to the plastic strips and the fuses (if
present).
1. Exhaust tube
2. Hose clamp
3. Hose holder
The exhaust tube is fixed to the underside of the ma-
chine.
Settings
4.2.1 Setting the Machine Covers Measuring Equipment and Tools
Service Manual SIPLACE SX1/SX2/DX1/DX2 FS02 249
4
4 Settings
Settings
4.1
4.1 Measuring Equipment and Tools
Measuring Equipment and Tools
For more information about the measuring equipment and tools used, refer to the service section of our
homepage at www.siplace.com.
4.2
4.2 Settings on the Basic Machine
Settings on the Basic Machine
4.2.1
4.2.1 Setting the Machine Covers
Setting the Machine Covers
4.2.1.1
4.2.1.1 Overview
Overview
NOTICE
Example
The following settings are shown using the example of an SX2 machine. The procedure is the
same for other machines. Any differences will be explicitly indicated.
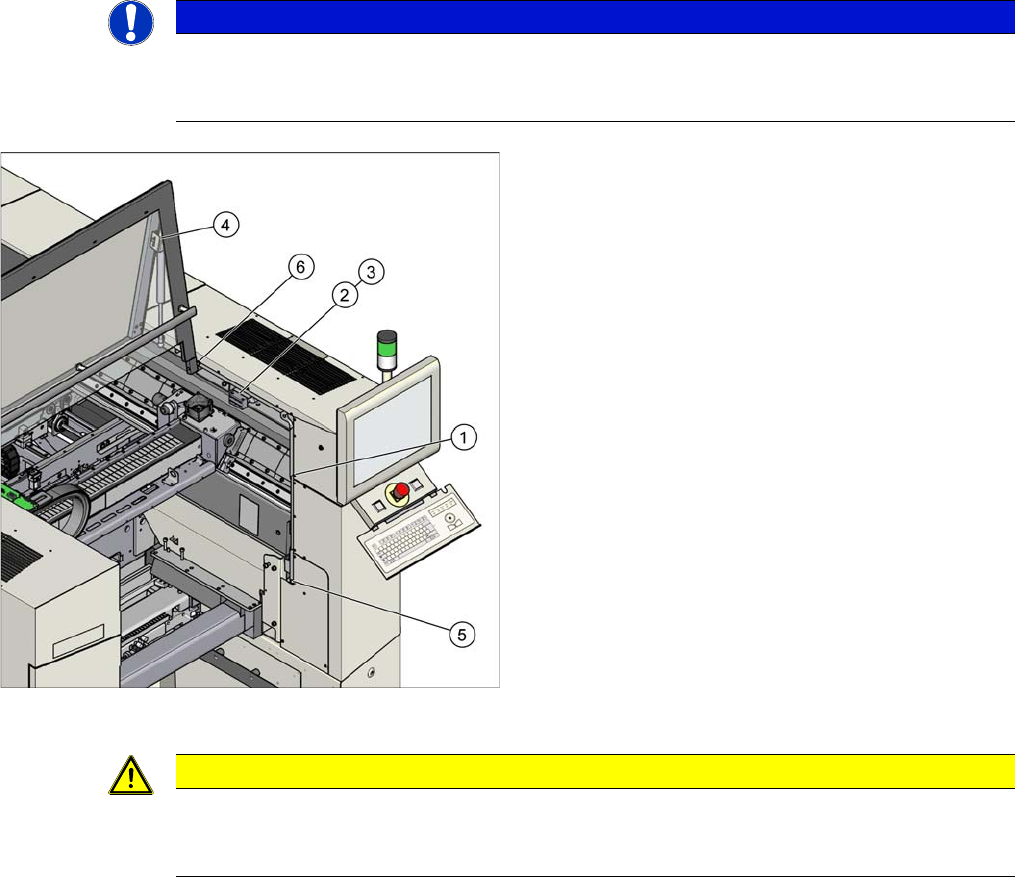
Settings (example of SX2 shown)
1. Setting the cover guidance
See "4.2.1.2 Setting the Cover Guidance" [ ➙ 250]
2. Setting the cover switch
See "4.2.1.4 Setting the Cover Switch" [ ➙ 251]
3. Setting the cover switch centering
See "4.2.1.5 Setting the Cover Switch Centering De-
vice" [ ➙ 252]
4. Setting the actuator
See "4.2.1.6 Setting the Actuator" [ ➙ 252]
5. Setting the bottom stop
See "4.2.1.7 Setting the Bottom Stop" [ ➙ 253]
6. Setting the rollers
See "4.2.1.8 Setting the Cover Rollers" [ ➙ 254]
CAUTION
SX1/SX2: closing the gantry changer doors
The gantry changer doors must remain closed during operation and be fixed in their set posi-
tion.
Settings
Settings on the Basic Machine 4.2.1 Setting the Machine Covers
250 Service Manual SIPLACE SX1/SX2/DX1/DX2 FS02
4.2.1.2
4.2.1.2 Setting the Cover Guidance
Setting the Cover Guidance
4.2.1.3
4.2.1.3 Checking the Loss Protection
Checking the Loss Protection
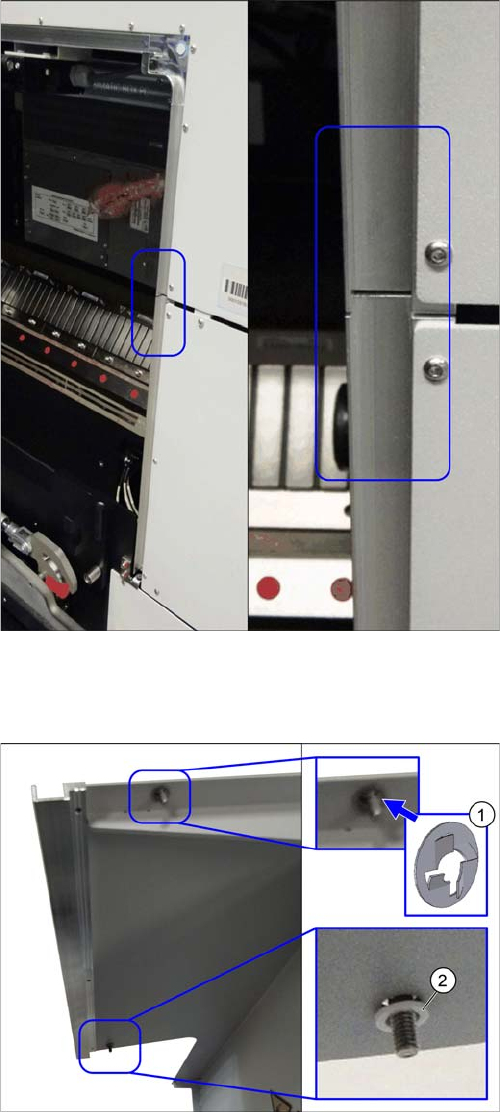
Cover guidance (example of SX2 shown)
The cover guidance transitions must be set when the
gantry changer doors are closed, so that the guidances
are flush with one another. Make sure that there is no pro-
truding edge, against which the cover guide roller could
be knocked.
► (1) Check if the loss protection [03103501-xx] is pre-
sent at the top.
► (2) Check if the plastic washer [00201148Sxx] and
the loss protection [03103501-xx] are still present at
the bottom.
► See also the Technical Information "New stopper on
folding covers for SIPLACE SX1 / DX1" [DE: TI2014-
04D05] [EN: TI2014-04E05].