00196497-07_SM_SXDX12_en.pdf - 第274页
Settings Conveyor Settings 4.6.1 Belt Tension 274 Service Manual SIPLACE SX1/SX2/DX1/DX2 FS02 4.6 4 . 6 C o n v e y o r S e t t in g s Conveyor Settings See also 5.3.1 TSP400 [03057341-xx] [ ➙ 321] 5.3.2 TSP400E …

Settings
4.5.3 Jumpers on the Nozzle Changer Nozzle Changer Setting
Service Manual SIPLACE SX1/SX2/DX1/DX2 FS02 273
Setting
► Set the correct value on the jumper for your head type, software and control method.
Nozzle Changer CP20P - Jumper X10
Jumper X10
See also
5.5.2 Nozzle Changer Main Board C&P20P [03107652-xx] [ ➙ 330]
Head SW <= 706.x SW >= 707.x
I/O controller XFCU I/O controller XFCU
CPx, DLM 1-2 1-2 1-2 2-3
C&P20 P --- --- --- 2-3 (factory set-
tings)
Settings
Conveyor Settings 4.6.1 Belt Tension
274 Service Manual SIPLACE SX1/SX2/DX1/DX2 FS02
4.6
4.6 Conveyor Settings
Conveyor Settings
See also
5.3.1 TSP400 [03057341-xx] [ ➙ 321]
5.3.2 TSP400E [03057342-xx] [ ➙ 325]
4.6.1
4.6.1 Belt Tension
Belt Tension
The precalculated values for setting the belt tension can be found in the following chapters.
In addition, the value for any section of the conveyor belt can be calculated using a formula. (See "4.6.1.4
Calculating the Belt Tension" [ ➙ 277])
4.6.1.1
4.6.1.1 Setting the Tension of the Conveyor Drive Toothed Belt
Setting the Tension of the Conveyor Drive Toothed Belt
Parts, equipment and tools
Prerequisite
► Use the software to move the conveyor sides into the position which allows you best access. Alter-
natively, you can also loosen the conveyor side clamps on the dual conveyor (see "3.6.1 Loosening
the Conveyor Side Clamps" [ ➙ 143]).
► Switch off the machine, disconnect it from the power supply and secure it to prevent unauthorized
reactivation. Observe the instructions in section "1.2 Preparatory Work..." [ ➙ 13].
► The motor needs to be loosely fastened with three screws. Do not tighten these screws fully yet.
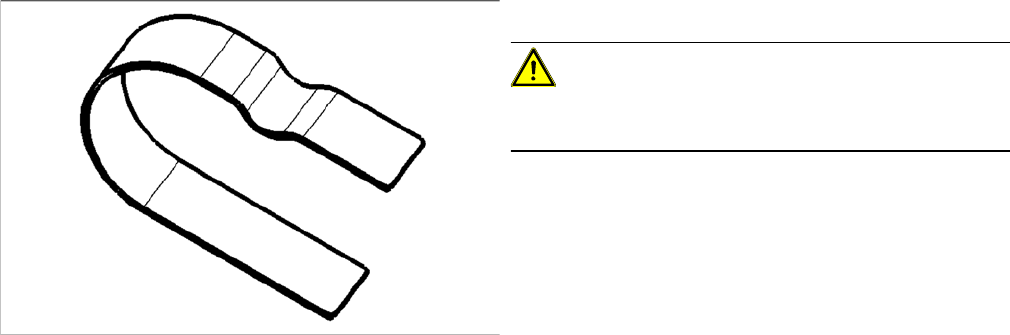
▪ Flat spiral spring [03075316-xx]
CAUTION!
If the flat spiral spring is used frequently or is bent, correct
setting can no longer be guaranteed.
Settings
4.6.1 Belt Tension Conveyor Settings
Service Manual SIPLACE SX1/SX2/DX1/DX2 FS02 275
Setting
4.6.1.2
4.6.1.2 Setting the Tension of the Conveyor Toothed Belt
Setting the Tension of the Conveyor Toothed Belt
Setting
► Use the software to move the conveyor sides into the position which allows you best access. Alter-
natively, you can also loosen the conveyor side clamps on the dual conveyor (see "3.6.1 Loosening
the Conveyor Side Clamps" [ ➙ 143]).
► Switch off the machine, disconnect it from the power supply and secure it to prevent unauthorized
reactivation. Observe the instructions in section "1.2 Preparatory Work..." [ ➙ 13].
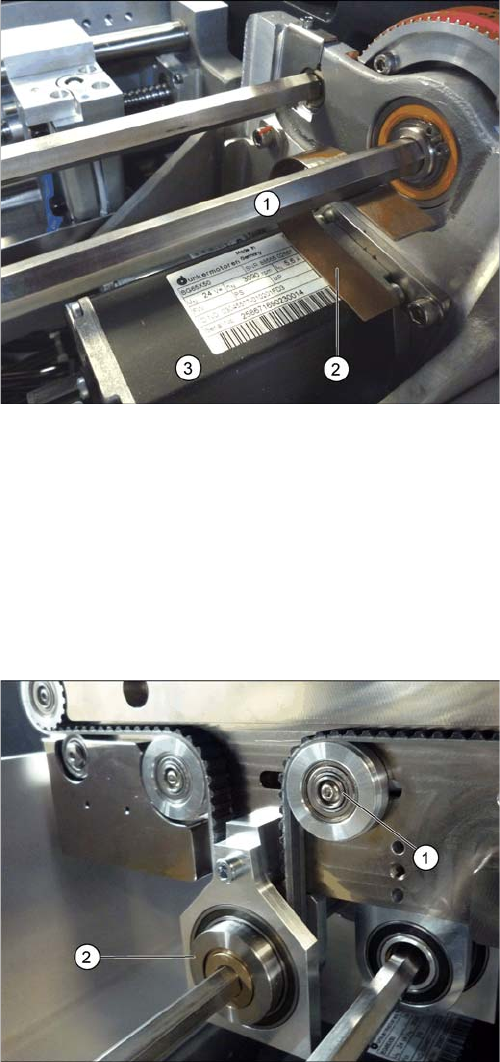
► Clamp the flat spiral spring (2) between the motor (3)
and the shaft above it (1). While doing so, push the
flat spiral spring as far as possible in the direction of
the conveyor side. The flat spiral spring must lie flush
on the motor, as shown in the diagram. The shaft
should be set so that its flat side is in the flat spiral
spring.
► Tighten the screws fastening the motor.
⇨ The tension of the flat spiral spring and the weight of
the motor should now have set the belt tension cor-
rectly to 250 +/-20 Hz.
► Set the tension of the conveyor toothed belt to 200 +/
-15 Hz. To do this, measure at the center, between
the flexible guide castor (1) and the tape drive (2).